Everyone probably has some sort of scrapbook or photo album at home. These items contain some of your most precious moments and life events and hold much sentimental value. But many of these precious memories are placed into store bought albums and books that are full of deteriorating and non-archival materials.
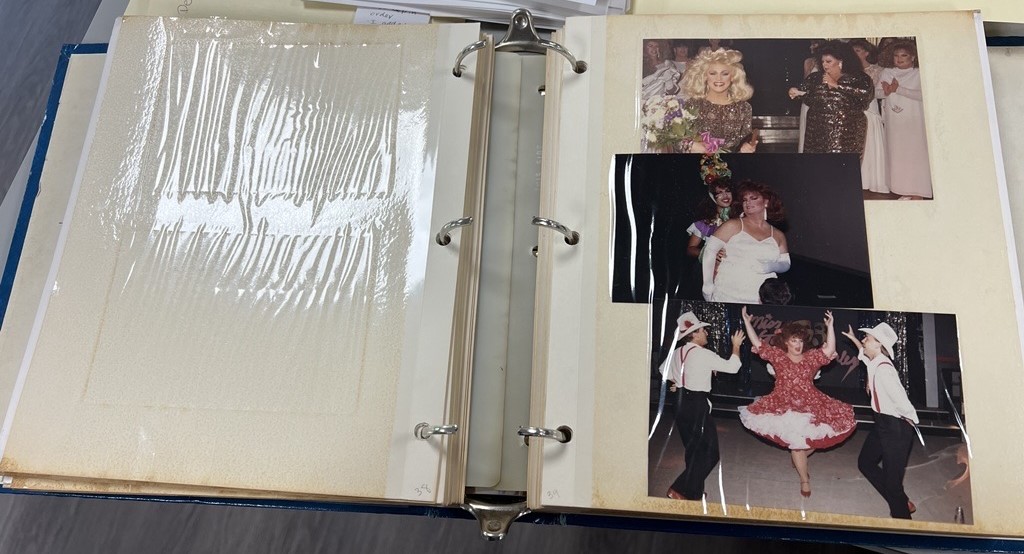
Many store bought scrapbooks and photo albums have very acidic paper backings, non-stable plastic sleeves, and even adhesive backings. Acidic paper will overtime, discolor surrounding items, will become brittle and fragile and will sometimes start to disintegrate, creating a layer of dust on your materials. Non-stable plastic sleeves—any plastic that is not polyester is not long-lasting and will deteriorate over time—will discolor, turn yellow, and sometimes discoloring items near it, begin to warp, and become tacky, melting onto your items. The adhesive glue or tape in adhesive backings can discolor the items, cause physical damage, cause items to warp, or just lose their adhesive strength over time, allowing items to fall out. Looking at the image at the top of this post, you can see the plastic warping and discoloration from the adhesive.
If you notice any of these deterioration signs happening, you can rehouse the items into archive-safe albums/kits. Or if you can’t remove the items, interleaving each page (placing a piece of acid free paper in between pages) should help alleviate the problems. Most modern copy paper is acid free and negligibly different from the bond paper we use for interleaving.
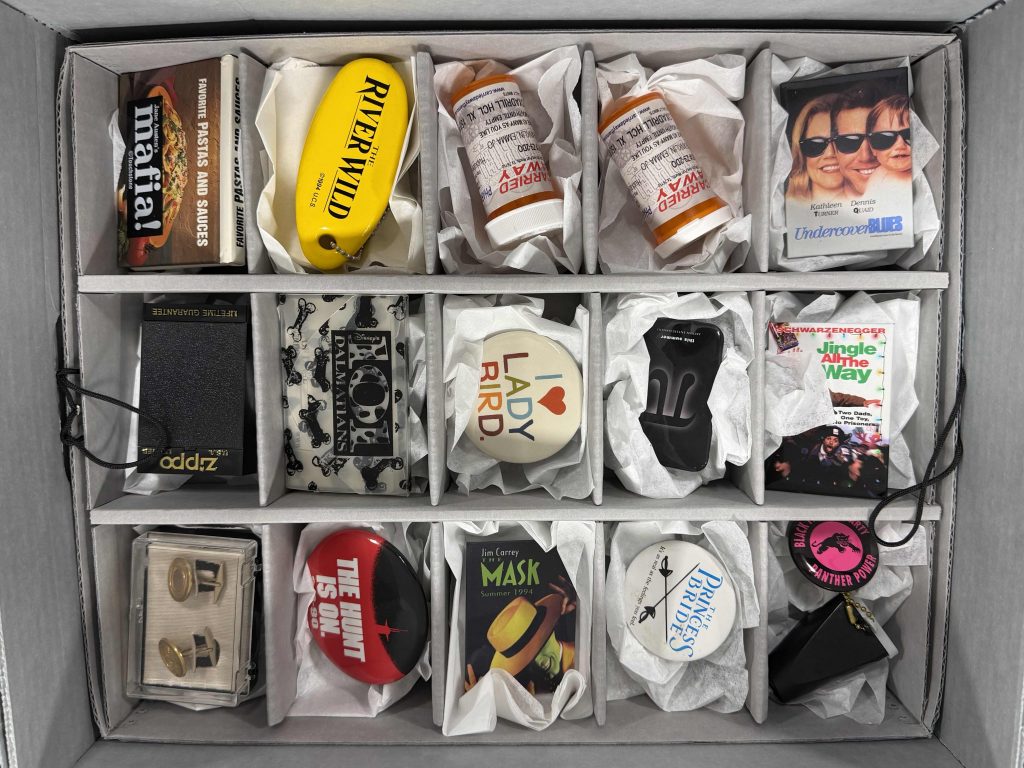
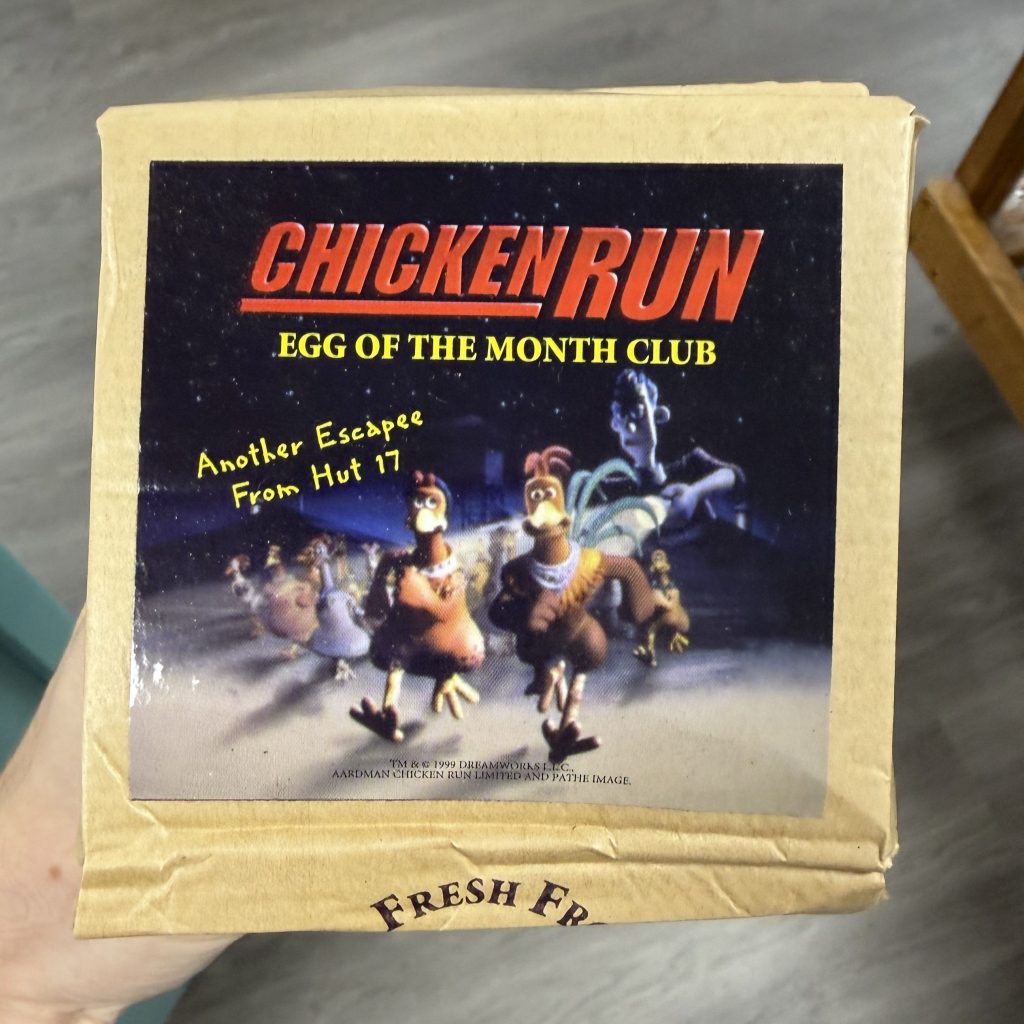
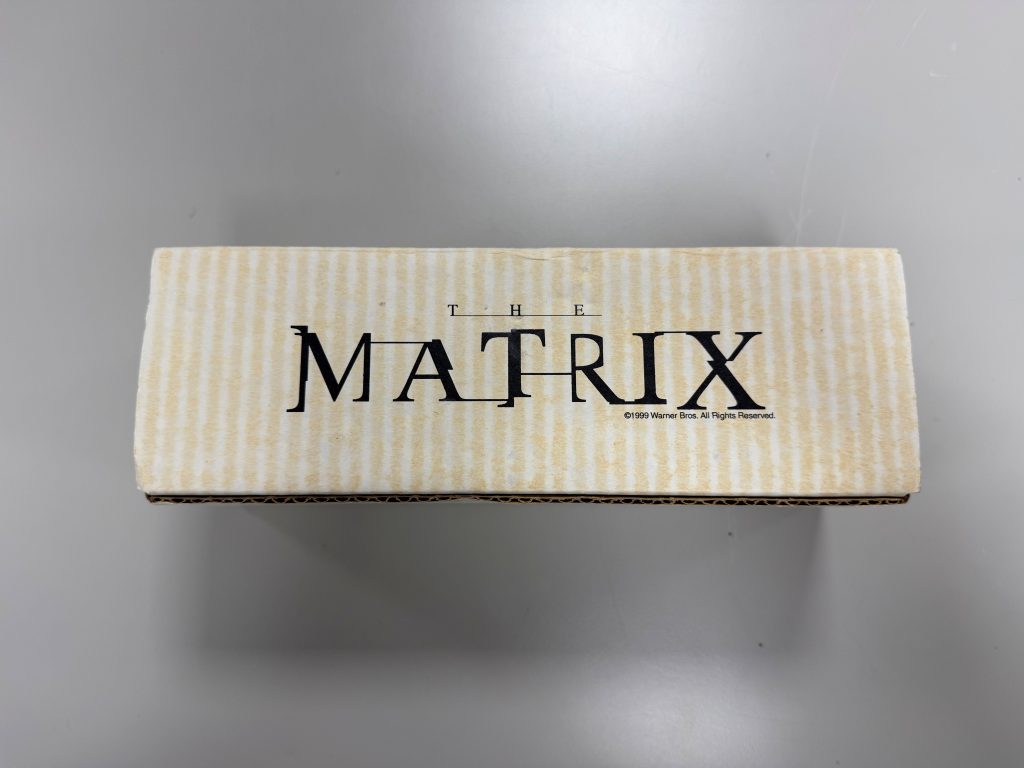
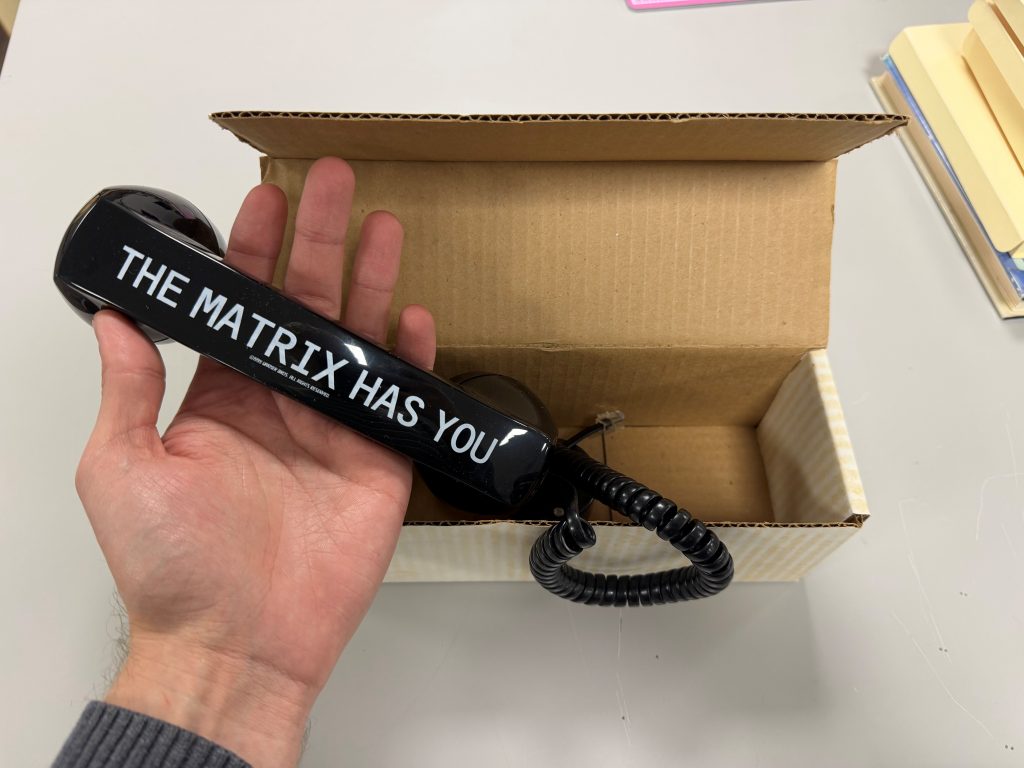
Bobbie Wygant began her career at DFW’s WBAP-TV, now known as KXAS-NBC5, in 1948, before the station even hit airwaves. Throughout her seven-decade career, Wygant interviewed massive stars from The Golden Age of Hollywood like Bette Davis but also more modern names like Gwyneth Paltrow and Bradley Cooper. Her long career as an entertainment news personality led her to not only meet all the biggest movie stars, but also to receive heaps of “swag,” i.e. free merchandise, from all the biggest movies.
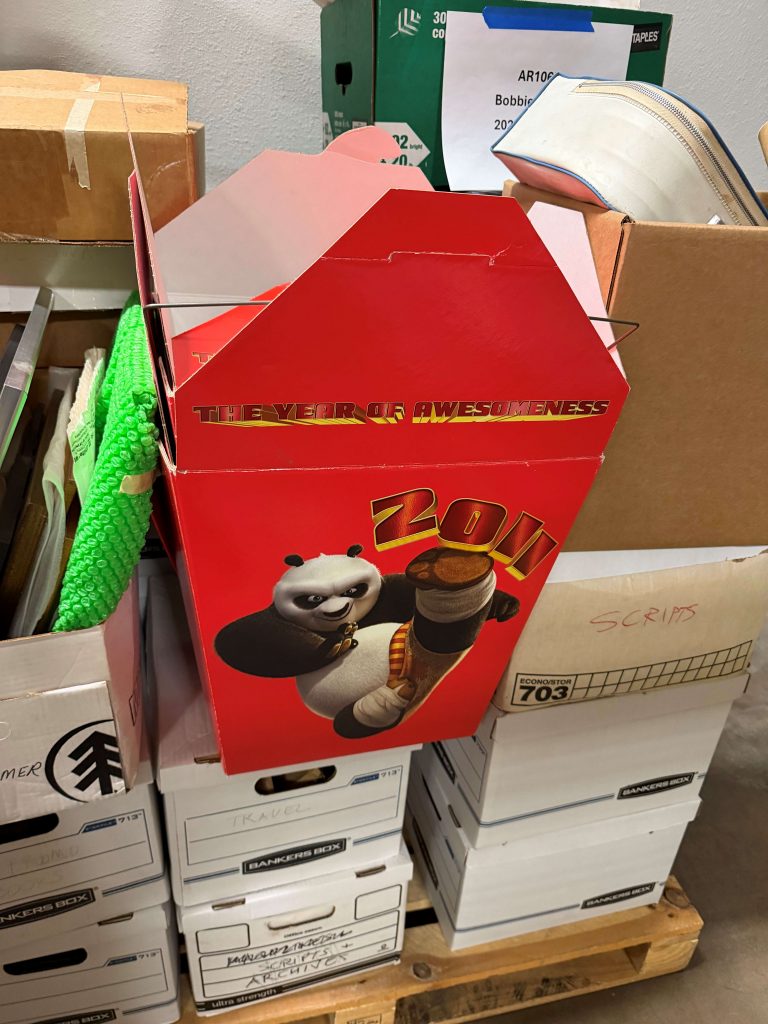
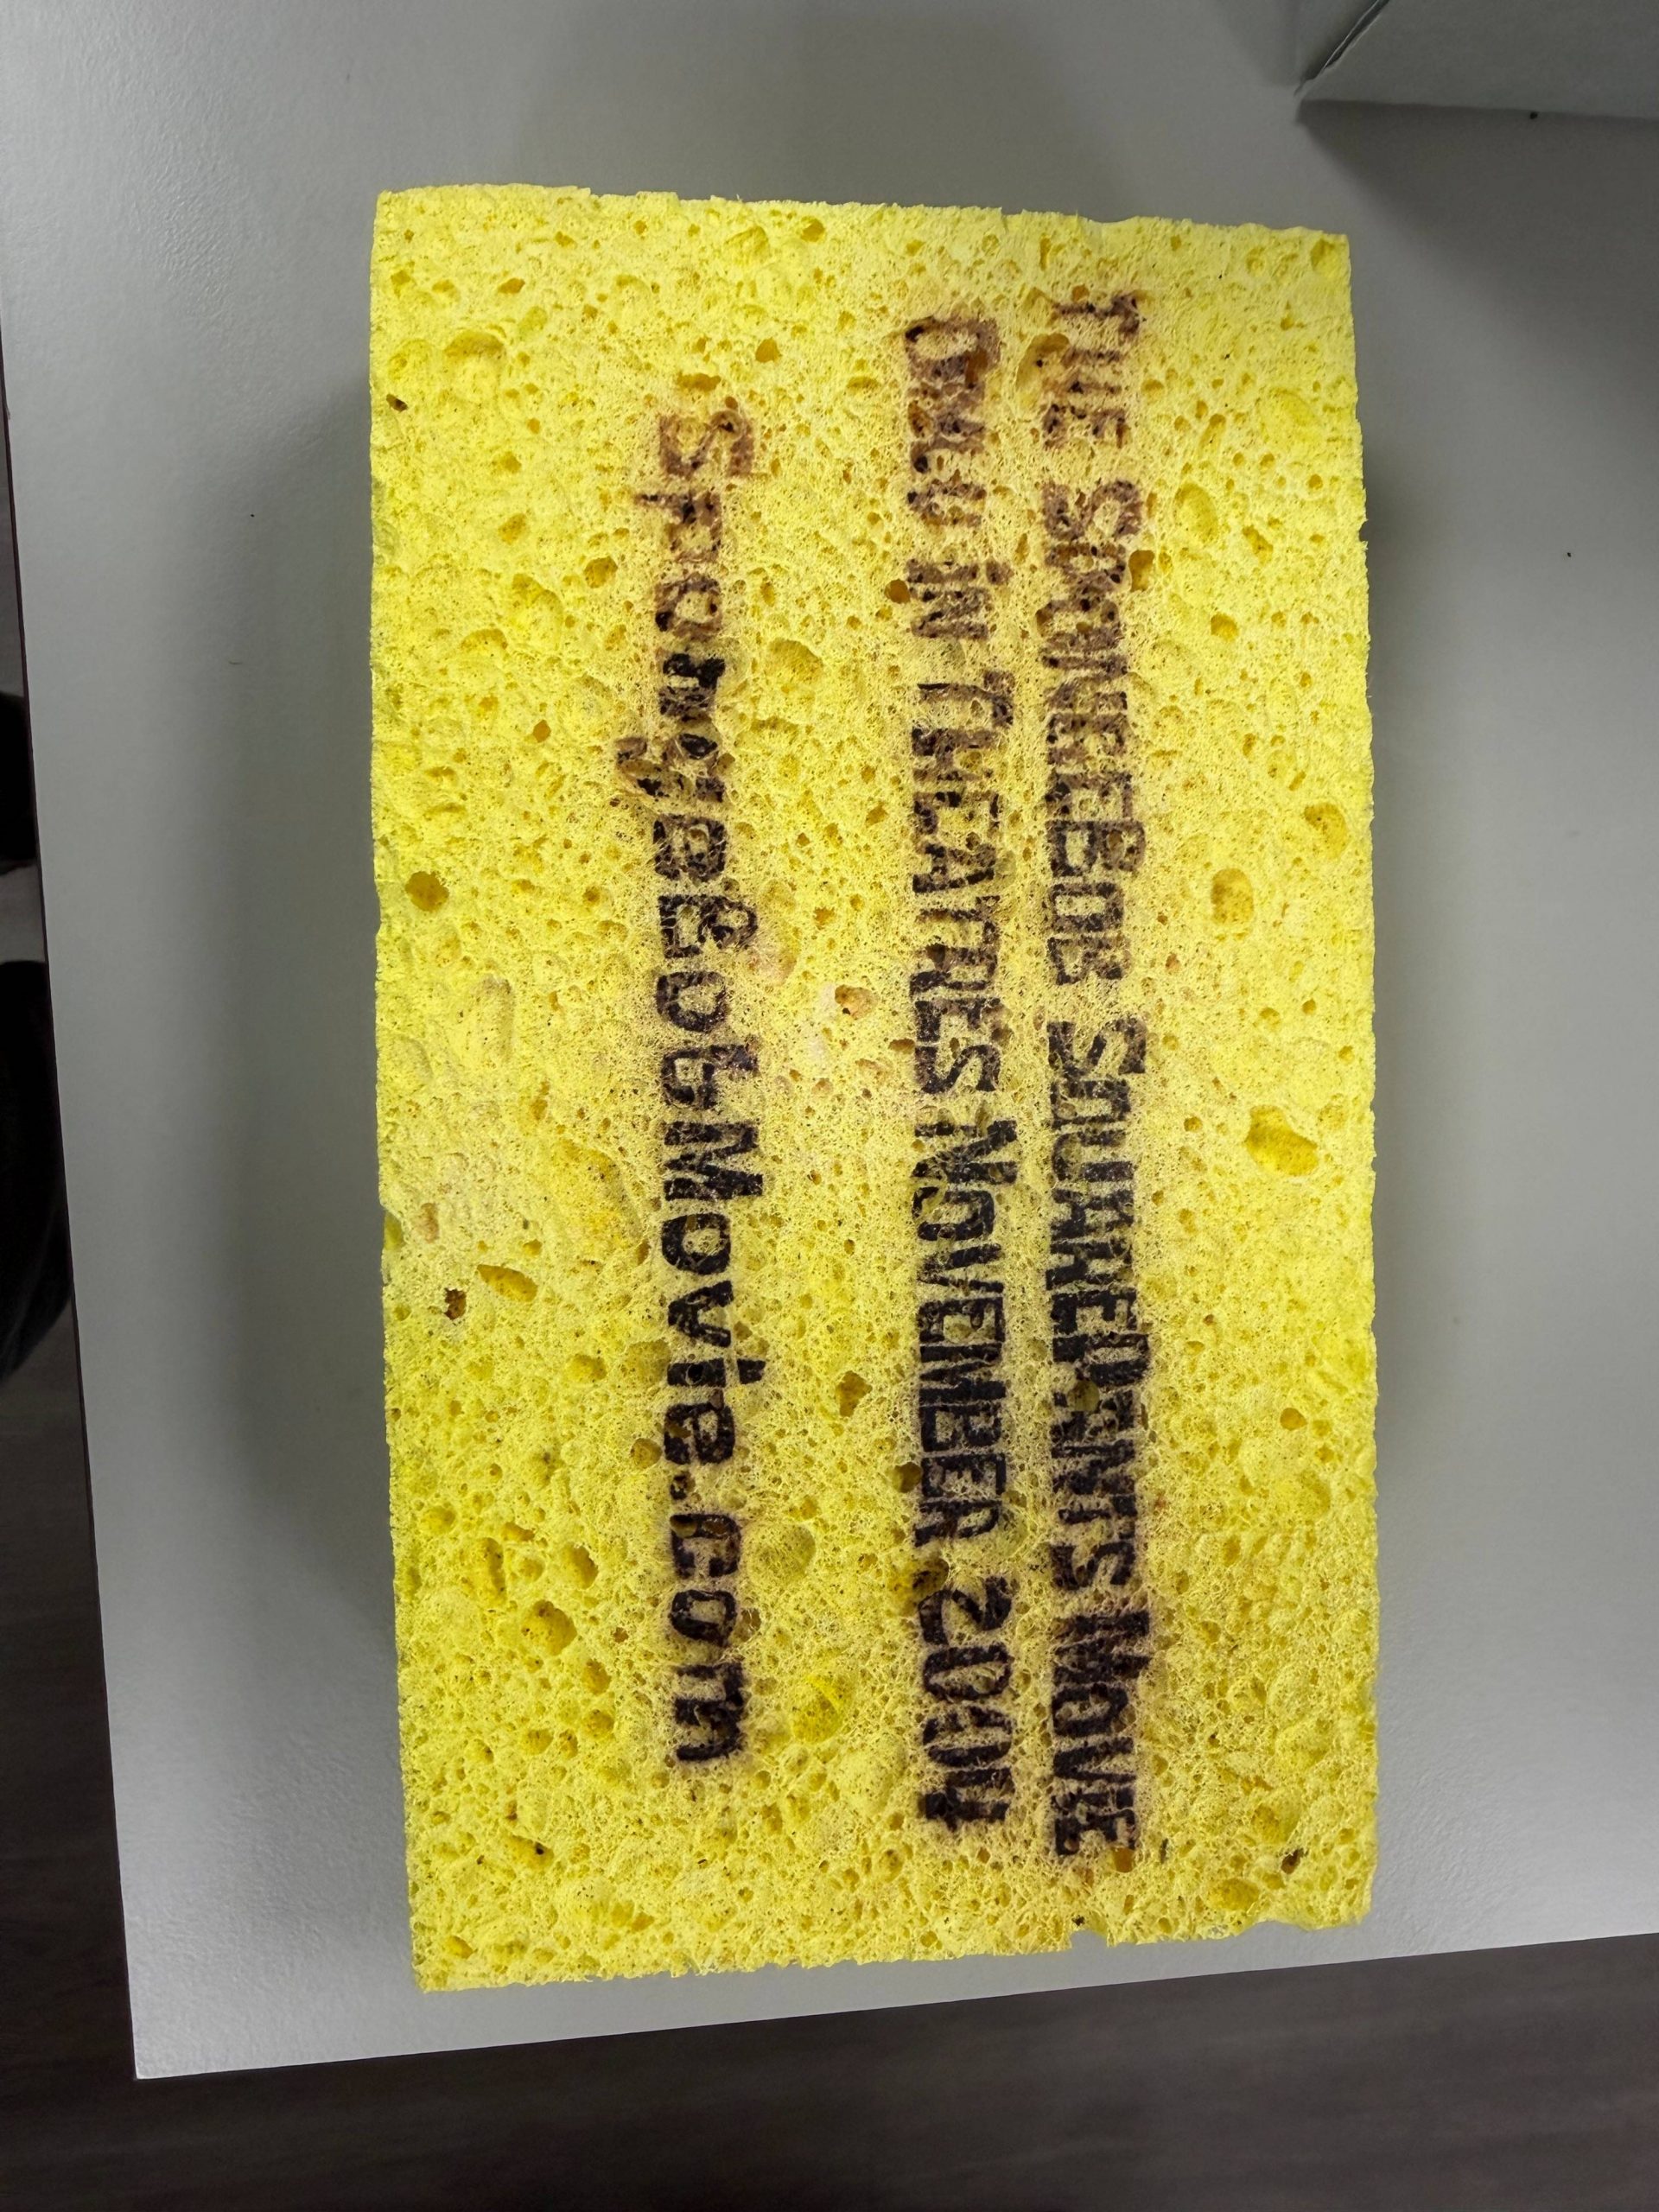
These items range from sensible pins and keychains to things more nonsensical like takeout boxes from Kung Fu Panda 2 or a large sponge from, you guessed it, The SpongeBob SquarePants Movie.
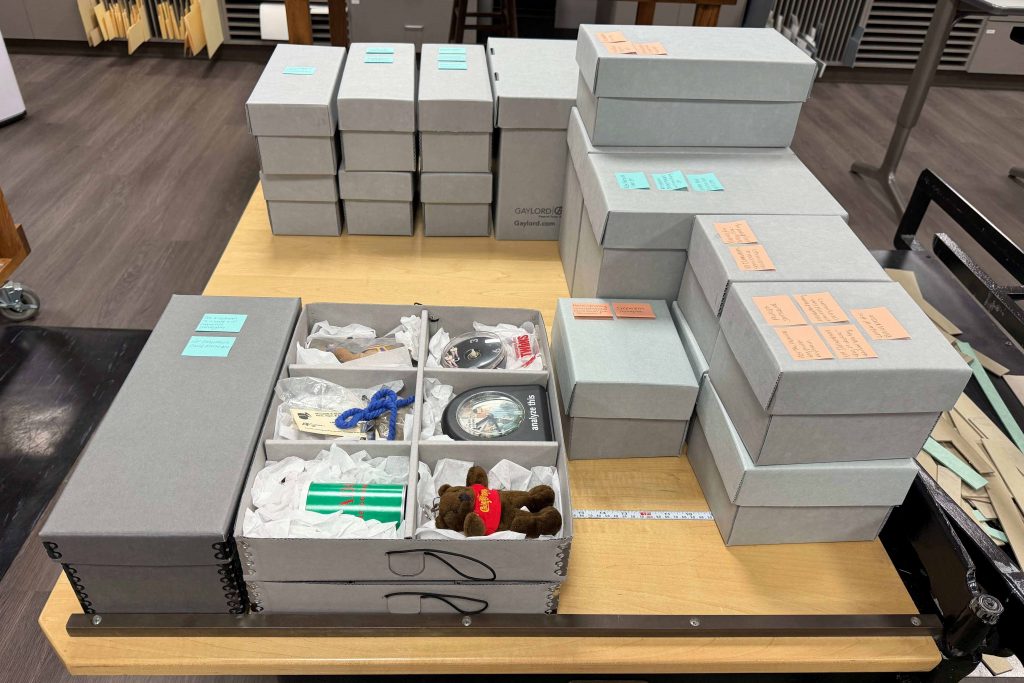
While it has been heaps of fun to look at all of these items, at the end of the day, my main task is to find a place for them to go! There are two main ways that I am going about this process at the moment: Nesting boxes and item trays. We have been creating a couple different sizes of custom boxes that are sized to perfectly fit into our typical records boxes. This way, we can have several different arrangements of items in a box, and most times, we can have two levels of items in one records box.
Our item trays are all purchased premade from Gaylord Archival and Hollinger Metal Edge, though I would like to try my hand at creating them myself. These trays are extremely efficient for housing small items. They can be stacked into a records box in several layers. This allows one box to contain dozens of small things without them all being heaped into a pile.
After about two weeks of work, I have rehoused almost 200 items. Although this is a good start, it is not even a fourth of everything this collection contains. A large concern of mine in planning this undertaking was space-efficiency. So far, I have been able to maintain a 1:1 ratio between the original boxes we were donated from Bobbie Wygant’s estate and the new archival records boxes I am moving the items into. Will this equilibrium last? I am not certain! Fingers are crossed. Nonetheless, as a preservationist, space-efficiency takes a second place in terms of my priorities. My number one priority is always the safety of our collection materials, and I believe that these artifacts are on the road to a lovely forever home!
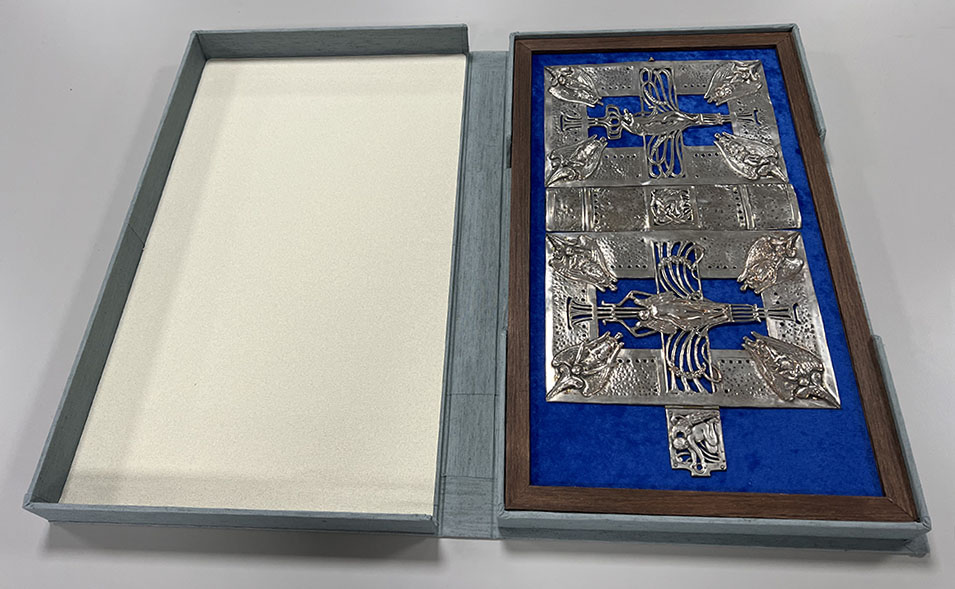
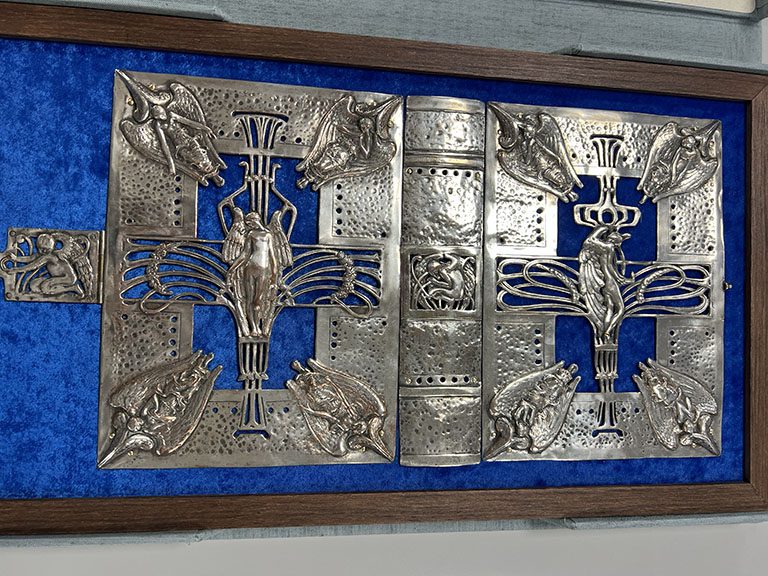
Customarily, when we build clamshells, they are for books. However, this enclosure was built for an item that used to be a plate binding. The electroplate arrived in a wooden frame on top of blue velvet. The plate was nailed into the velvet backing with silver nails. We considered removing the plate from the frame but were concerned that we could damage the silver and bend it if we tried to remove the nails. So, we chose to build a clamshell around the frame!
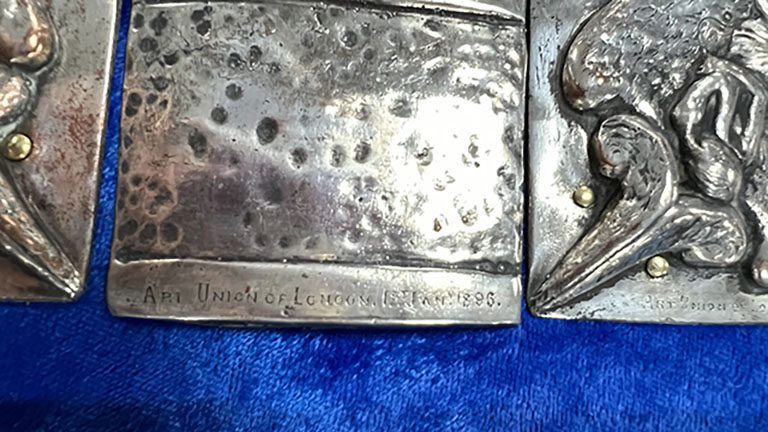
This binding was created by M. Lilian Simpson at the Art Union in London in 1896. The binding is made of silver and depicts winged angels in the corners. The center image depicts the figure of Love. (View the catalog record for this item)
So, what exactly is preservation? And is it the same as restoration and conservation? Despite how often the terms preservation, conservation, and restoration and used interchangeably, they are different.
Preservation actions deter future damage to materials.
Conservation actions deal with current damage.
Restoration actions attempt to return an item to its original state through invisible repairs.
Preservation actions include things like rehousing, building enclosures, and environmental monitoring. Conservation actions include paper mending and repairs, and stabilizing items. Restoration of items can include actions like book rebinding and restoring color and paint in artwork.
At UNT, our Preservation Unit mostly does preservation actions, creating enclosures and safe spaces for our collection materials. Occasionally, we will do some basic conservation like paper mending, but the golden rule we always follow when working directly on collection materials is IT MUST BE REVERSIBLE.
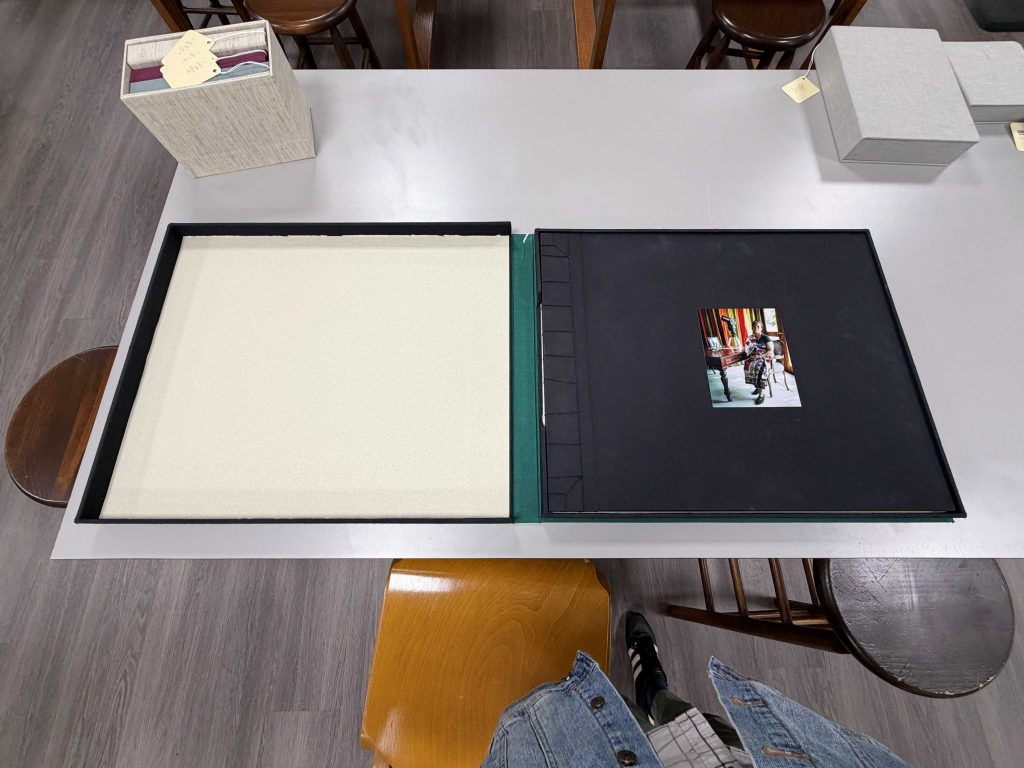
Out of the various enclosure types we build here at Special Collections, the clamshell is the most time-consuming. It is therefore also selected rather sparingly. Traditionally, we use it for books of high value that warrant a visually-appealing enclosure. Although it is very protective, it is just slightly more protective than a heavyweight phasebox. For context, it takes about 30 minutes to build a heavyweight phasebox. It takes about 5 hours, uninterrupted, to make a clamshell.
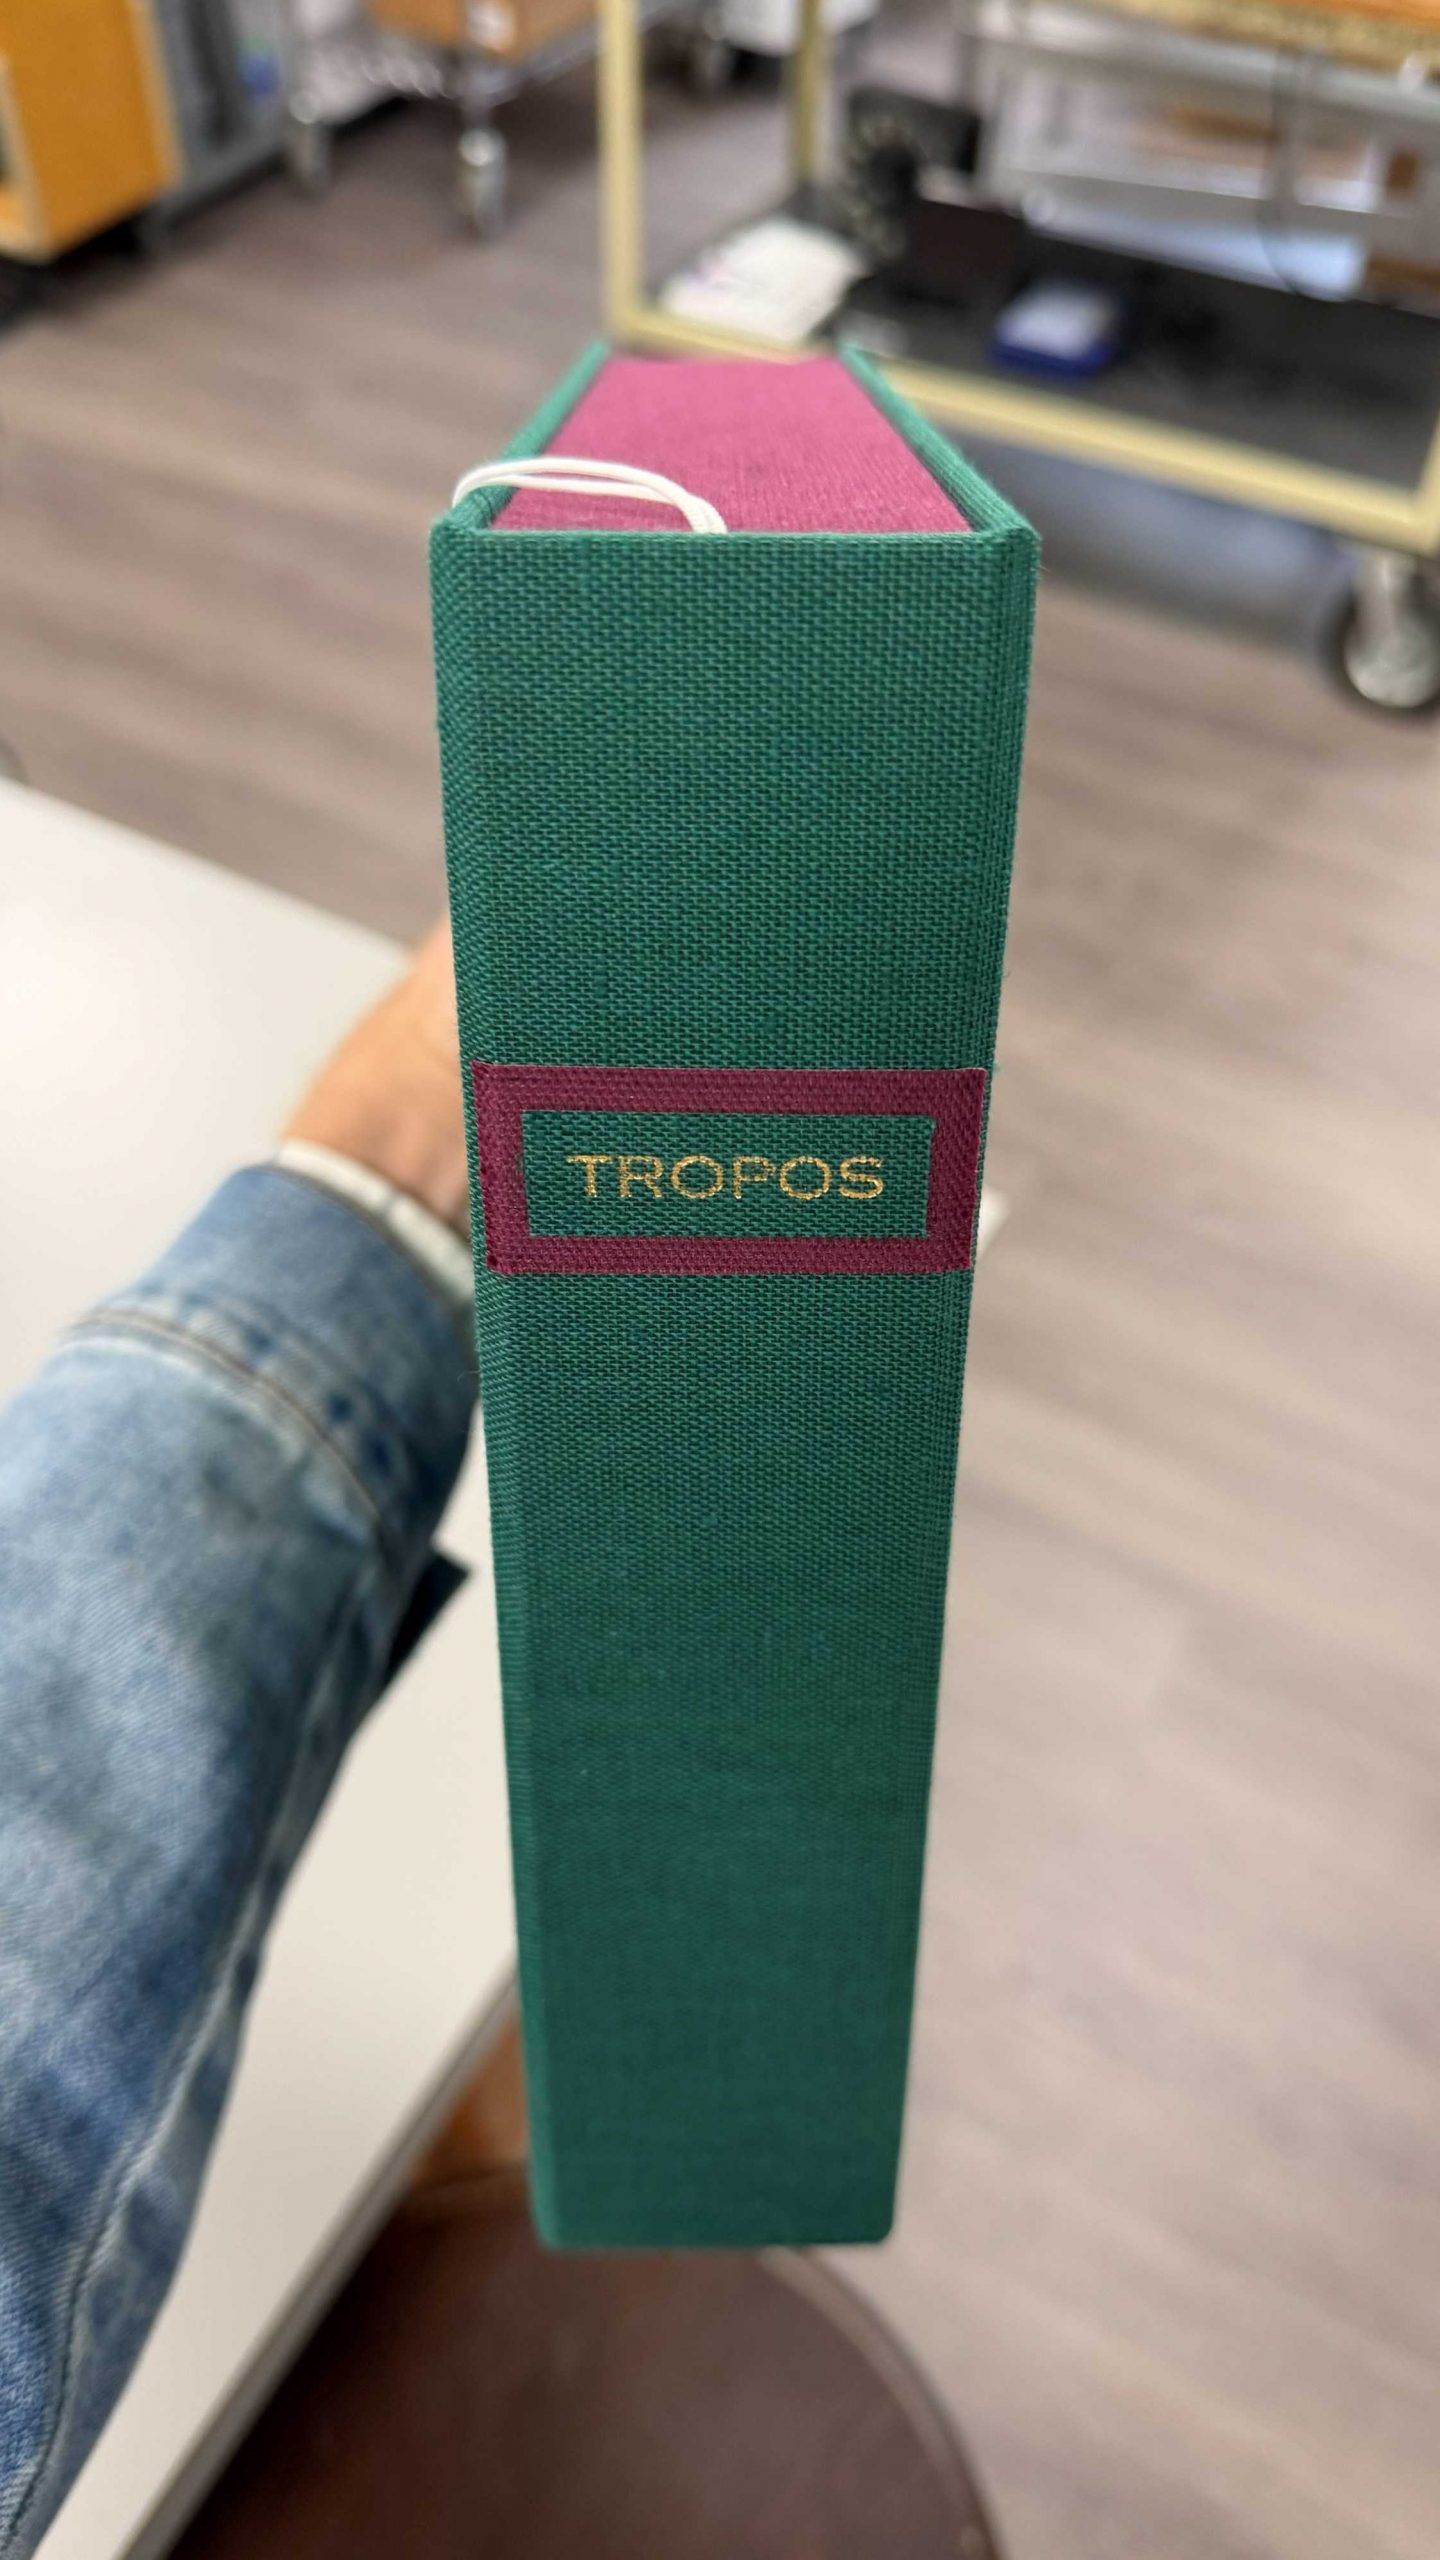
In late-July/early-August, I was tasked with making three clamshells. Now, at the end of August, I can say that I have made six. That is a lot of clamshells! Did I have to? No. Nonetheless, this month in the Preservation Lab I have had several marvelous artists’ books and an artbook land on my shelf, and I couldn’t pass up this opportunity to spend a whole week making clamshells.
Pssst… pssst… I also couldn’t pass up this opportunity to explain the difference between artists’ books and artbooks. An artists’ book is a book that is a piece of art while an artbook is a printed selection of an artist’s works. Took me a while to know which one was which. It kinda sounds like it should be the other way around…
Mexican Punitive Expedition diaries by George Burt Lake
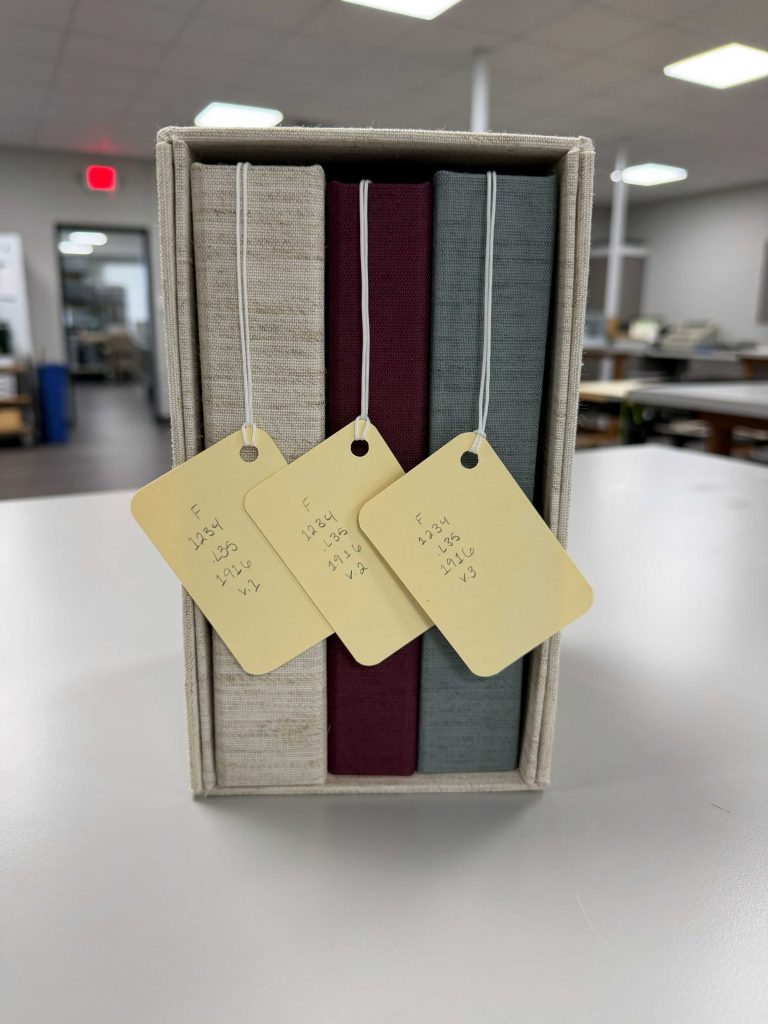
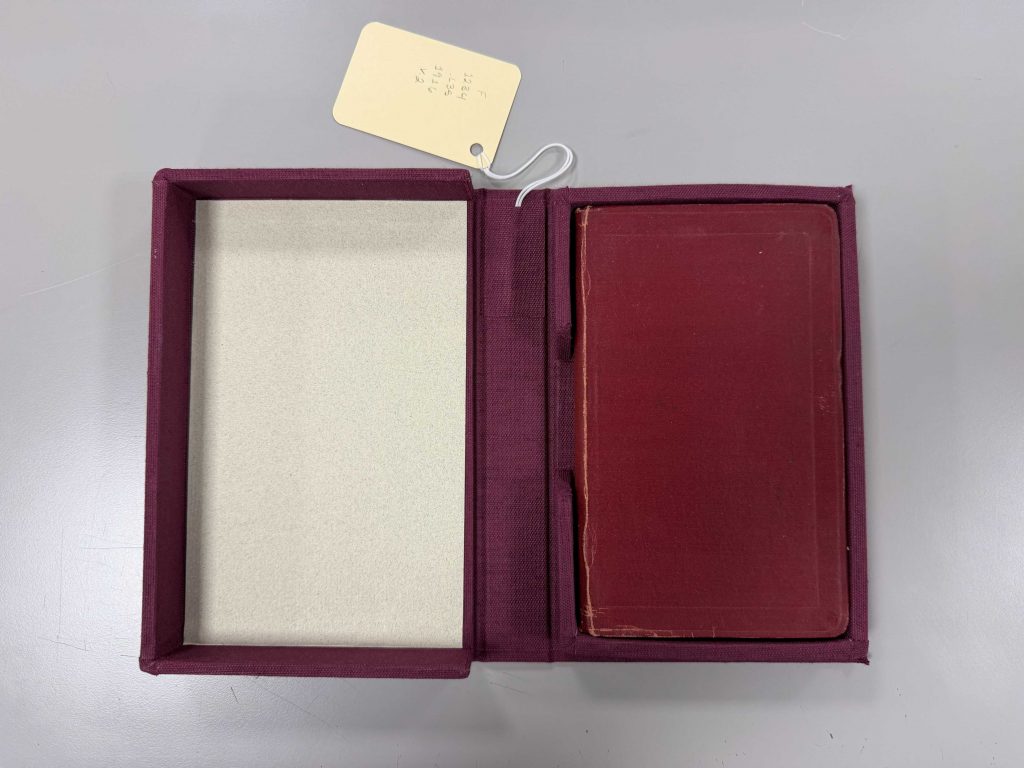
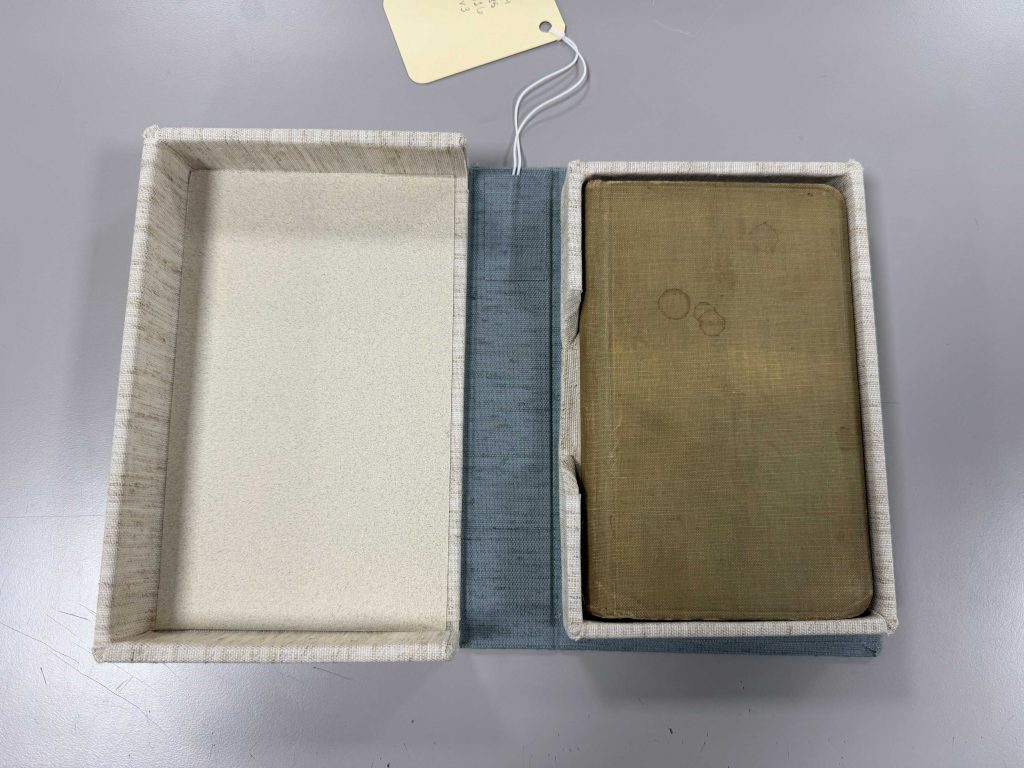
Here are three clamshells made by my talented preservation assistant, Natalie, and myself. The clamshells contain a three volume series of diaries written by George Burt Lake during the Mexican Punitive Expedition (a.k.a. the Pancho Villa Expedition or the Mexican Expedition). The goal of this almost year long expedition spanning from March 1916 to February 1917 was to capture the Mexican revolutionary Francisco “Pancho” Villa in retaliation for a previous attack on Columbus, New Mexico led by his revolutionary forces.
I had three main considerations for the creation of these three clamshells. The three clamshells had to be somewhat reminiscent of the book’s colors, the first volume had to have additional protection due to it coming unbound and having red rot, and, since the books will all live aside one another, I wanted to create a slipcase for them to live in.
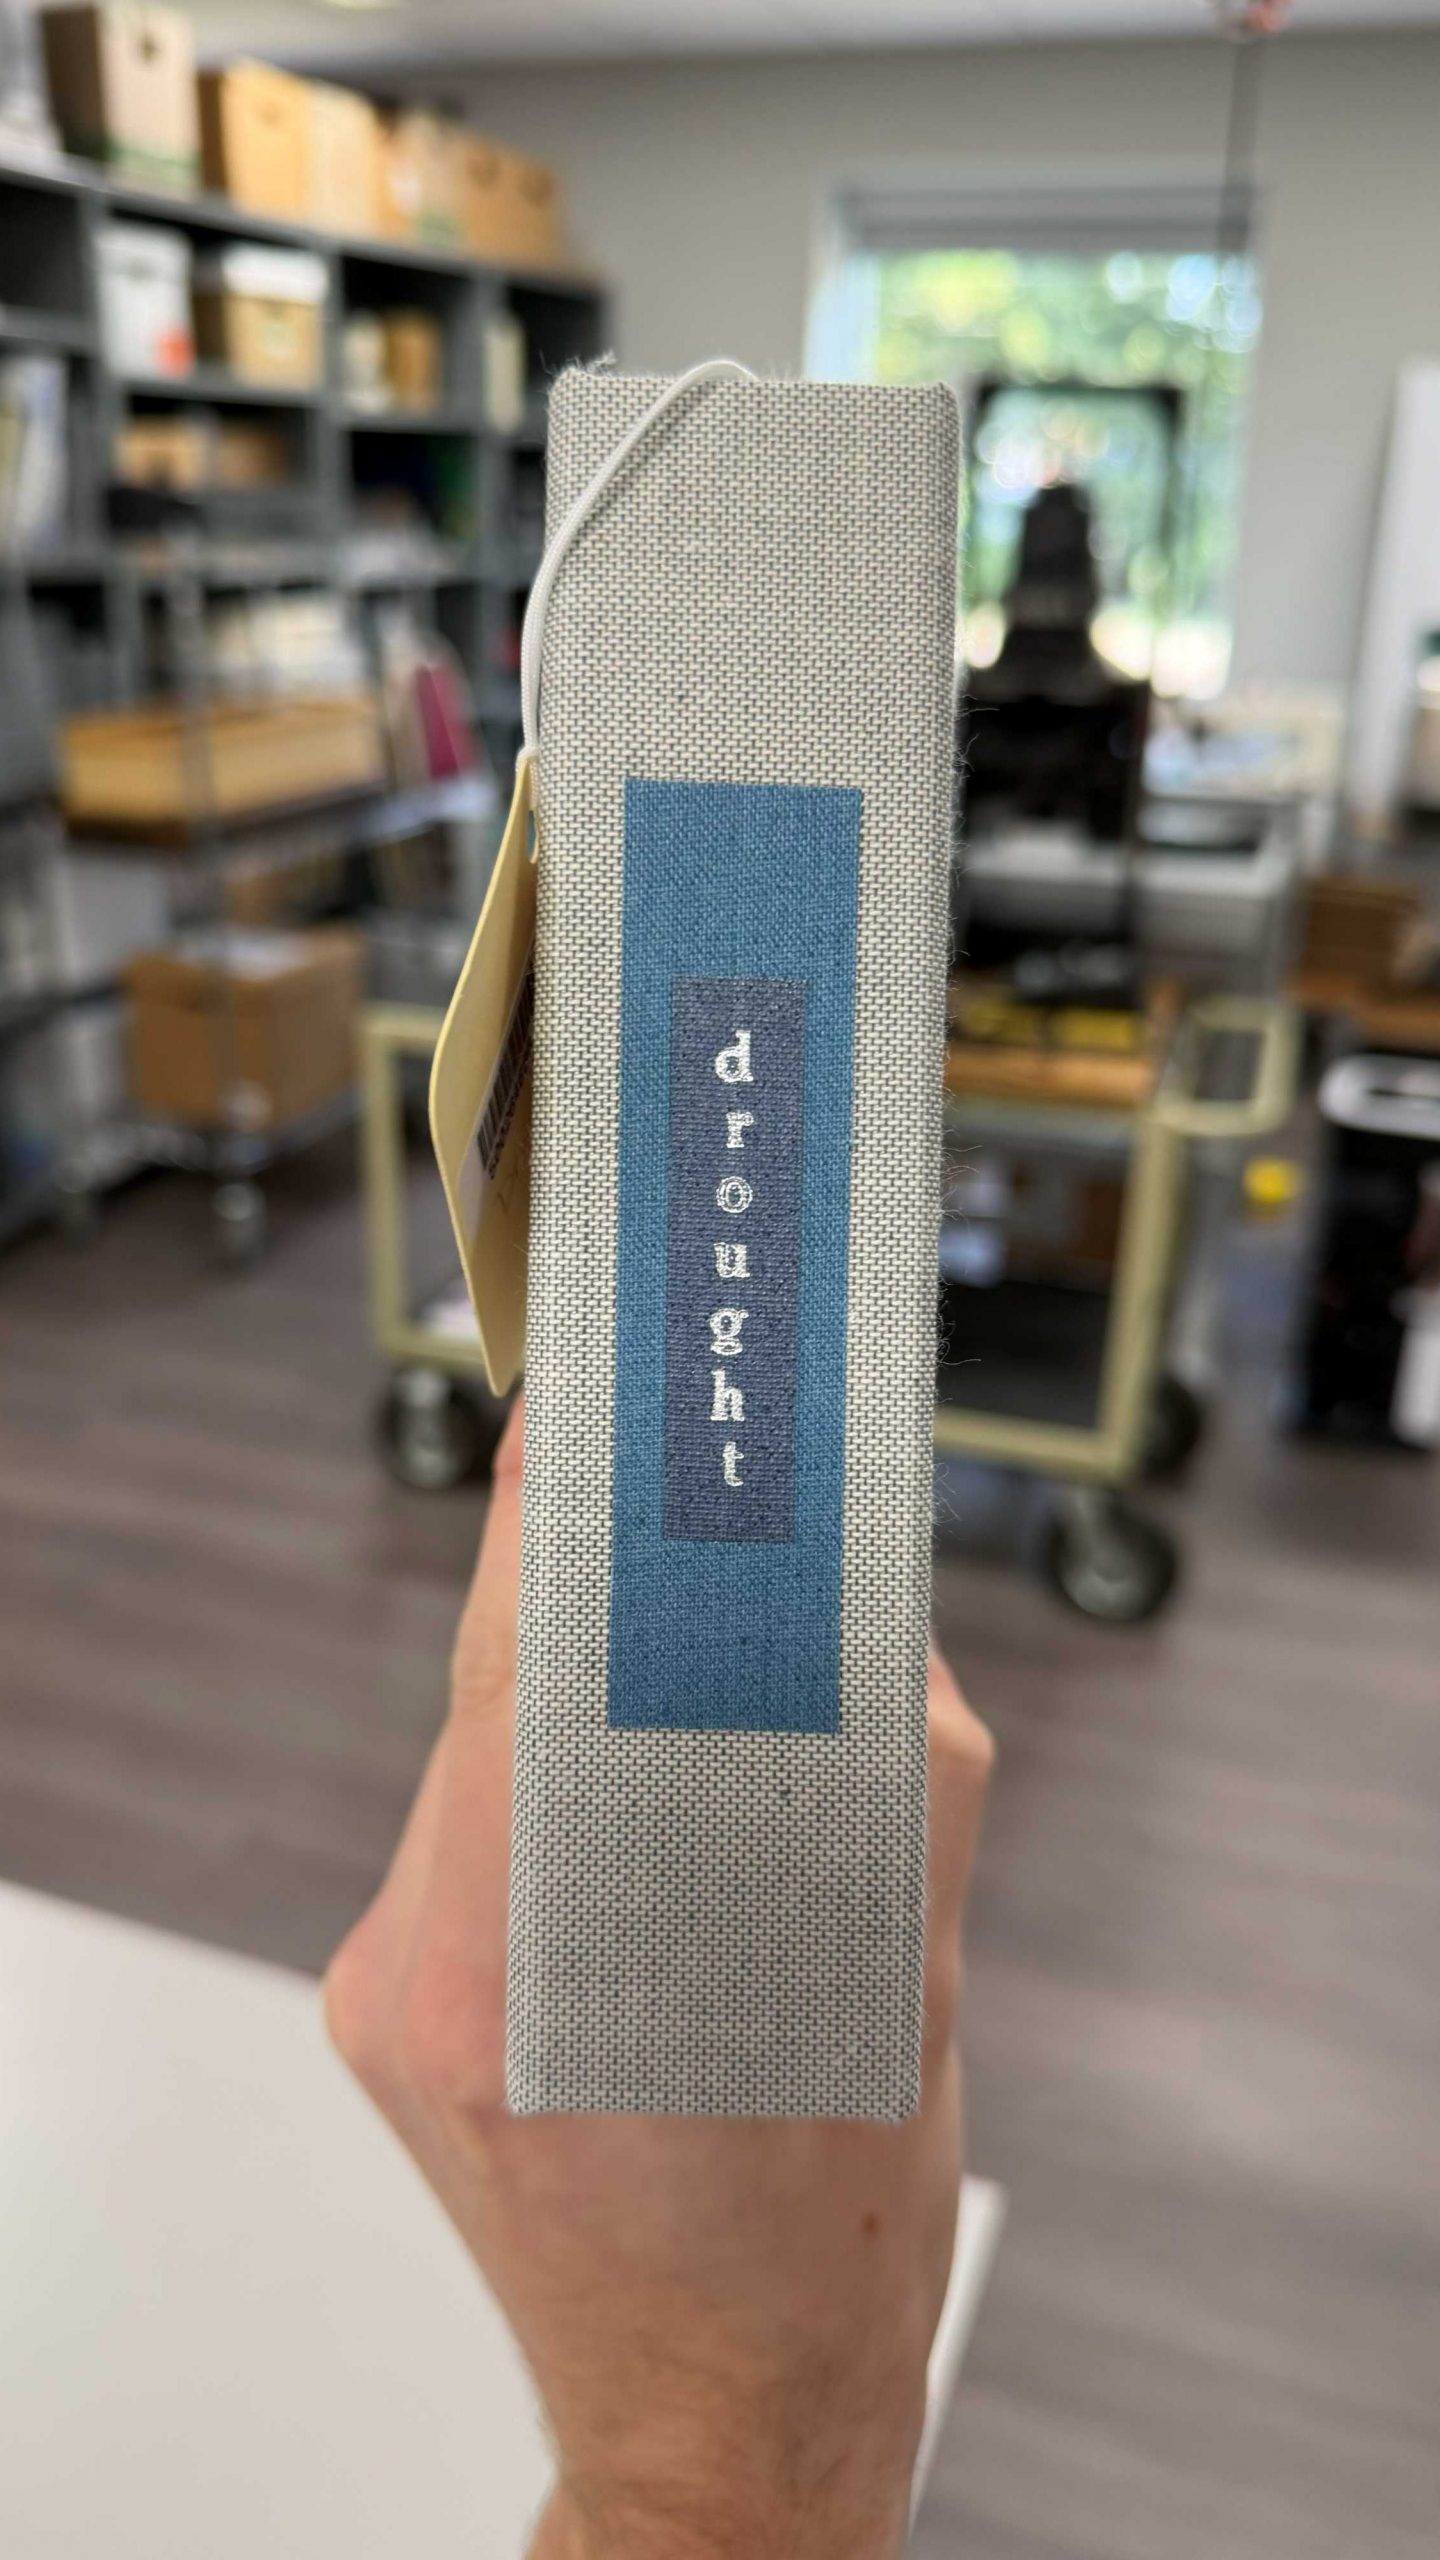
Rather than following instructions for the creation of a slipcase, I figured, “Well, I know what a slip case looks like! I can just make one.” Was that true? Somewhat. Was it the best choice? Certainly not. While the slipcase works, the processes of lining it with fabric and finding the accurate dimensions for the inside space had too much trial and error for my taste. If you look at the sides of the case, you can see that I had to add in additional boards to take up more space.
Next time, I will be following instructions for creating a slipcase, and I will also ensure that all clamshells in the slipcase will have the same exterior dimensions so they all fill the space equally. Despite difficulties in this process, this sparked some desire to continue making clamshells.
Lucky for me, two weeks later we received a large order of artists’ books from Passages Bookshop, and all of them needed enclosures…
Artists’ Books Clamshells
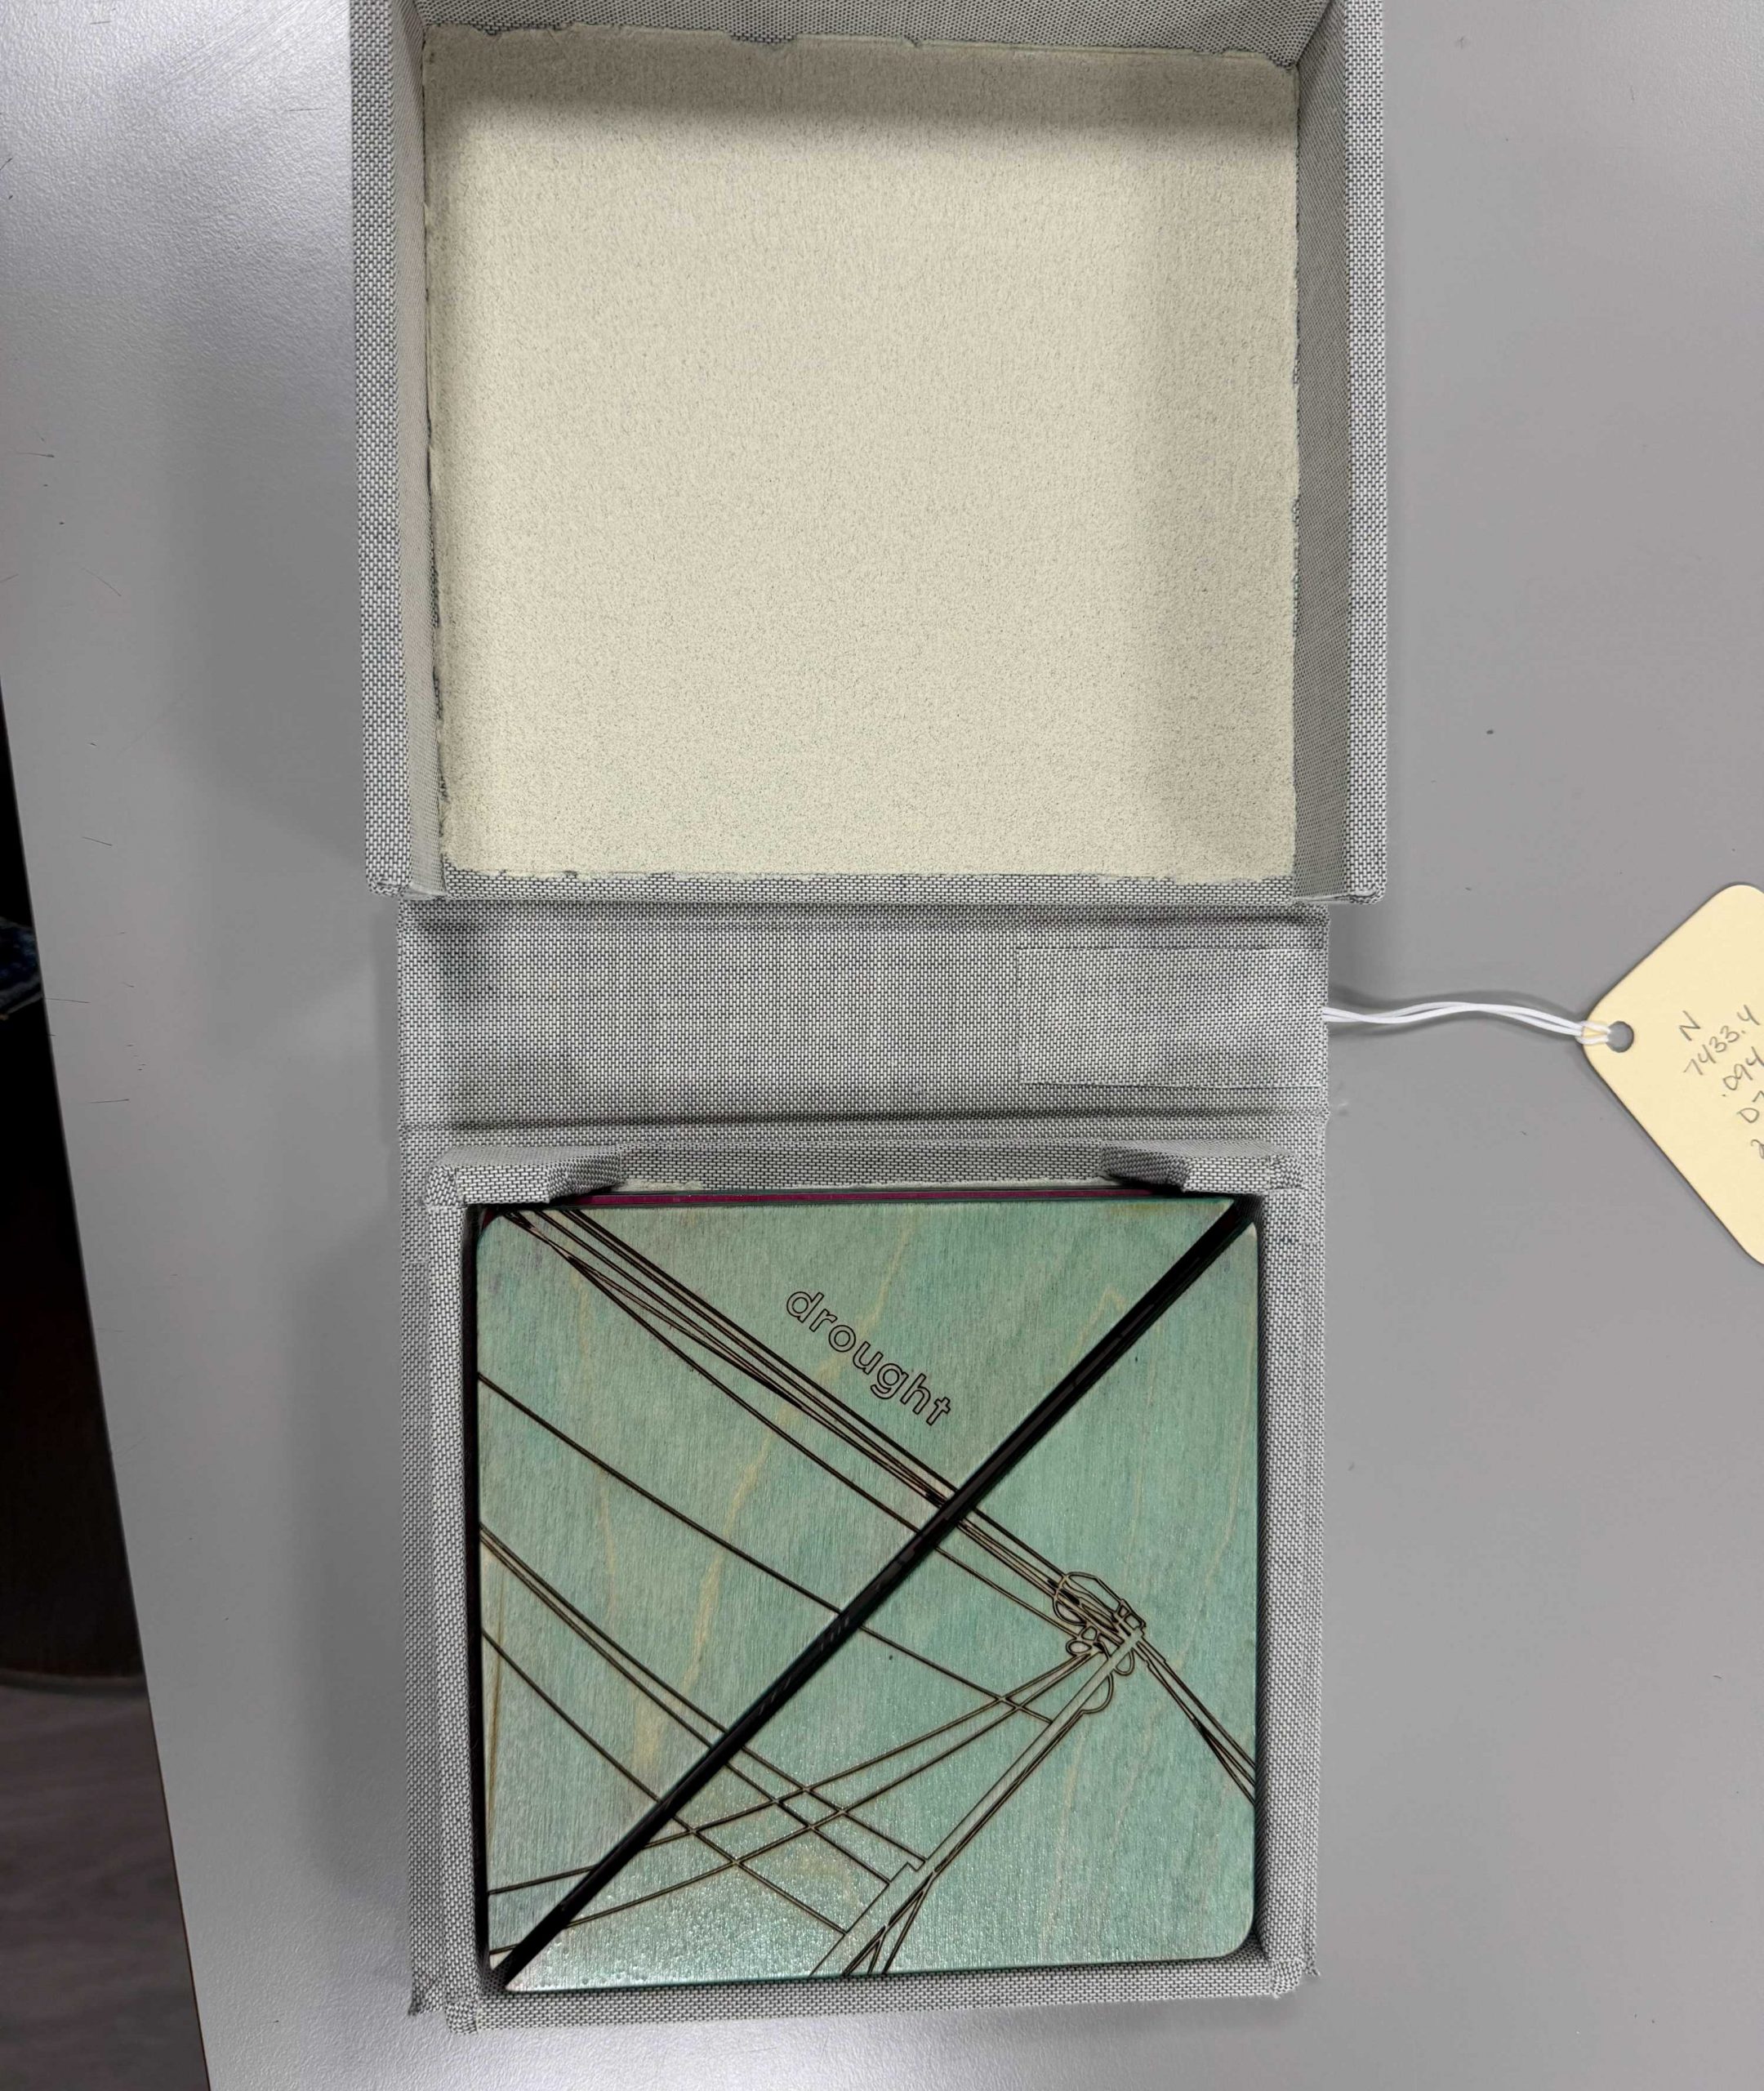
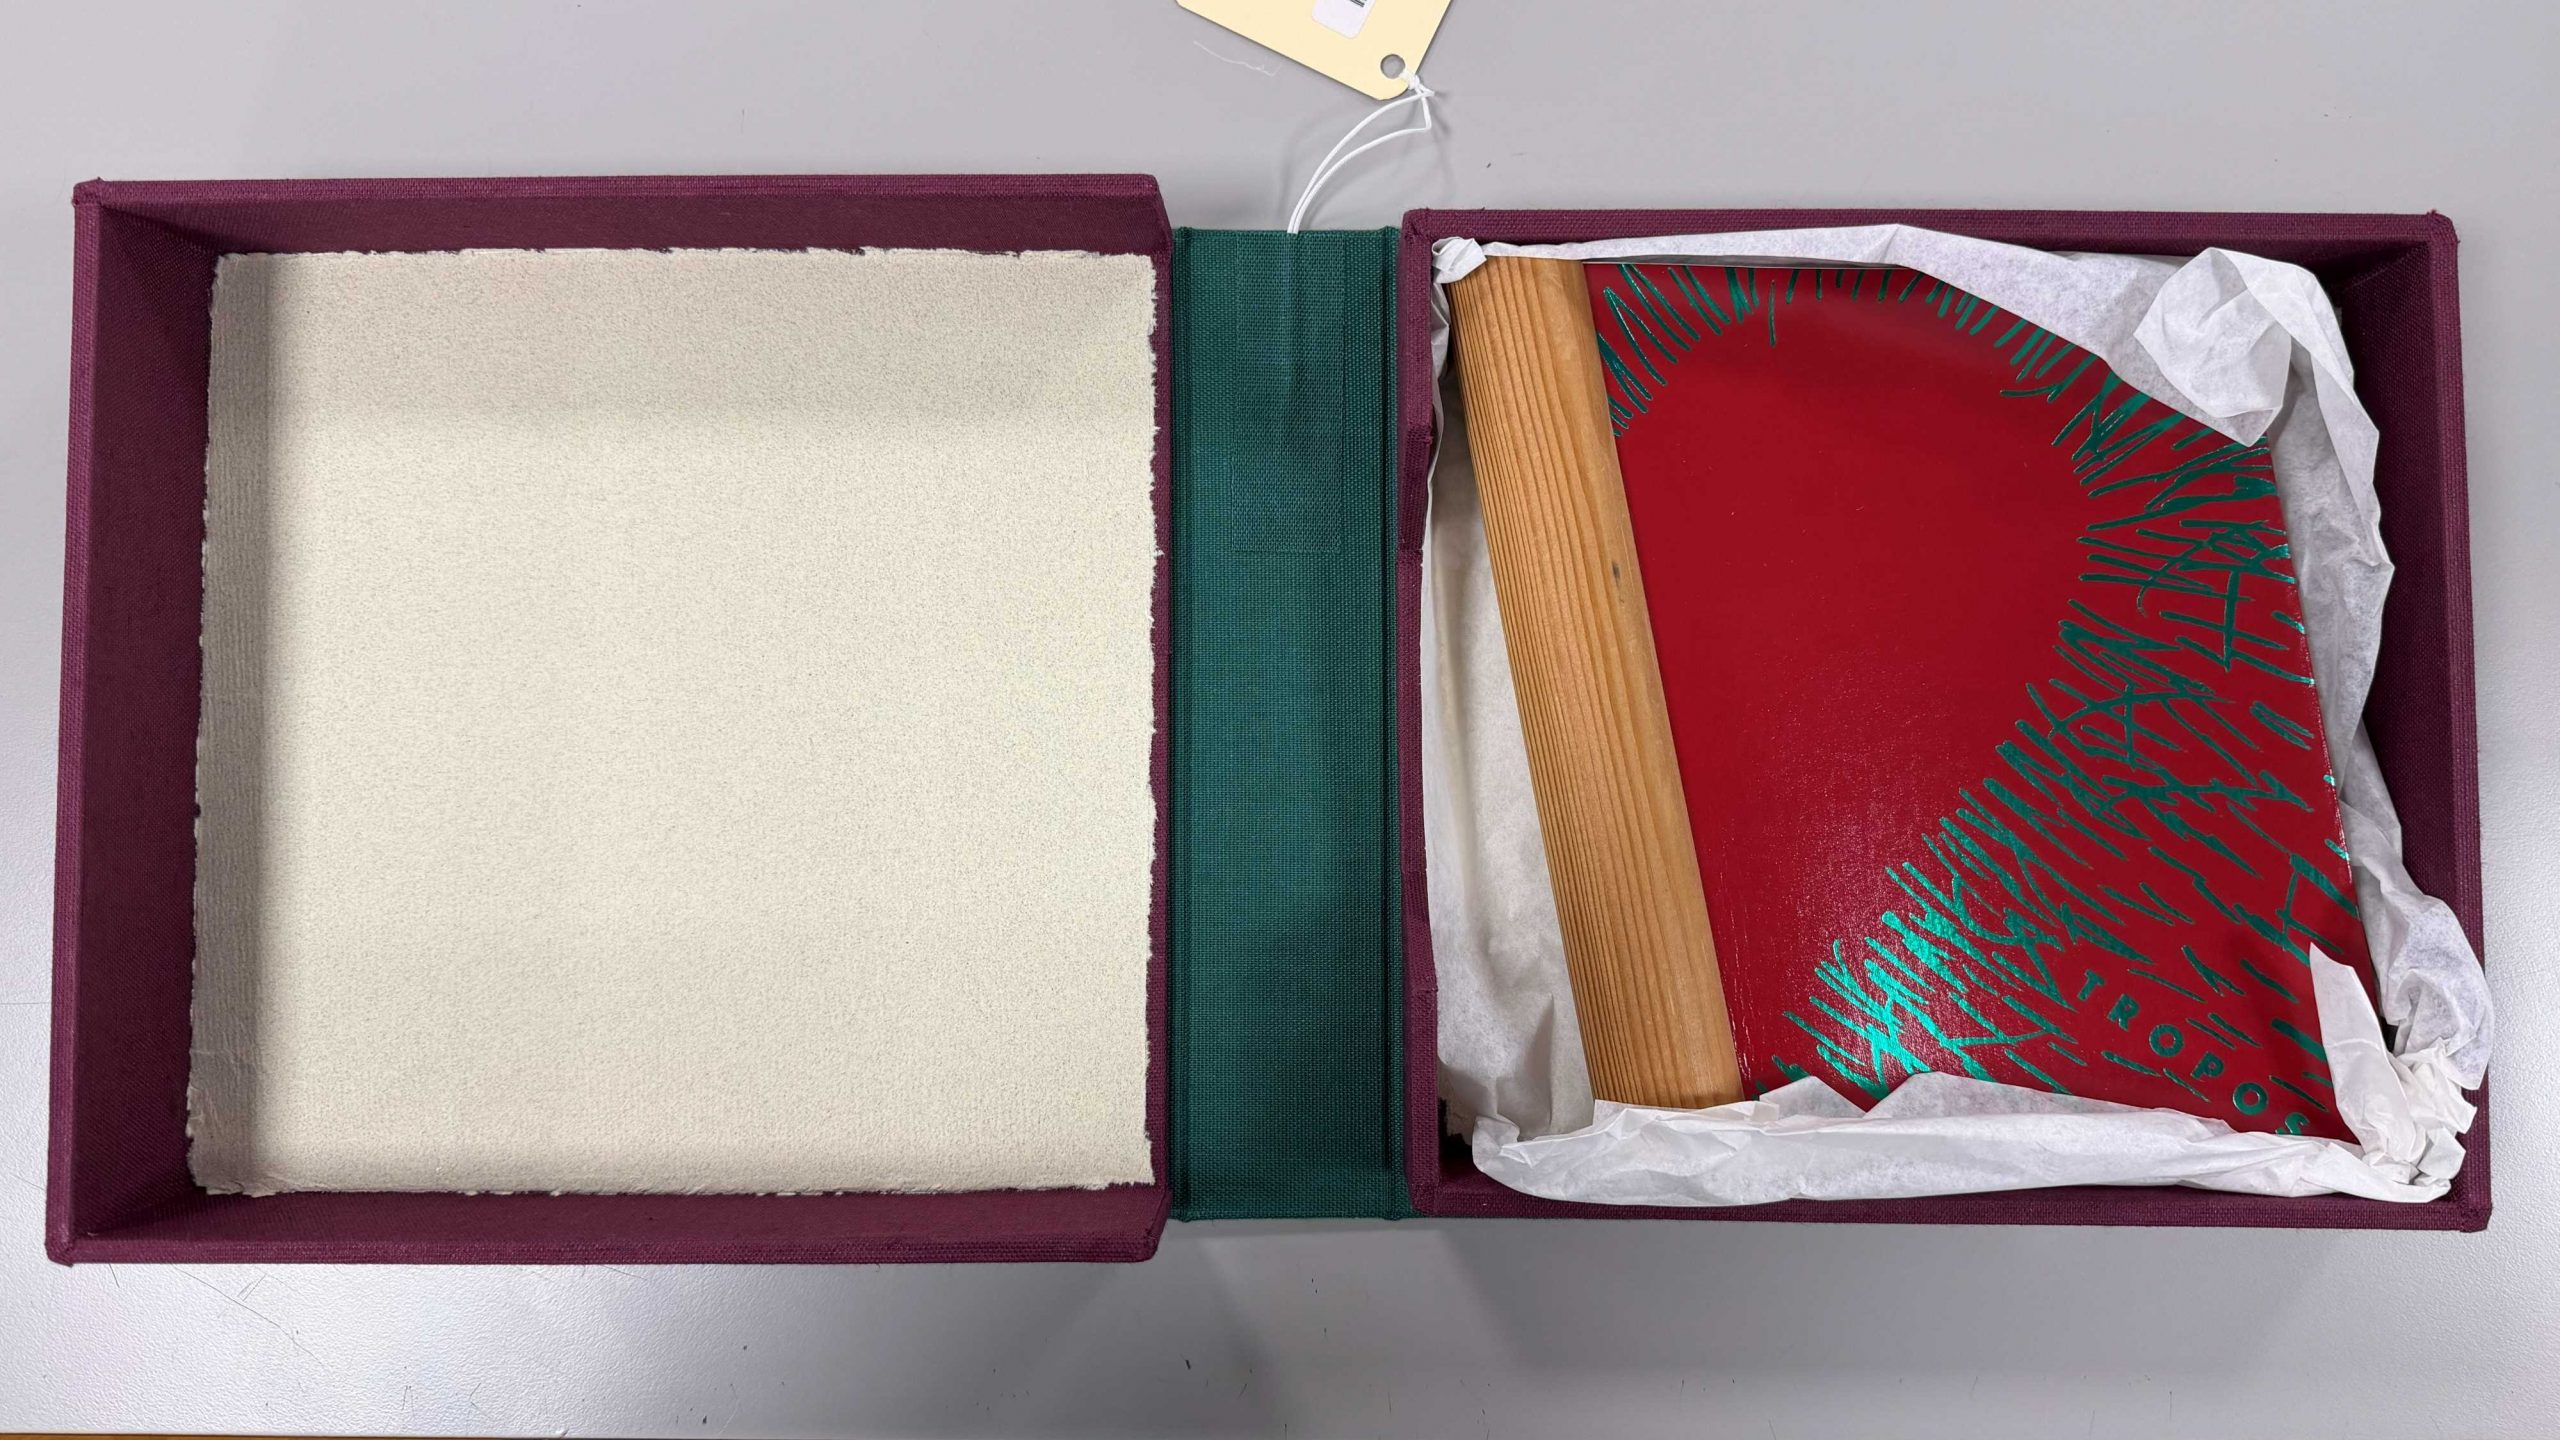
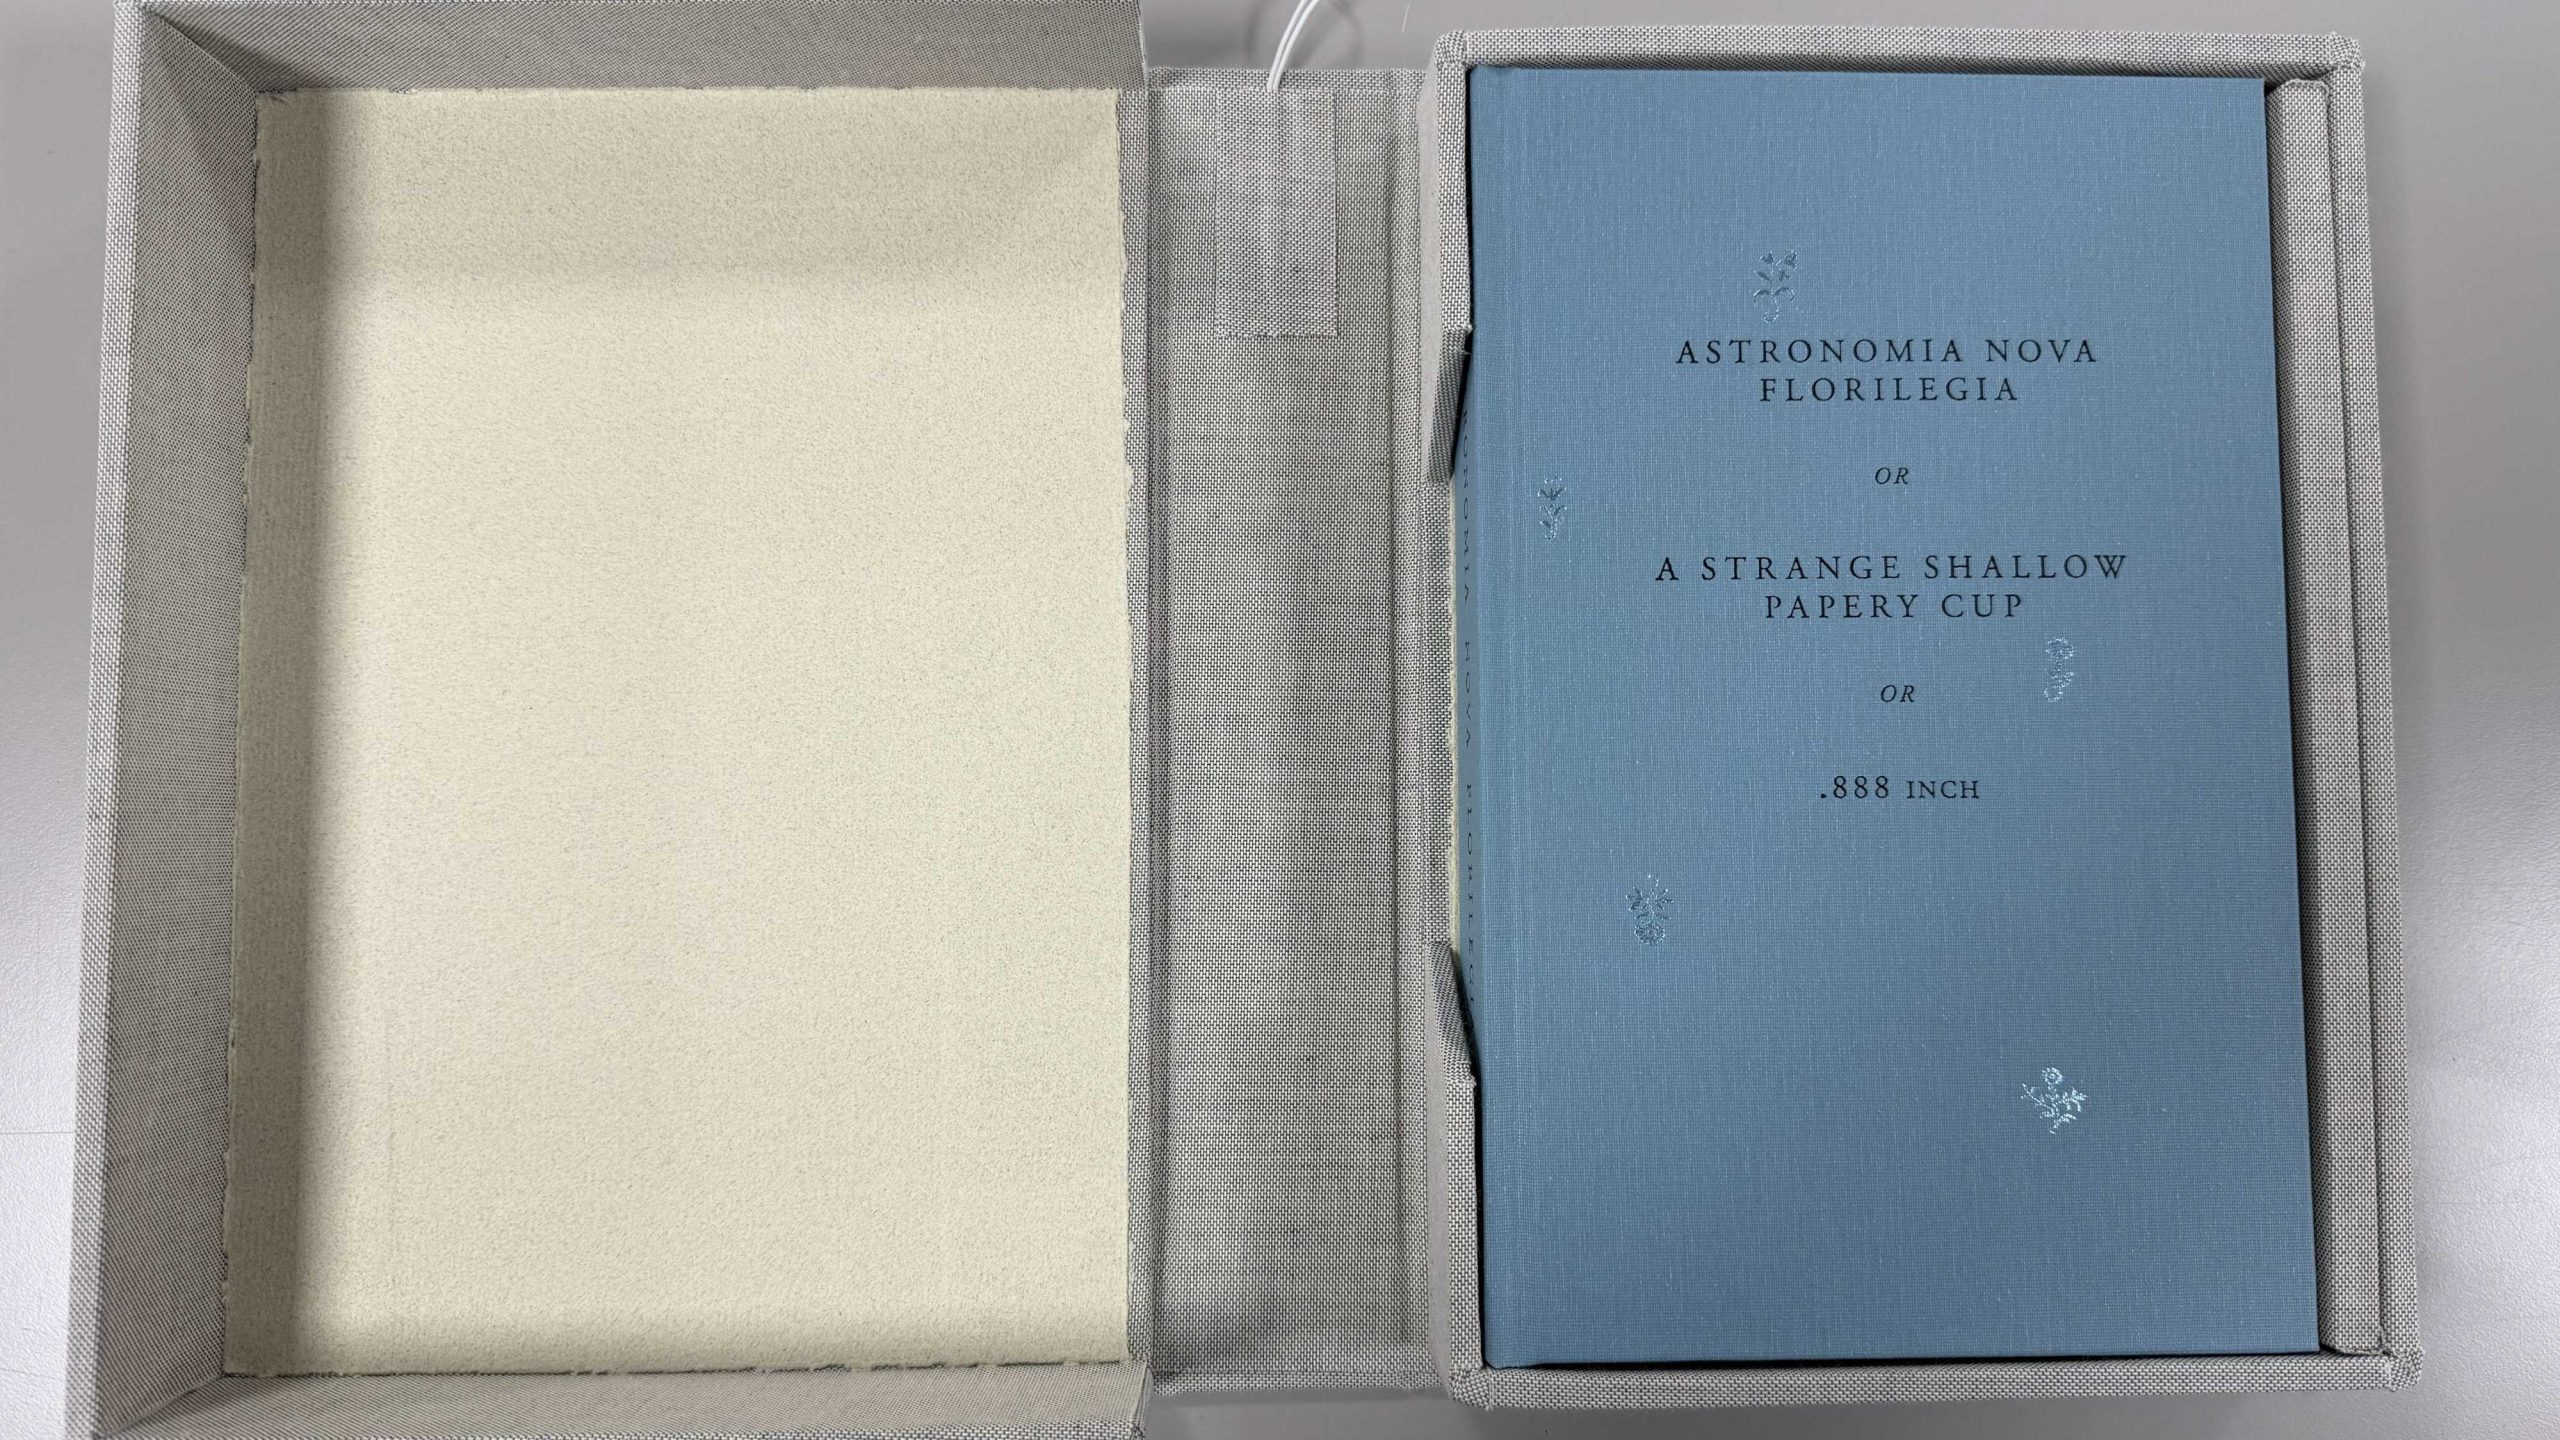
As you can see, these books vary quite drastically in shape, size, and materials used for their construction. The book on the bottom right is a classic hardcover book, while the other two books have unique wooden cover material. Not to mention, one of them is not rectangular!
All but one of these clamshells were created without issue. If you look to the right side of the last clamshell, you can see that I added in two additional pieces of board to take up excess space. Nonetheless, I think it still turned out quite nice.
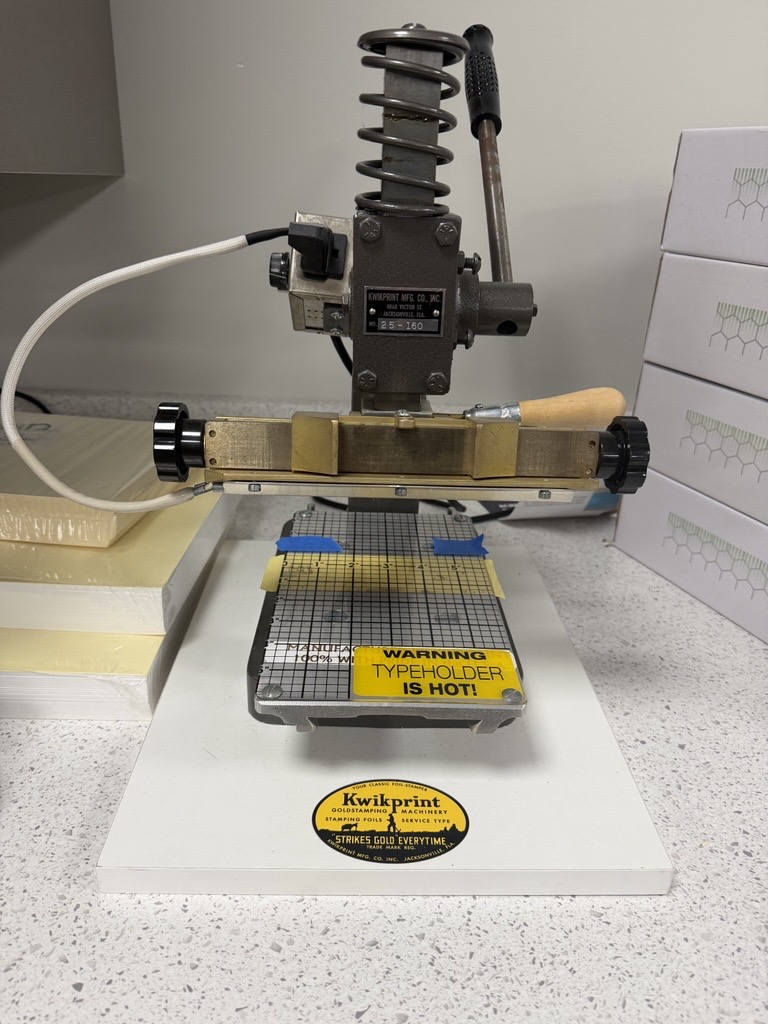
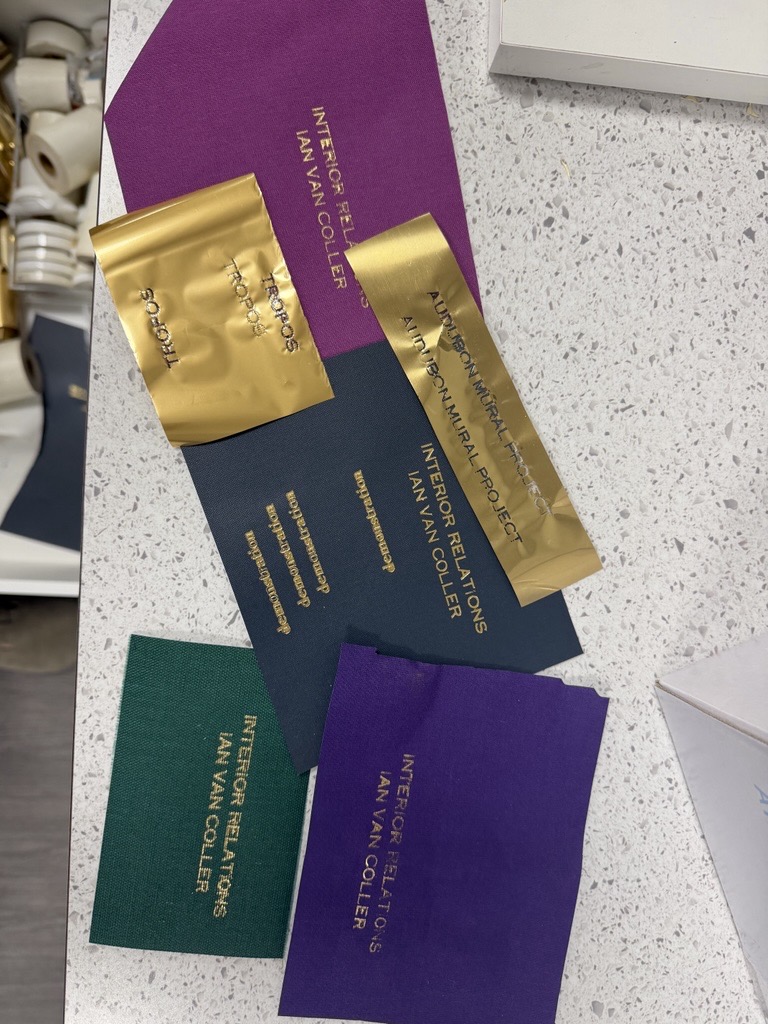
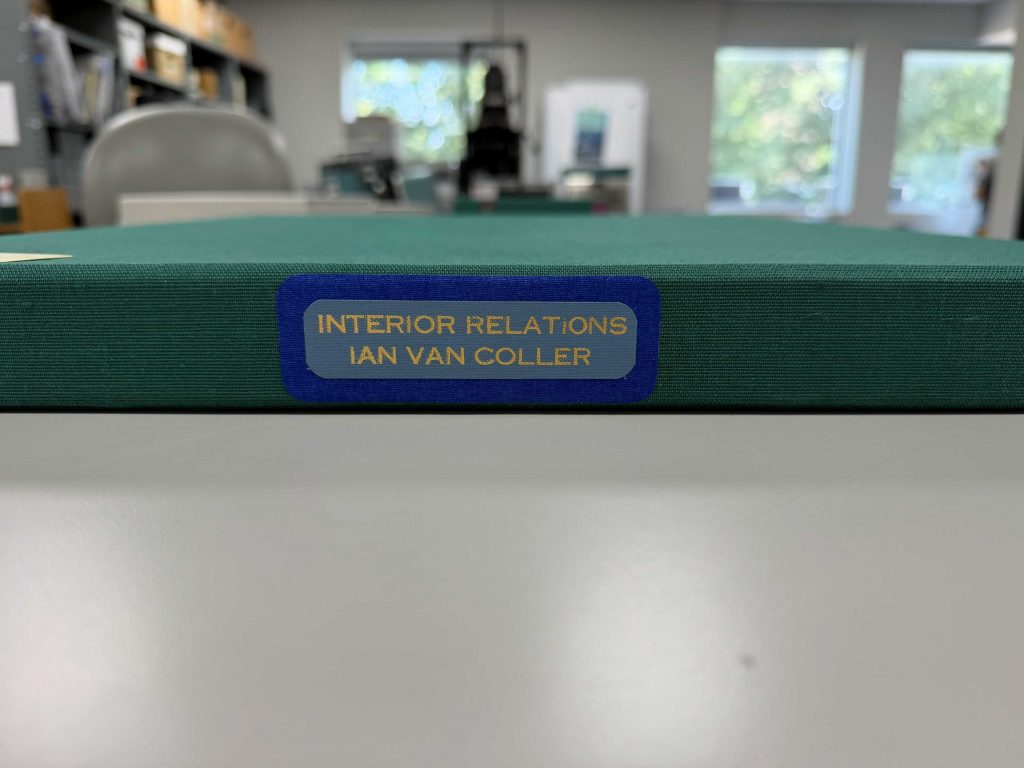
Furthermore, I have recently gotten quite obsessed with creating custom labels for our clamshells. This process entails using our foil letterpress machine to press hot metal letters onto a piece of metallic foil. The combination of the foil with pressure and heat transfers the letters onto the material. This takes some trial and error. I typically print the same thing a few times on a single sheet of book cloth or buckram before deciding which one looks best. After that, I cut out the winner and create a border around it.
Large Artbook Clamshell
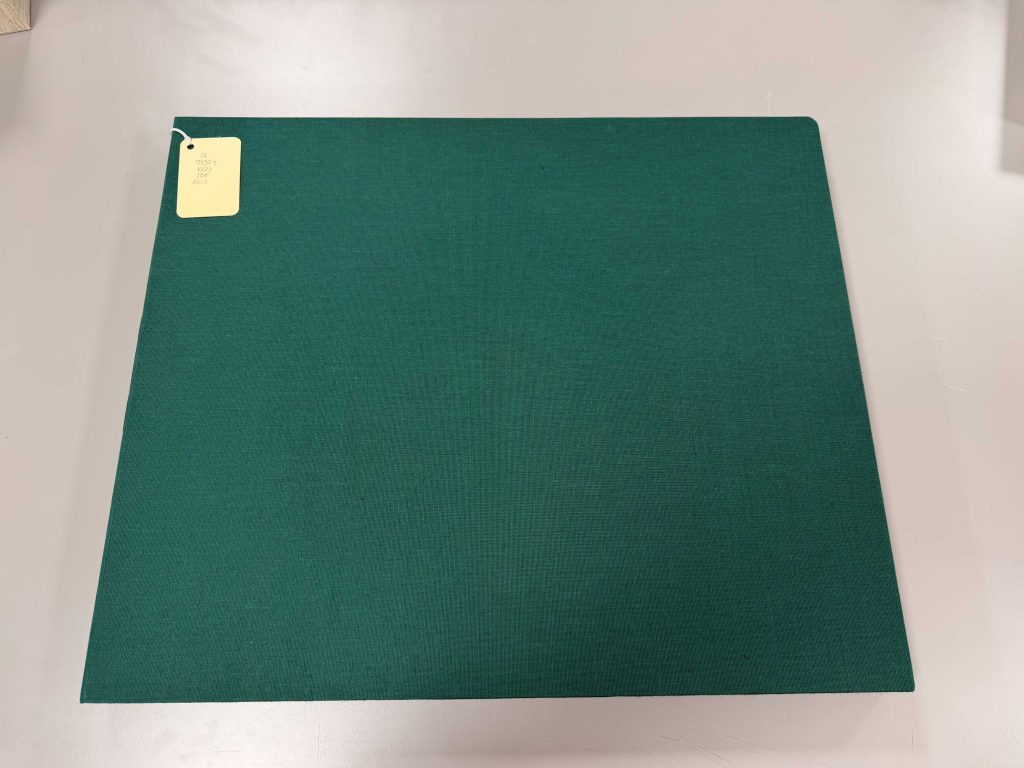
Finally, to end this saga of rapid clamshell creation, I made an oversized clamshell for a book of photography by Ian van Coller titled Interior Relations. Both miniature and large items alike generate similar levels of increased difficulty when building preservation enclosures. Special considerations must be made, and measurements become much harder to accurately take. It is also quite hard to cut either miniature or large pieces of binders board. It is a Goldilocks situation, a regular-sized book is just right.
Perhaps due to the increased attention I had to pay to making my measurements and cuts, this clamshell ended up fitting the book perfectly. It was, well, just right.
Where can I access these books?
These books, and their clamshells, are all part of UNT’s Special Collections and can be made available by appointment to access at the Sarah T. Hughes Reading Room on the fourth floor of Willis Library. Below, I have provided the links to them through the UNT Discover catalog:
The five main types of enclosures that we build in preservation are: clamshells, lightweight phase boxes, heavyweight phase boxes, four-flaps, and custom boxes. Enclosures are used for various reasons including protecting items from light exposure, keeping out dust and dirt, providing support for warped or brittle items, and isolating items that have received mold treatment or that are displaying red rot in their own environment.
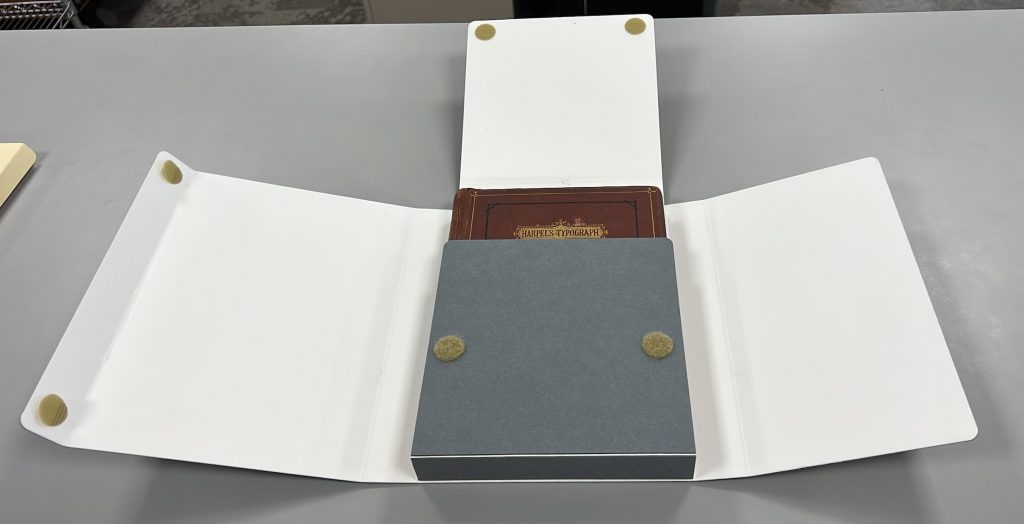
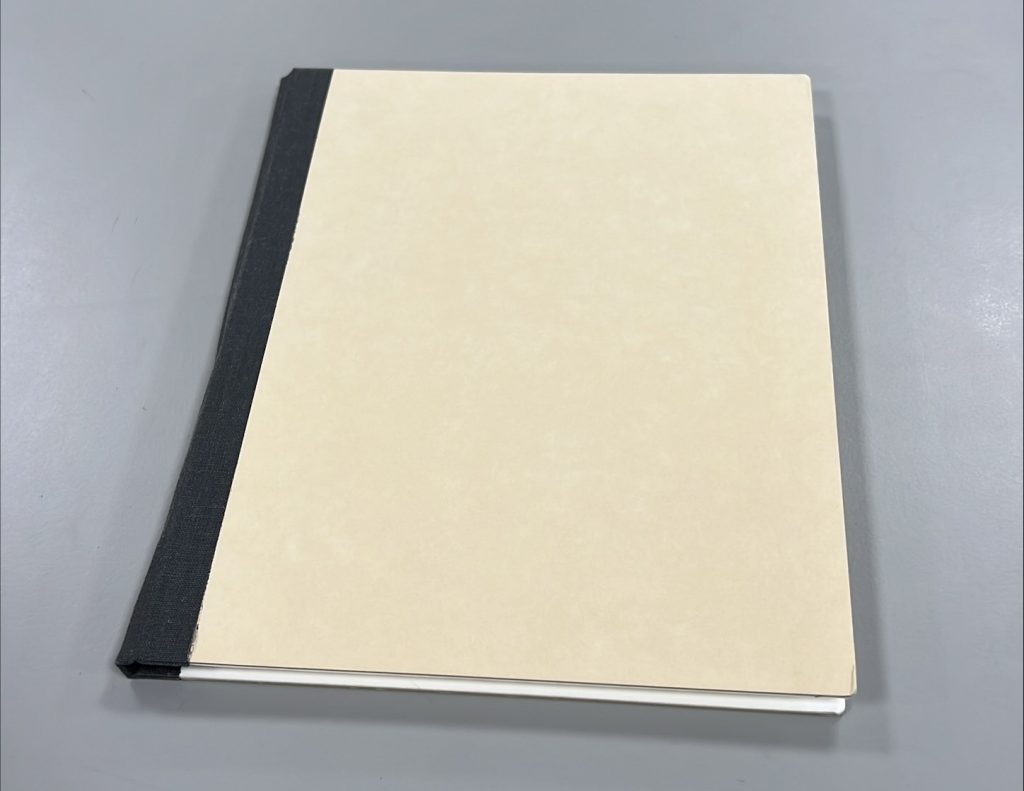
Clamshells are customarily built for our rare books. These types of enclosures are custom built out of board, PVA glue and book cloth. To see some images of clamshells we’ve built, take a look at some of our Custom Clamshell blog posts! Lightweight phase boxes are made of heavy-weight folder stock, double-sided tape and Velcro.
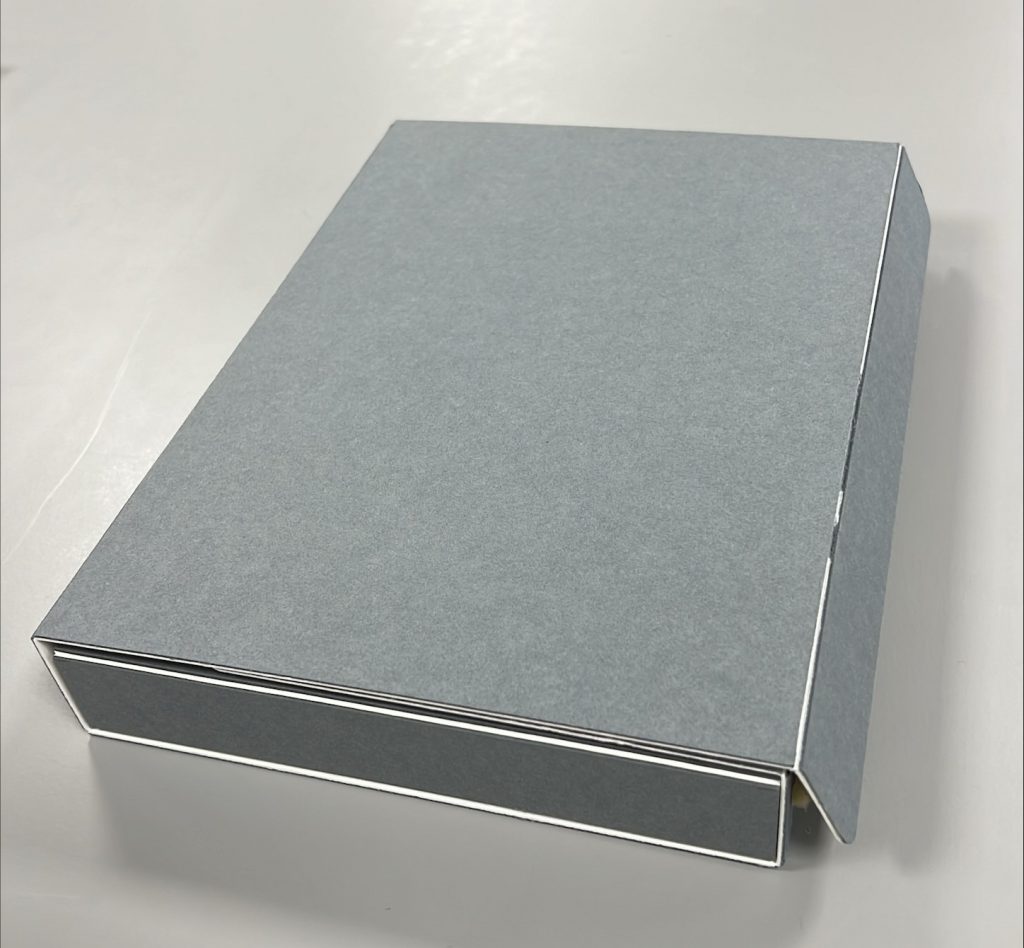
Heavyweight phase boxes are made of barrier board, PVA glue and Velcro. They are constructed the same way as a lightweight phase box, but is made of a thicker and sturdier material, providing a little more structural support.
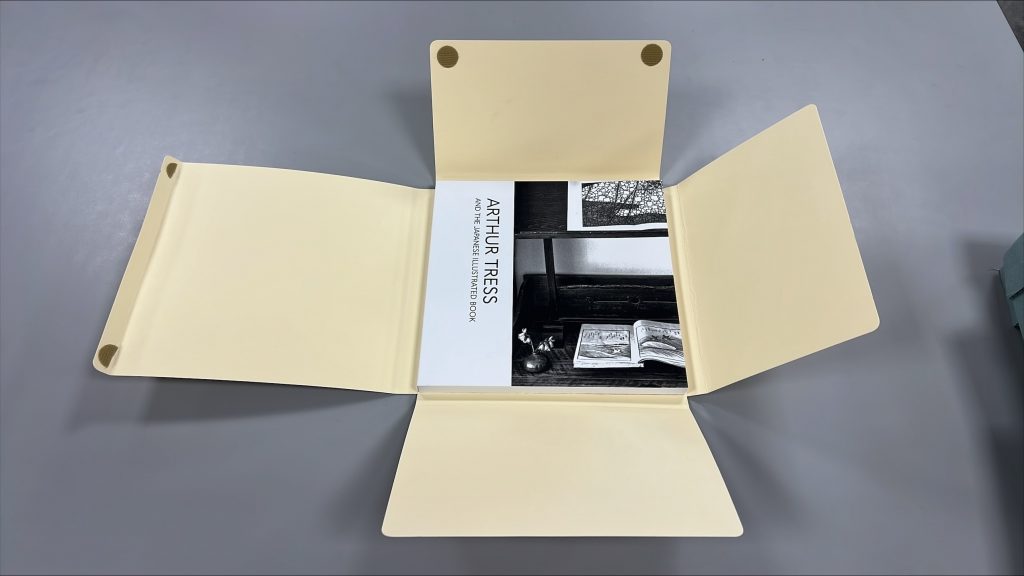
We utilize both pre-made or custom built four flaps for items. They are made of heavy-weight folder stock, double sided tape, book tape, and barrier board.
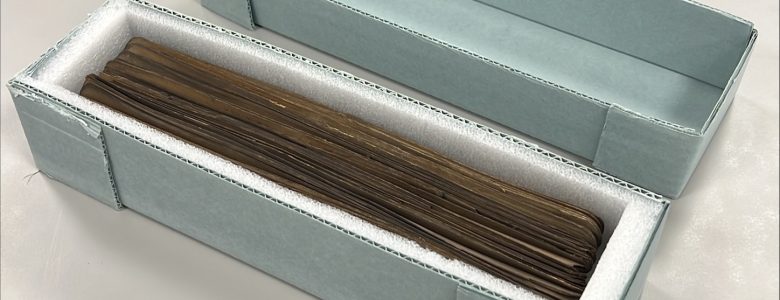
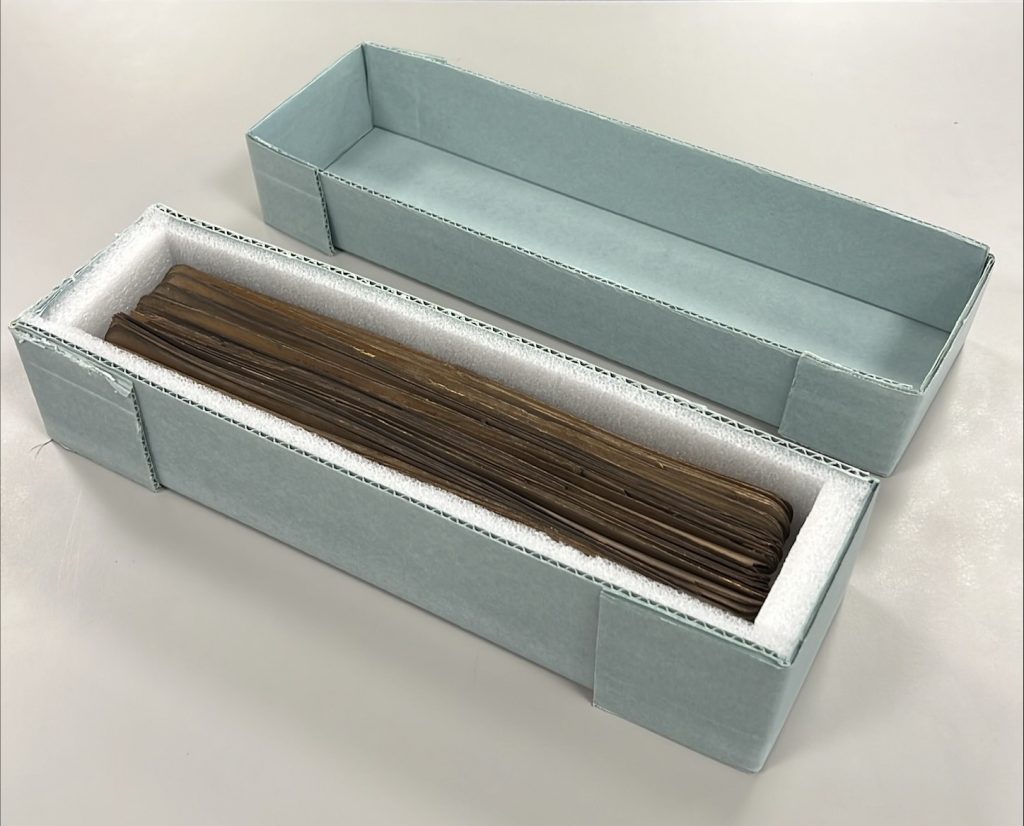
Custom boxes are exactly what they sound like, boxes that are made custom for the item! They are made of corrugated board and PVA glue and sometimes if items are especially fragile, they are lined with polyethylene foam.
One small detail in the movie Nine to Five created an indelible link between two remarkable women; renown entrepreneur Bette Nesmith Graham, and world-wide celebrity Dolly Parton.
The Liquid Paper Company was founded in 1958 by Bette Nesmith Graham, a secretary who identified a need for easily correcting mistakes on typed documents. By 1969 the Liquid Paper Company was a multi-million dollar company headquartered in Dallas, Texas, but Liquid Paper found a new level of success in the hands of Dolly Parton.
This article from the October 1980 issue of Letter Perfect, the Liquid Paper Company newsletter, describes how producers for the movie Nine to Five used Liquid Paper to ensure that the office setting in the movie felt authentic to the time period. In the publicity still from the article Liquid Paper is featured prominently on Dolly Parton’s desk proving that it was something no office could be without.
There are three key benefits to mending torn documents and prints.
The first, and perhaps most important from a preservationist’s perspective, is preventing future damage. If paper is torn, then it is only easier to tear it more when handling, even if one is to handle it carefully. Through paper mending, these weak points are reinforced and future damage is halted.
Second, paper mending can improve an item’s practical accessibility. As previously mentioned, one must exercise caution when handling a torn piece of paper, especially if it is embrittled. This often discourages or prevents entirely the handling of these fragile items. Upon mending tears and holes in a piece of paper, it can be picked up and examined closer without fear of causing harm to it. Always exercise caution, of course.
Finally, paper repair can improve the aesthetic presentation of a print or document. If one looks at a beautiful image with a rip through it, one is likely to shift their focus rather fast to the fact that the print is damaged. Paper mending, when done right, minimizes the appearance of tears to the point of their imperceptibility (when observed on the opposite side of the mending).
Guarding with Heat Set Tissue
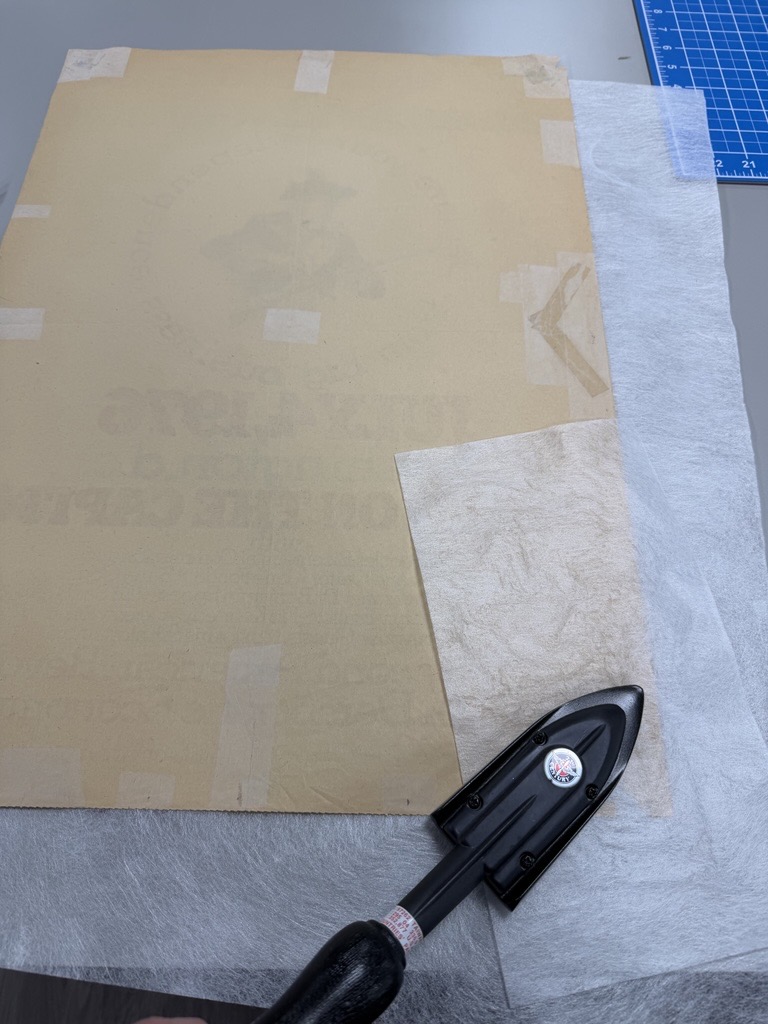
Guarding is a simple, quick method of paper repair that involves adhering heat set tissue paper to damaged areas of paper. This process of adhering the tissue is done with an iron at around 300 degrees Fahrenheit, and heat can also be used to remove heat set tissue paper if an item needs to be returned to its original state.
The simplicity of heat set tissue paper mending is somewhat evident through its appearance. It typically is a translucent, almost-white color, so it rarely blends nicely with prints that have stood the test of time. Furthermore, it can often loosen through handling, especially if not allowed to rest after its initial application. This can make it somewhat finicky and untrustworthy.
Japanese Tissue Paper Mending
If a print is mended with Japanese tissue paper, it has “made it big.” This time-consuming, but rewarding, process entails tearing strips of Japanese tissue paper and applying them along tears or holes. The tissue is applied using a preservation-friendly reversible adhesive, we at Special Collections opt. for methyl cellulose. It is reversible, a little goes a long way, and it dries clear!
Japanese tissue paper can have very loose fibers. When torn, the frayed edges “melt” into the paper being mended, creating an almost-seamless result. Because of its malleable property, it can be layered to give more reinforcement to areas that need it.
Like heat set tissue paper, Japanese tissue paper also is off-white in appearance, typically contrasting itself from the paper being repaired. Luckily, depending on the thickness used, it can often be translucent enough to be applied over text without affecting legibility. Small, precisely torn pieces also minimize the appearance of the tissue used.
Who Wins?
On paper, no pun intended, Japanese tissue paper mending seems like the clear winner. It can be used precisely to reinforce almost any hole or tear, it blends nicely into surrounding paper, and it can be layered upon to provide varying levels of reinforcement.
Guarding damaged paper with heat set tissue certainly does not have the “oomph” that Japanese tissue paper provides. It does not look as good, nor does it have the same level of strength. Nonetheless, a paper with multiple tears could be repaired with heat set tissue in 30 minutes at most while, on the other hand, the same repairs would likely take twice the time or more with Japanese tissue paper.
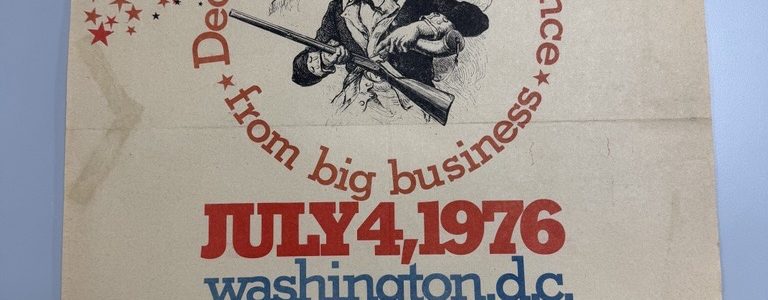
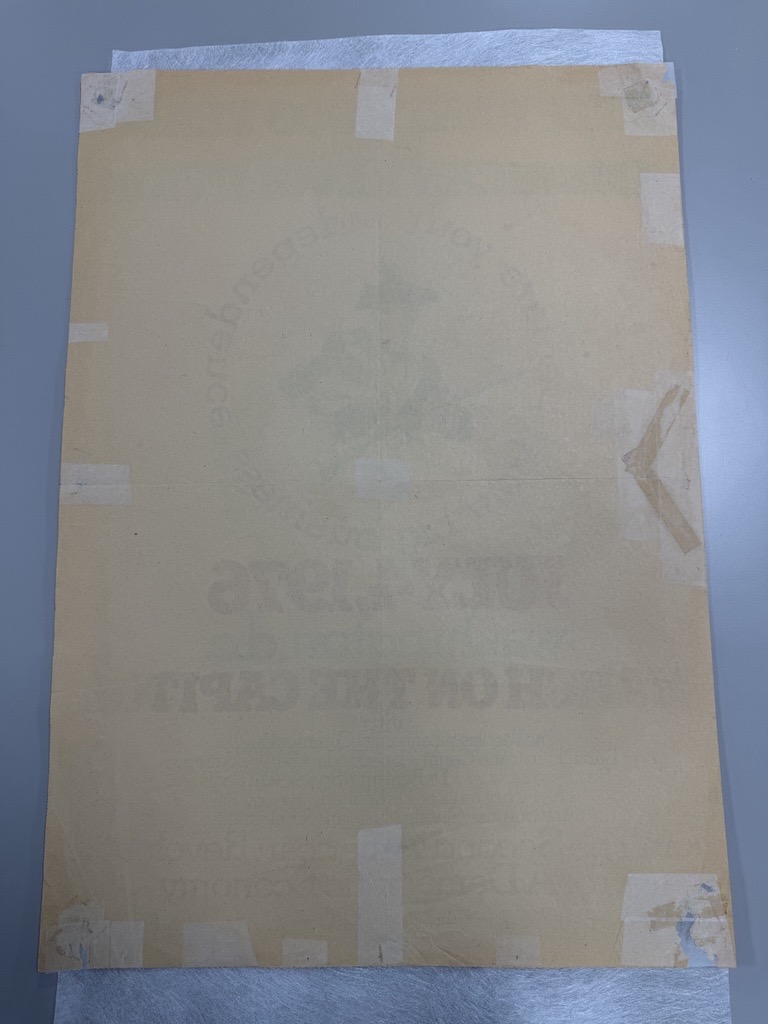
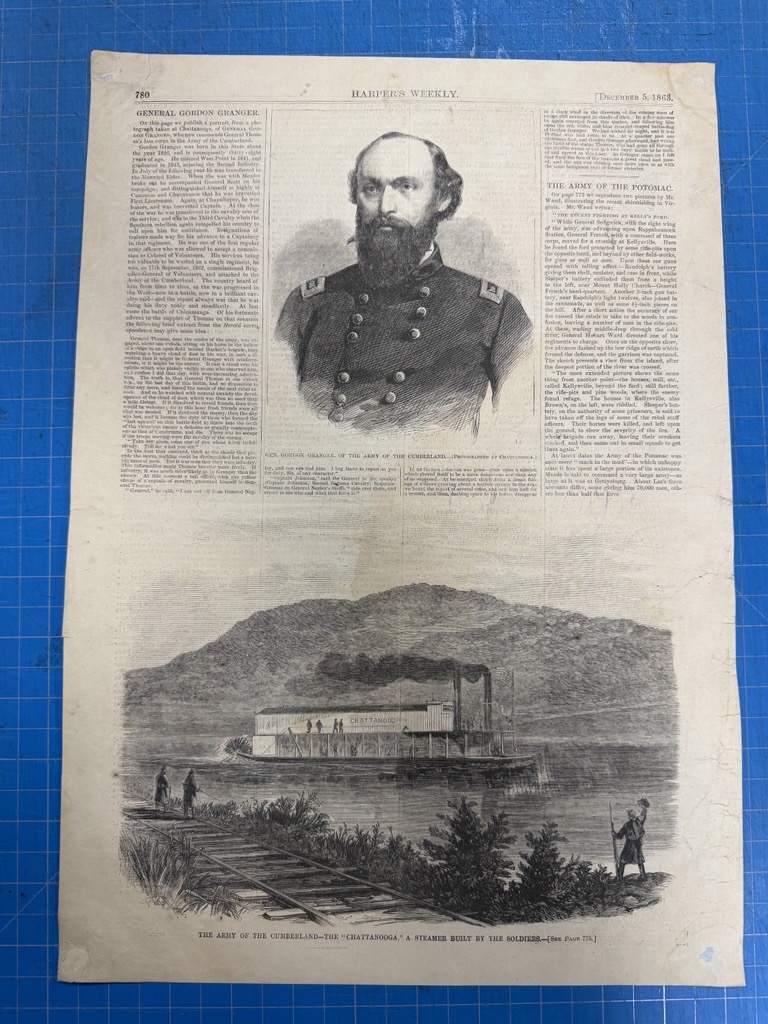
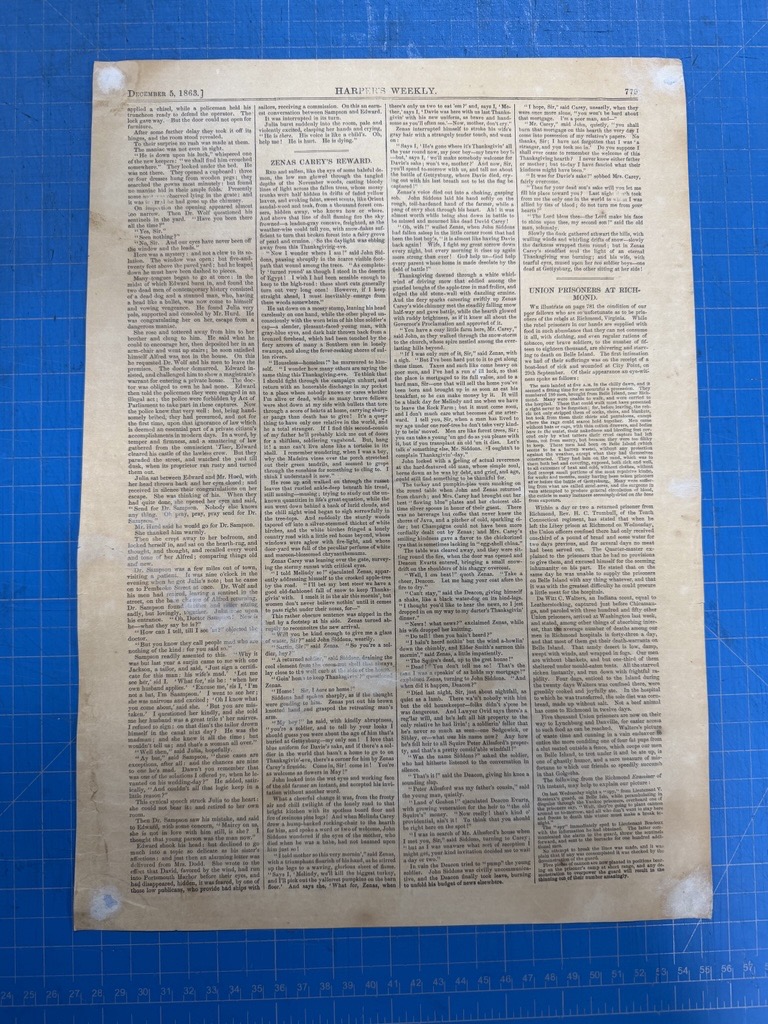
As always, the true answer is, “It Depends.” I opted for heat set tissue repairs on the poster because it is large, has several spots of damage, the backside of the poster is blank, and it is a duplicate. The other matching poster was scanned and encapsulated. In this instance, the guarding was only done for the purpose of preventing future damage. The Harper’s Weekly page got the Japanese tissue paper treatment due to it having content on both sides, having long tears and areas that needed more reinforcement than others, and it lacks a duplicate.
Working in an archive, you are bound to come across mold at some point. We want to ensure that mold does not cause health hazards for future researchers viewing the materials, and ensure that it does not spread to other materials in the collection.
When mold is brought to our attention, we immediately isolate the material and place it in vapor sealed (Ziplock) bags. These bags are then placed into a frost-free freezer for at least 3 weeks. We freeze the mold to deactivate it. This will not destroy it, but it will make it much easier to clean and hopefully keep it dormant. After this time, the bag is removed from the freezer and placed into an acclimation chamber (a cooler) where it’s temperature is brought back to room temperature overnight to help prevent condensation buildup. Then cleaning can begin.
When dealing with mold, safety is always the first priority. Mold can cause significant health problems, and we want to ensure anyone working with or around mold is protected. Anyone dealing with mold should be wearing full PPE (Nitrile gloves, N95 mask, goggles, and an apron).
Utilizing a variable suction HEPA vacuum, we place the item under our vent hood and slowly vacuum the entirety of the item with a soft bristled nozzle. If the item is particularly fragile or is a photograph, we place a piece of mesh screen over the item to keep it from getting damaged. After the item is cleaned, we will create an enclosure for it (i.e. phase box, four flap, or encapsulation) with the hope that if the mold ever does reactivate it will be contained to its enclosure.
There are times, however, when the mold is too extensive and dangerous for us to mitigate and clean. To ensure the content of the item survives, we digitize the item, upload it to The Portal to Texas History, deaccession and discard it.
Identifying mold can be tricky if you’ve never had to do so before and sometimes it can be confused for foxing. But what exactly is foxing? Foxing is a deterioration process where impurities in paper (such as iron) oxidize and create brown or rust colored spots. This type of deterioration appears when exposed to certain temperatures and humidity, but it will not spread to other items.1
It is important to distinguish between foxing and mold as one can wreak havoc to other materials in your collection. So, let’s play…foxing or mold???
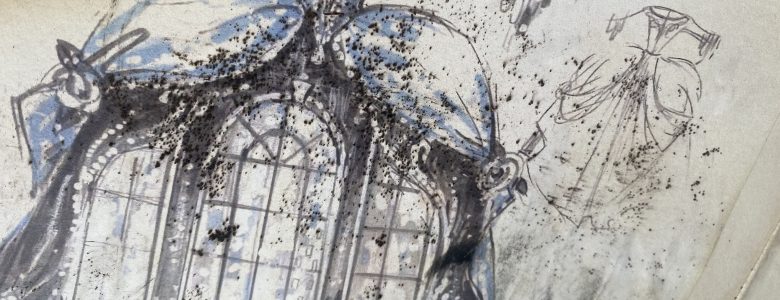
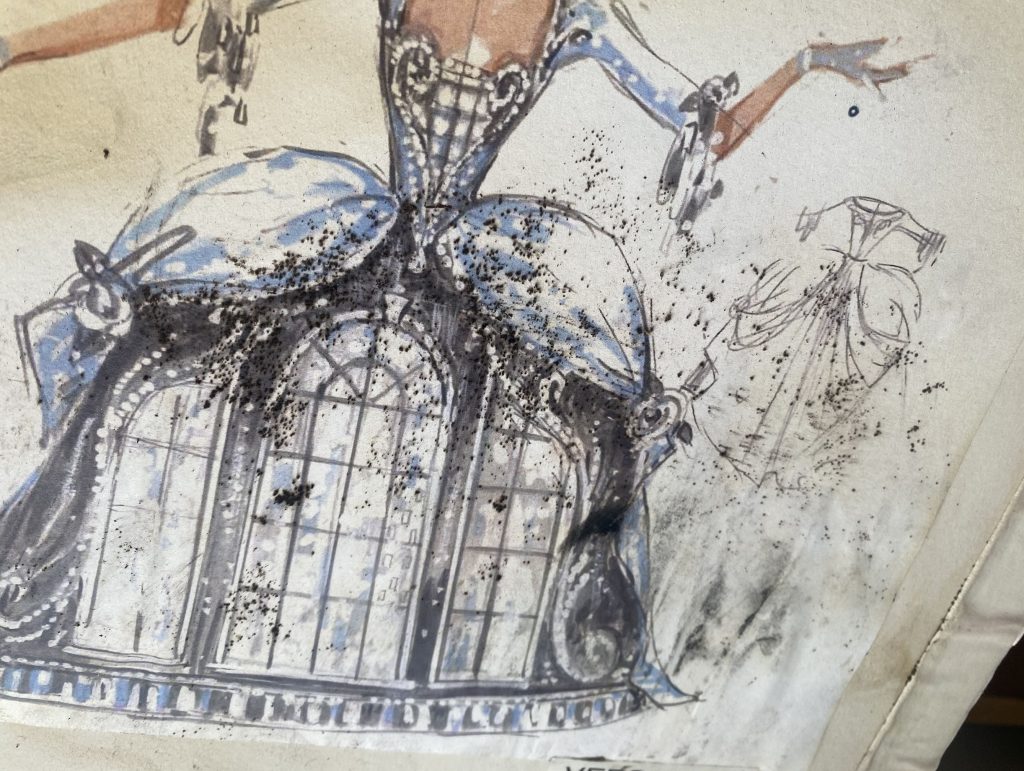
Example 1
It’s mold!! This image displays very active, thick black mold in the bottom corners of these images. It has a powdery/fuzzy look to it and is bunched up in patches. If you were to swipe a gloved finger over it—I AM NOT CONDONING TOUCHING MOLD—the mold would smear. This will occur with active cases of mold.
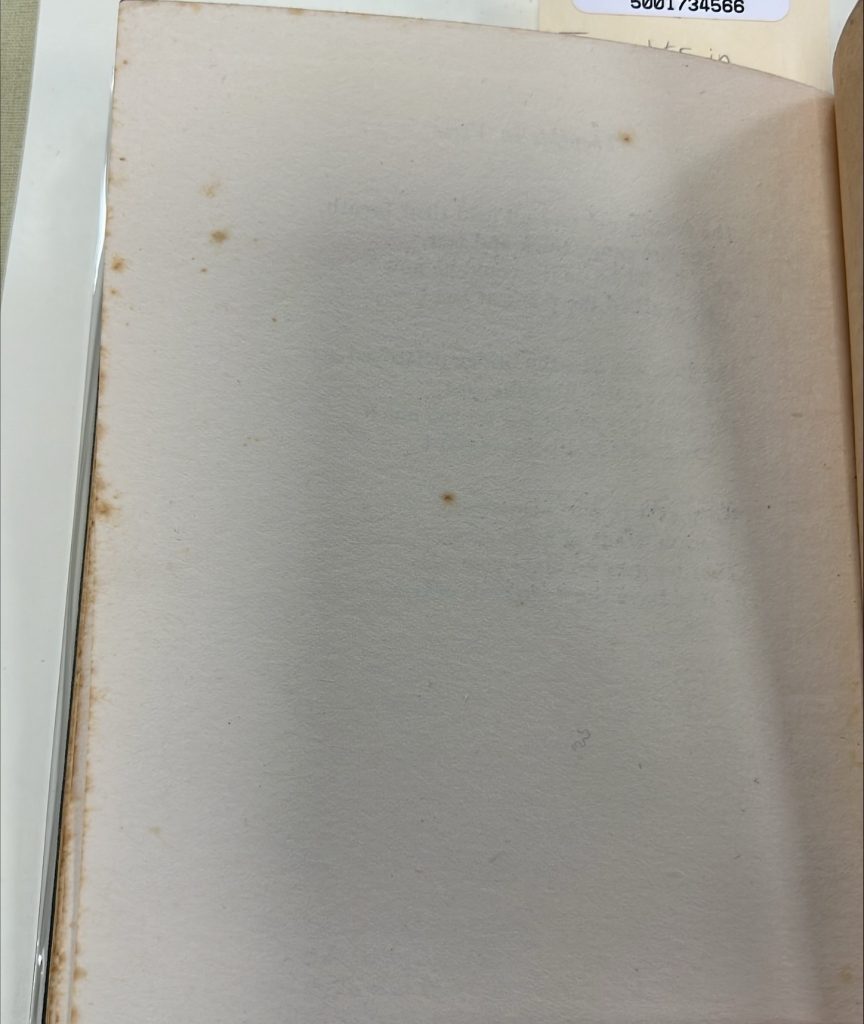
Example 2
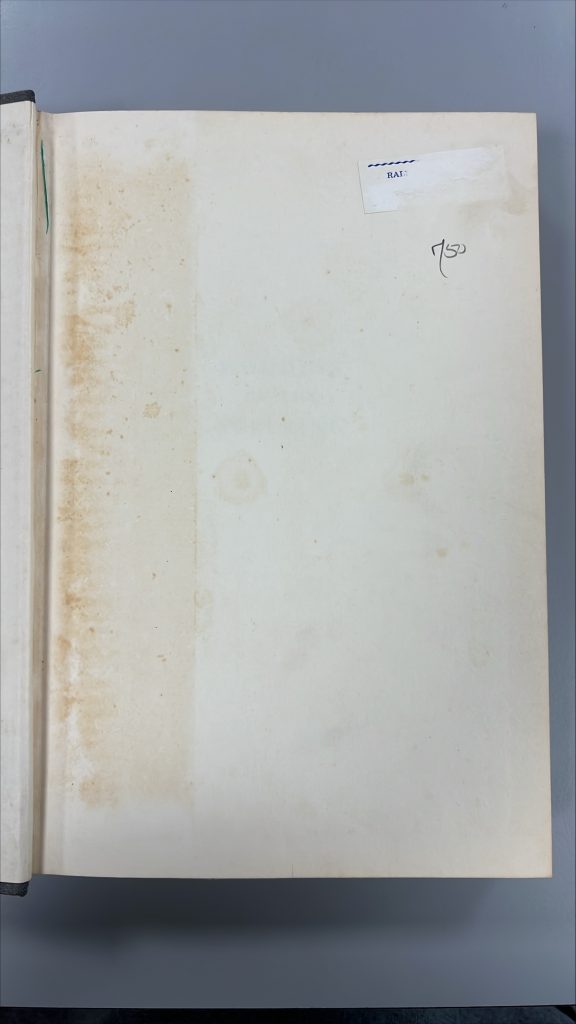
It’s foxing!! This page in this book does display some round brown spots across the page, but they are not clustered in certain areas and there is nothing raised on the surface of the page.
Example 3
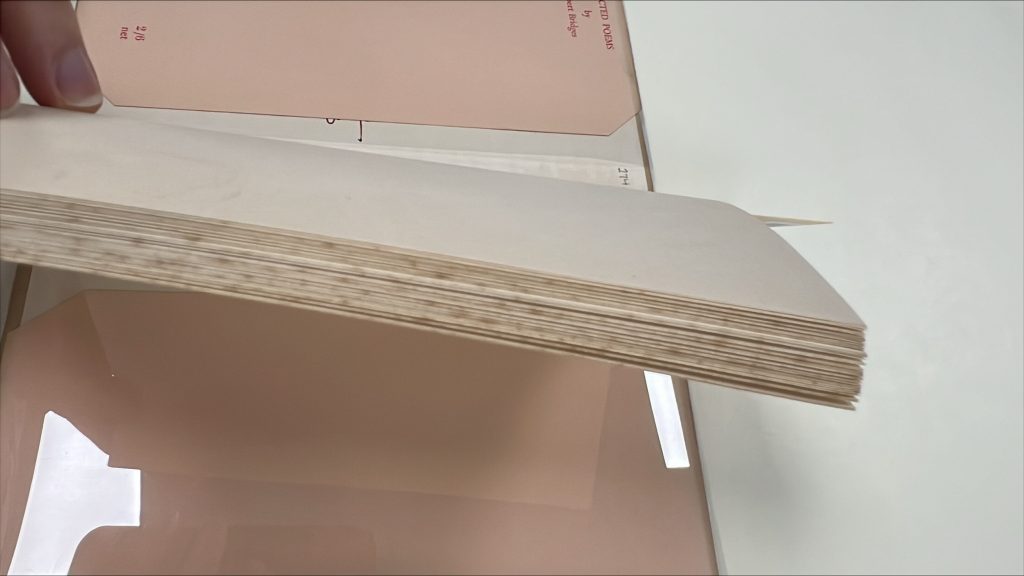
It’s foxing!! The edge of these pages may look suspicious, but they more spread out not raised.
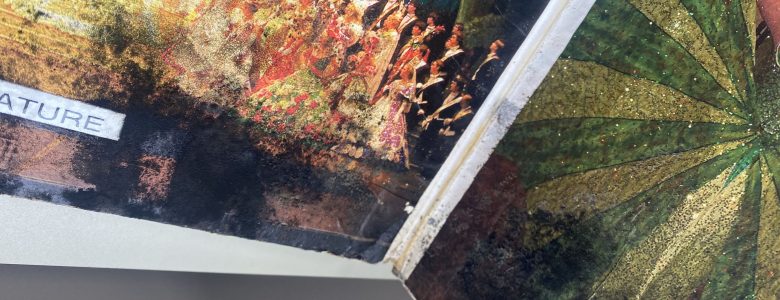
Example 4
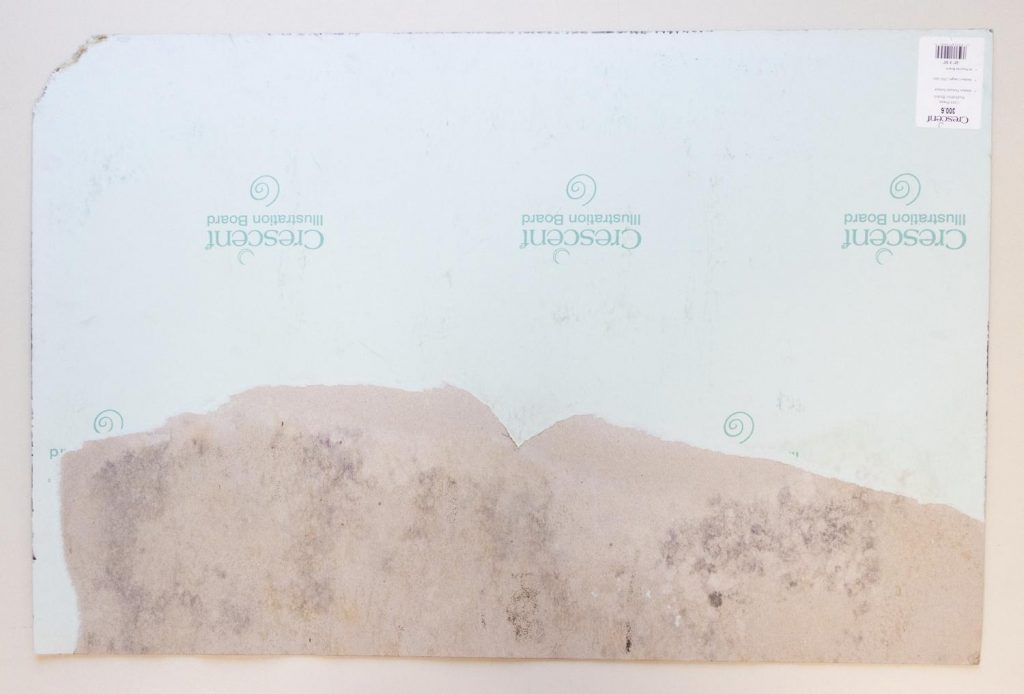
It’s mold!! This mold is not nearly as active as the one depicted in the first image, but this is still mold. It is clustered and powdery and has discolored the backing.
Example 5
It’s foxing (and some staining/discoloration)!! This page in this book displays round brown spots across the page. These ones are a little more confined to a certain area, but not in the same way as the mold examples. The large discolored area is from acid migration from the book jacket wrapped around the book.
The characteristics described in this post are things we commonly see when we come across mold, but there are times that we’re not sure if something is mold. If you are unsure something is mold, ask for help or play it safe and treat it as if it is mold. Better safe than sorry!