This is the last post in the mini-series on accessibility and Microsoft Word. In this post Conversion to HTML and PDF are discussed. Also how to understand and use the Accessibility Checker in Word. Lastly, there are some additional resources at the end for use.

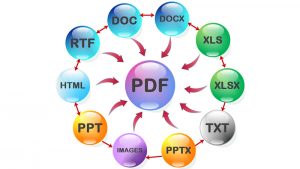
The programs that can be converted to PDF and which can be converted to each other.
How to Do Conversions to Other Formats:
Converting to HTML
Converting to HTML is possible, however the implementation is not considered standards compliant, and therefore is not recommended.
You can copy the material into a web editor, such as Dreamweaver.
Most of the time if you need to save to HTML document structure and alternative text can be preserved, assuming it has been added correctly. Microsoft recommends saving as Web Page, Filtered.
NOTE: this keeps only content, style, and some other information. In all likelihood you will loose any other material. The reason this is recommended is because it makes a manageable file size without a lot of extra code.
You can also use Single File Web Page, or Web Page.
Single File Web Page will document properties and more of the program and code information, but the file will be much larger.
Web Page saves pictures in a separate folder, but makes a document that looks very close to the original, this can also take up considerable space depending on length of document, number and quality of graphics, etc.
Converting to PDF
Converting Word documents to PDF has become increasingly easier over the years if you have Adobe XI or higher it could just be a matter of a few clicks.
Having the Adobe Add-in (aka PDFMaker) is the simplest solution. It will create high-quality tagged PDFs from the Word document. There are 2 ways to accomplish this:
File > Save as Adobe PDF
or
There will be an Acrobat ribbon if you have the add-on installed.
Acrobat ribbon > Create PDF
If tags do don’t show up on your PDF check the Preferences (accessible in the ribbon), and make sure that Enable Accessibility and Reflow with Tagged Adobe PDF is selected.
Understanding and Using Accessibility Checker:


Accessibility checker is familiar to the readers of this blog series, Adobe Acrobat has an accessibility checker too.
The accessibility checker is easy. To run it;
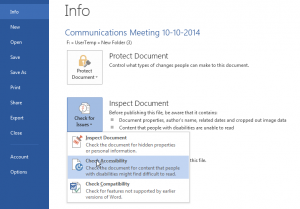
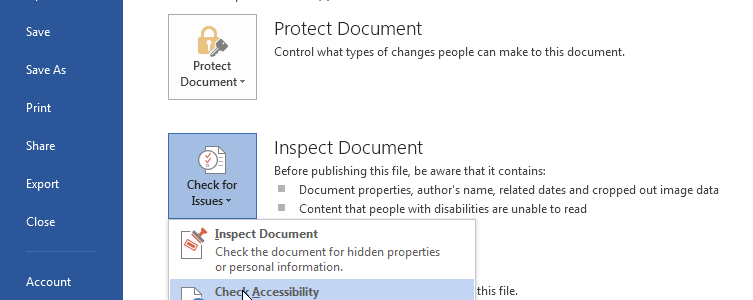
File > Check for Issues (by Inspect Document) > Check Accessibility
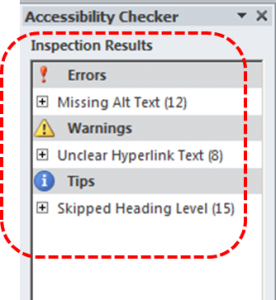
The checker has three classifications:
- Errors: these are things that need to be fixed or it could be impossible for those with accessibility needs to access it fully or properly.
- Warnings: these are things that make it difficult but not usually impossible for those who use assistive devices and in document markers to navigate.
- Tips: these can be ignored, they do not impact accessibility. However, it might provide a better organizational or presentation plan. They are good to consider.
If you need additional information click in the section and look for Why Fix, which explains the impact of this issue on accessibility, and How to Fix, which can give you repair suggestions for the issue.
Additional Resources:
Accessibility Check list for Word 2016, is a helpful checklist provided by Microsoft that addresses many of these issues. Microsoft also has 7 short video on Check document accessibility videos, and the provide a downloadable Accessible Template Sampler, Office Accessibility Center- Resources for People with Disabilities, is a further resource of Microsoft that provides training and tips. It is geared toward those with disabilities, however, it is also something for those who work with the disabled need to know and take into account.
This concludes the mini-series on Microsoft Word accessibility, I hope you found it useful.


Leave a Reply