Hey! My name is Patrick Friedman, and I am a Makerspace Specialist at UNT’s The Spark. I am a Junior Computer Science major at the University. Stemming from a young age, I knew that I always wanted to be an engineer. I enjoyed learning about computers and software. I had to learn to problem solve early on as my family constantly installed viruses and malware on the family desktop.
I have always liked creating and building. In school, I looked forward to working with computers and electronics. I have been in a woodshop and metal shop since they piqued my interest. I learned how to weld and use power tools, while others were learning Speech or AP English.
The Spark is a great space to learn and bring our creativity to light. Recently, I have gotten into 3D modeling and rendering, and I have used blender primarily as it is a free, yet powerful software. Many game developers and professionals use it to animate and even create full movies.
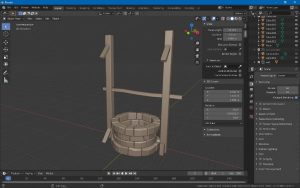
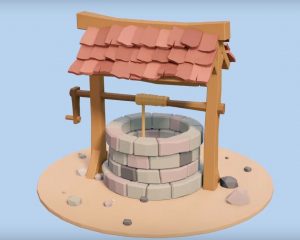
Included are some renders of projects I have done. Above is an early and final picture of a low poly well. Low poly is a polygon mesh in 3D computer graphics that has a relatively small number of polygons. Low poly meshes occur in real-time applications like video games. The number of polygons in a mesh is an important factor to optimize performance but can give an undesirable appearance to the resulting graphics. Below is a more high-quality render I have made. It is a lightsaber I created in the same software.

The Spark is available for every UNT student who wants to create or just learn a new skill. I am excited to keep working and gain important skills in engineering so that I can use it in the future both professionally and personally.
Written By: P. Friedman
 We also want to shorten and optimize our code. From the beginning, I emphasized that functions were the best way to code. It is much faster to debug specific areas in our code. We can also simplify things by utilizing object-oriented programming. We can have a functions file and the main driver on another main file. This will make our code easier to test, read, and optimize. Since we have a better understanding of our code and the project, many functions can be simplified. It is good practice to take breaks and step away during this step. It is easy to later question why you made some functions more complicated than they should be.
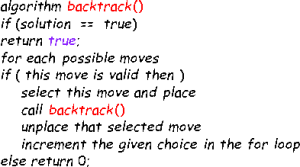
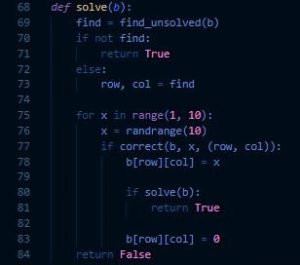
 Now that our code is clean and debugged, we can add a Graphical User Interface. We are using a library called PyGame, widely used in Python for small games and early game development. A library adds lots of predefined functions that we can utilize. First, we will draw our board using simple statements in PyGame. Since we have already determined what the user can do, we have a roadmap. We will use the same functions, but modify them for our board. We must create a sketch, draw, select, place, clear, and an update function. We can also create a nice GUI update to show our backtracking algorithm. PyGame has useful draw and event functions for keyboard presses and formatting. The two screenshots are of my previous code and the updated GUI code with PyGame.
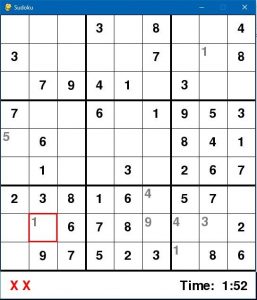 The left screenshot is my outcome. I allowed the user to play and have the solving algorithm run if they choose. I created an executable and setup wizard as well so others can download and install the game using a simple plugin installed similar to PyGame called Cx_Freeze. With this, I can change the logo of the executable, create a setup wizard, and so much more. I hope you enjoyed coding this project with me and implemented new functionalities to your liking.