Written By: S. Sparkman Spark Maker UNT Junior Media Arts
One of the tools available at The Spark is the MakerBot Digitizer. This device allows a user to take an everyday item that will fit on the scanner turntable and capture its likeness in 3D. How this scanner work is using lasers to project lines on the object, then a camera with a filter captures how the laser light deforms to the model. Slowly the model rotates on the turntable, and the camera captures every new line segment. In software, the different lines are stitched together, and your 3D model is complete.
Although 3D scanning may seem very new and high-tech, the idea and the technology has been in development for quite a while. 3D scanning started in the 60s thanks to new computing technologies. This type of scanning was very much in its infancy and took long hours for a not that great result. Later decades in the 80s and 90s when computers were developing faster. The push for a 3D scanner by the manufacturing and animation industry was at its highest. New techniques like line scanning used in the MakerBot Digitizer gave the scanners a better resolution. Faster computing and more memory space allowed software to capture more data and better details. Today, some of the best 3D scanners can capture the smallest detail up to thousands of an inch, all in full color.
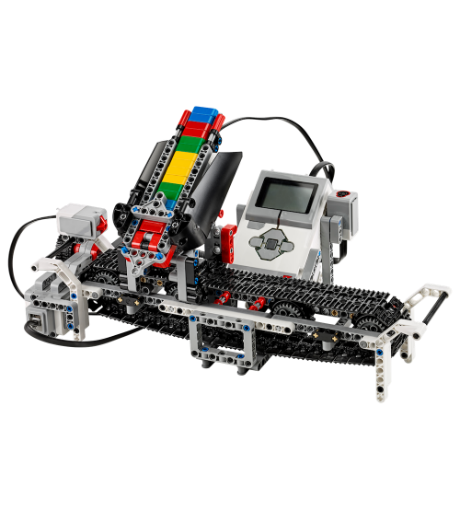
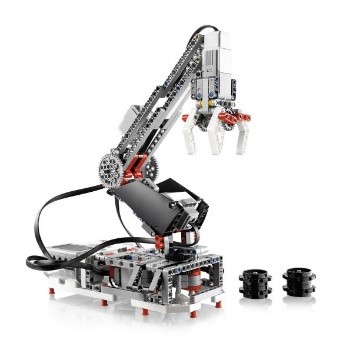
The Spark has a large array of robotics for all ages. Today, I’m going to touch on our Lego Mindstorms Kits. The recommendation age range is 10+ but it can be a good introduction to people who may not know as much in construction or coding.
The construction part is straight forward since it is Lego and their instructions are kid-friendly, but you do have to pay close attention to the picture on how they change. On the coding side, it is block code like Scratch and there are tutorials online through UNT LinkedIn Learning if you want to do self-learning.
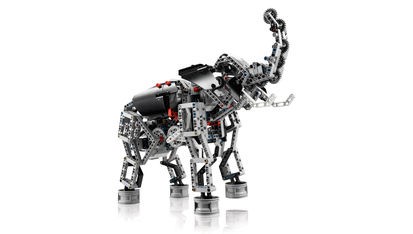
Other than that, you could set up a consultation with the Spark and we would be more than happy to help you. There are several building options with the kit. Some can be more for recreational use such as the Elephant, but it can also have a more functional use like building a color sorting robot or a robot arm. With all the built-in examples from the Lego Mindstorms software, they do include the code for the robots, but that does not limit you on editing the code to make it your own.
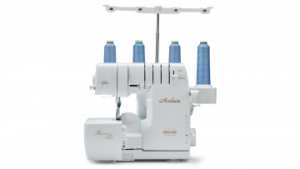
Tryston here! Today I’m going to explain what a serger is and help take the fear out of sewing with one! I’ll also be answering some common questions!
What is a Serger?
A serger is a sewing machine that binds fabric together with an overlock stitch. It uses 3-4 stitches to create the overlock stitch. This is the finishing stitch you see on many of your shirts and garments that you have around the house right now.
What does a serger do?
A serger trims the seam and encloses the seam allowance or edge of the fabric, inside a thread casing, all in one step. The width and density of the stitching are two of the many variables available on a serger. The options are not the same on all sergers. As with almost anything you purchase, the more you spend, the more options you will have. But mostly all basic sergers around the 200-300 range work perfectly for home use.
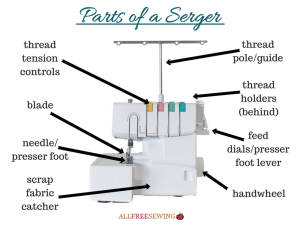
Part of a serger
The dials you see on top of the machine are the tension settings for your thread. From left to right, they are:
left needle
right needle
upper looper
lower looper
**Please note that most sergers do look the same so even if you have a different type than this the chances are they will still be very similar to this.
Left of the machine.
Adjust the stitch width and length
Turn the knife on or off
The stitch width and length/ There are times when you may want to turn your knife off.
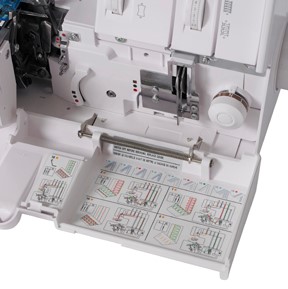
Inside:
The main thing that sets sergers apart from sewing machines is the loopers. These are located inside the machine and under the needle.
The loopers act like knitting needles, in that they overcast over the needle threads.
The loopers are threaded in a special sequence.
Many machines include a threading chart right on the machine, for an easy reminder when threading the serger.
Written By: T. Bruner
-Stay tune to the next post: How to thread a serger-
Written By: E. Lopez Spark Specialist UNT Senior Mechanical and Energy Engineering
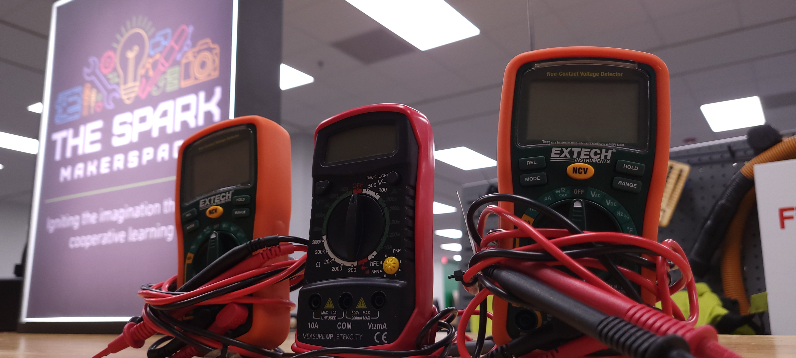
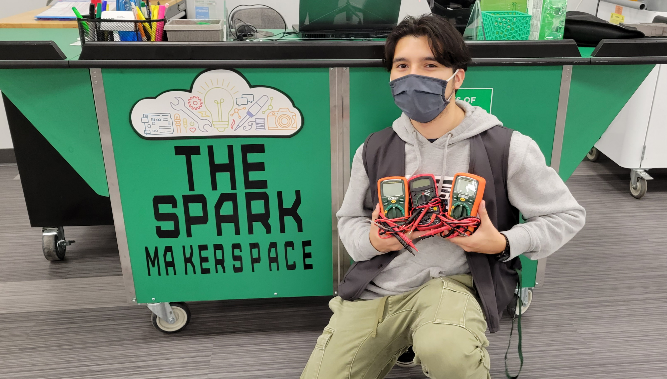
Hey everyone! The Spark Makerspace can provide you with portable Multimeters! With advanced technology, our digital Multimeters are simple and easy to use with high accuracy. Our Multimeters vary in purpose; testing can range from examining simple DC circuits from a flashlight to a more complex system from an electrical junk box. Some functions include testing for AC/DC Voltage, temperature, and frequency. An included User Guide will give you more detailed instructions on how to use each function and what all the values mean. Using a multimeter is highly recommended when dealing with electrical projects since it can act as a troubleshooting tool assuring your circuits are working properly. So if you have an electrical project coming up soon, make sure to stop by and check out one of our Multimeters here at The Spark Makerspace!
Written by: D. Da Costa Spark Specialist UNT Senior Mechanical and Energy Engineering
Hello there! If you are interested in weaving and weaving accessories, you are in the right place. Whether you are interested in large-scale weaving, or something smaller, here you can find information that will help you understand the weaving process with Mirrix Looms.
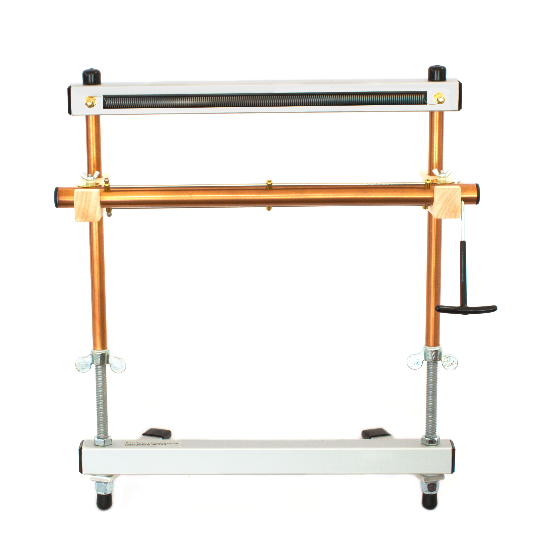
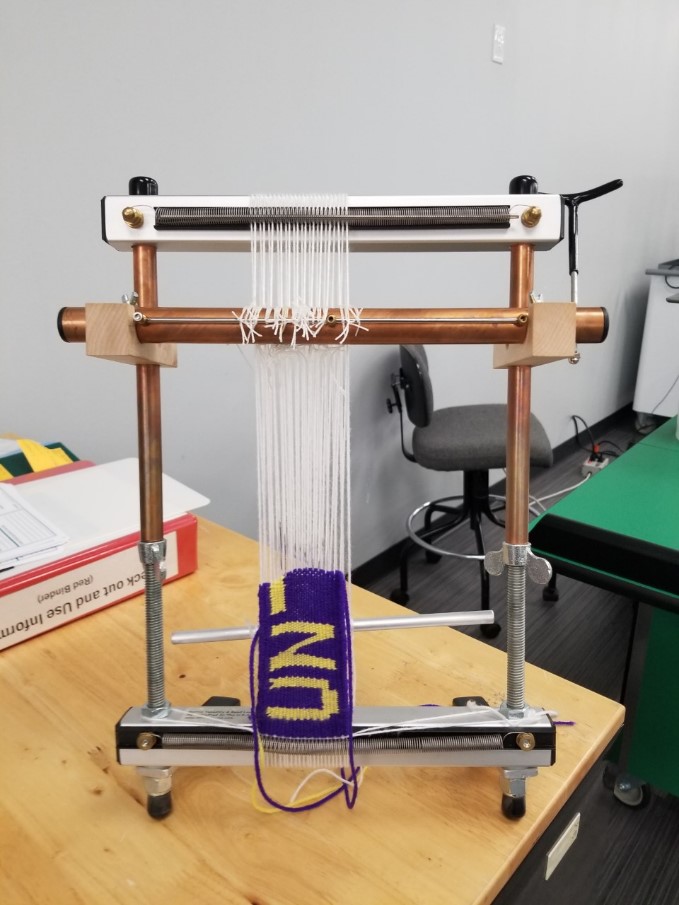
Mirrix Loom with Sheading Device
At the UNT Spark, we have 2 Mirrix weaving looms available for students to check out. Here we have our 16-inch big sister loom and 12-inch little guy loom, which are perfect for a wide variety of projects. Seen in the image below is our 16-inch loom, which is better for larger projects, and our 12-inch loom, more suitable for smaller projects.
16” Big Sister Loom Located at The Spark
12” Little Guy Loom Located at The Spark
Before diving into the process of weaving, it is important to know all the pieces included in the weaving loom and their purpose.
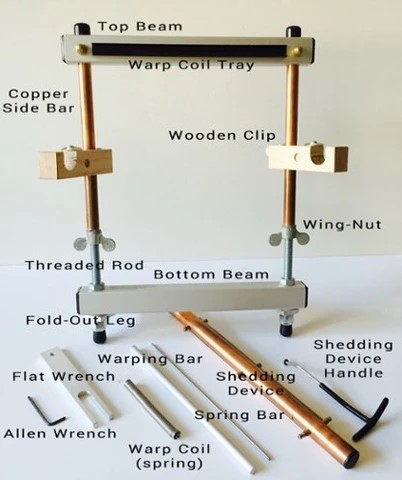
Labeled Parts in Mirrix Kit for Reference
First, we have the main body of the loom, which includes the top beam, warp coil tray, copper sidebars, wooden clips, threaded rods, wing-nuts, bottom beam, and fold-out legs. It is important to note that this set-up will be the same for the two sizes of looms provided by the Spark, and this is the main piece of equipment needed for weaving.
The next important piece of this assembly is the shedding device. Although it is optional to use during the weaving process, it is a great tool for those who are just starting and simplifies weaving. The purpose of this shedding device is to separate top and bottom warp threads for the weft to be woven through. This device will sit in the slots on the wooden clips and be held in place by the small circular discs on the wooden clips. To activate the shedding device, a shedding device handle will be used to move the warping thread forward and backward.
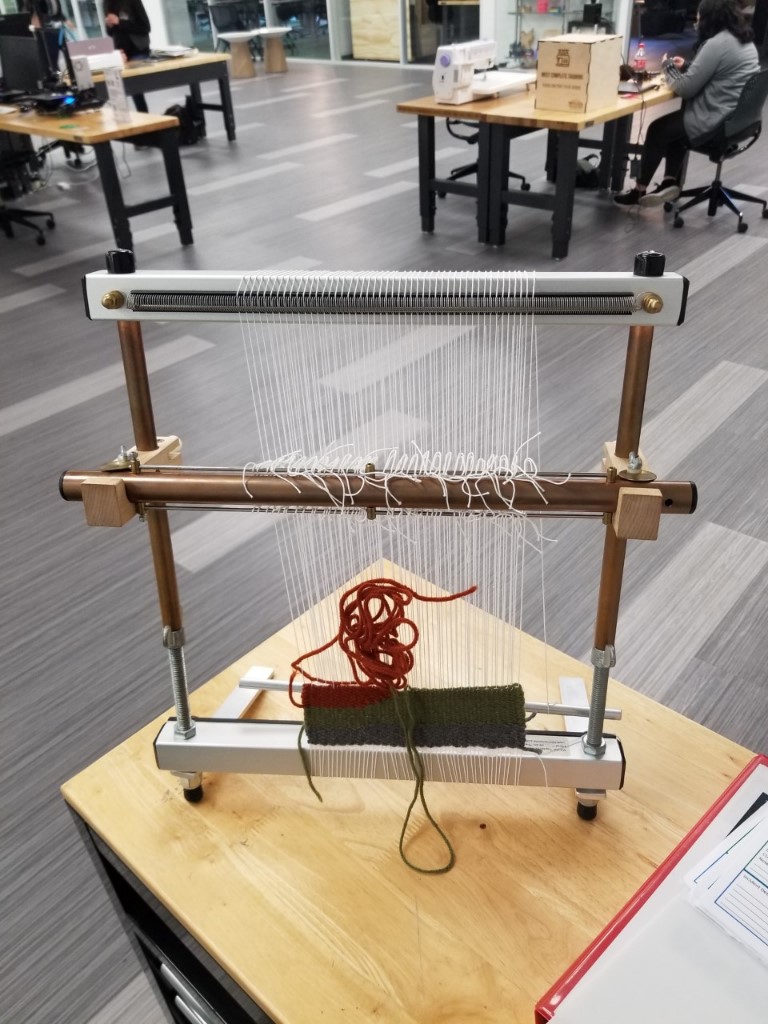
Following this is the warping and spring bar. The warping bar is basically where you will loop your warping threads to complete your warp. Not only will the warp loop around the bar, but also the main body. Additionally, the springs located at the top and bottom of the main body will be used for separating the warping threads an equal distance apart, and a spring bar will be used to hold the thread down while in the spring.
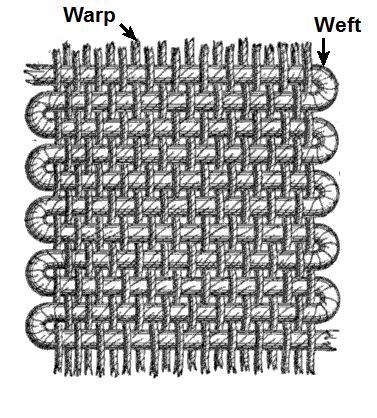
Warp and Weft are the thread/yarn being turned into fabric through the weaving process. Warp is usually longitudinally placed in tension on the main body of the loom and remains stationary throughout weaving. Weft is the thread being woven in a transverse direction over and under the warp threads. These are the main components that transform the thread into fabric.
Visual of Warp and Weft Threads
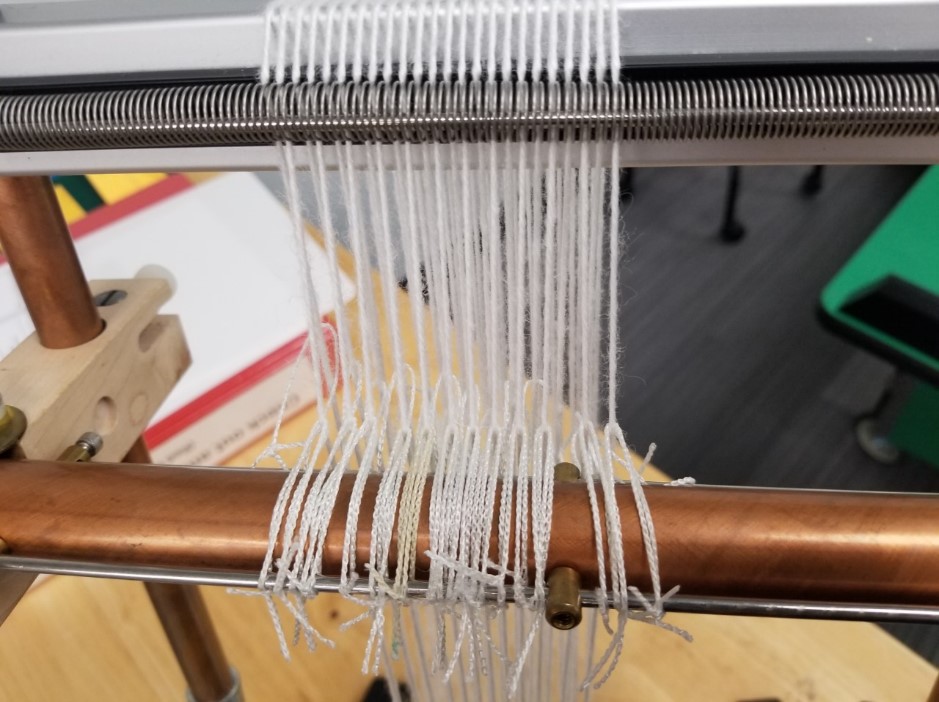
Finally, the last piece of equipment utilized in this kit is heddles. Heddles are attached to each warp thread on the loom and connect the warp to the shedding device. Heddles are the tool used to bring the warp thread pattern in and out, making them a key piece of equipment when using the shedding device. The great thing about heddles is that they are easy to make out of thread or cord, so if you run out you can always make more.
Heddles on Shedding Bar
It is best to familiarize yourself with all the equipment provided in the Mirrix kits for a successful looming experience. Learning about the loom base, shedding bar, heddles, warps, and wefts is a great place to start before weaving.
If you have any questions or want to get started weaving, head over to The Spark located in room 135 at Willis Library and talk to one of our specialists or email us at thespark@unt.edu. Thank you!
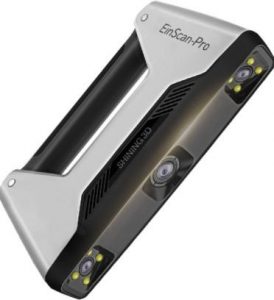
The EinScan Pro is a portable 3D scanner that can serve a variety of purposes. It is compact and can be used handheld or mounted with the industrial pack that includes a turntable and a tripod mount.
It also supports a full-color scan by attaching the Color Pack that allows you to scan an object with the colors and materials included in the digital scan. The EinScan Pro can be used for creativity, reverse engineering, manufacturing, healthcare, and the list goes on.
Ever wanted to feel like a mad-programming genius? Arduino gives you the opportunity by simulating and creating an interactive environment for individuals of all skill levels.
History
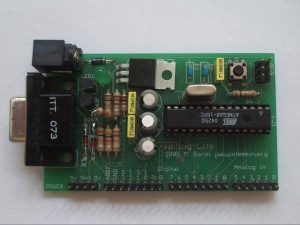
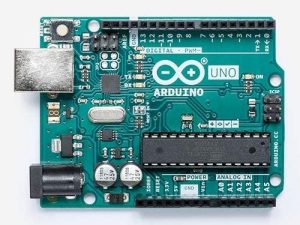
Arduino came into play in 2003 at the Interactive Design Institute Ivrea, Italy. The project was meant to provide a low-cost interactive way to simulate large scale projects. Wiring was the first board that was drafted consisting of a printed circuit board (PCB) and an ATmega168 microcontroller with some basic library functions. Now a 32-bit board, an ATmega328P, 14 Digital I/O pins with a 5V operating voltage.
First Arduino prototype named “Wiring Lite” 2003
Current Arduino Uno since 2016
Interaction
Some simple projects can include LED lights and resistors. Making an LED light blink is one of the simplest projects one can do. Other projects can be creating a system where a house plant can “sing” when touched, door alarms, pet feeders, and robots! As long as creativity exists, projects will flourish.
Blinking LED sketch
Arduino soon became a hobby for many people of all skill levels not necessarily just engineers. Fun fact about the name Arduino, the 5 founders consistently met up at a bar in Ivrea, Italy called “Bar di Re Arduino” so to honor the place of origin, Arduino became the namesake.
Come by the Spark and check out one of our Arduino starter kits and see where your creativity takes you.
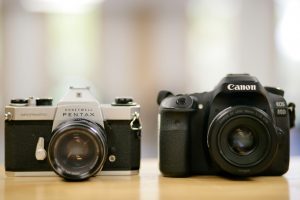
Lens selection is one of the most impactful aspects of an image, determining the compositional and visual characteristics for which the camera captures a scene. A photographer can use a wide variety of different lens selections to get the look they want to achieve.
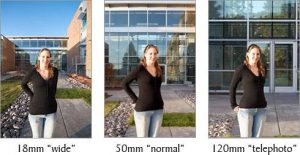
The first main category of lenses is the focal length, which affects the breadth and angle of the scene being captured. The focal length is measured in millimeters and is defined as the distance from the optical center of the lens and camera sensor. A longer focal length will lead to a narrower field of view, and vice versa. Knowing exactly how this works is not important to take photos, but it is helpful to pay attention to the perspective a particular focal length will capture. A wide-angle lens, most often identified by a focal length of 35mm and below, captures a large portion of the scene in front of the camera. Normal focal lengths, between 35mm and 50mm, will capture a scene almost exactly as the human eye. Beyond that would be the telephoto category, including 85mm and up. Telephoto lenses are often used to capture a subject that is far away or unreachable, for example, birds or other wildlife. This is because of their narrower field of view, zooming into the scene and magnifying a small section compared to what humans see. Check out this example of three different focal lengths all shot from the same position:
Keep in mind that wide-angle lenses will distort the final image, making them less ideal for portraiture where the subject’s face is the main focus.
The second category of lenses is zoom versus prime. A prime lens has a single, fixed focal length. Zooms are adjustable with the minimum and maximum focal length indicated on the adjustment ring, for example, 18-55mm or 150-300mm. Both types of lenses will take good pictures, though you may want to choose one or the other depending on the situation. Prime lenses tend to be much lighter and more compact, allowing for more portability. A street photographer or someone on vacation may find it easier to carry around. Zoom lenses have the advantage of many different focal lengths, effectively acting as many prime lenses in one. Zooms are, of course, much larger and heavier.
Choosing the right type of lens is one of the first steps to take when planning a shoot. Keep in mind how the subject and background will interact with your chosen lens. The appearance of the final image will depend on this one decision.
Film and digital cameras work similarly, but with slight advancements for digital such as autofocus and smart auto-exposure settings. The basic concepts for exposure are exactly the same (swapping film for a digital sensor). If you can operate a digital camera in manual mode, there’s a good chance you would do well on film without much extra practice. Finding a working film camera can be difficult, but if you research and make careful observations, there are tons of working, used cameras out there. Film is still for sale on many online retailers, and you can send it to a lab for processing in as little as a week.
Now is the best time to shoot film, as everything is much cheaper than it ever was. Professional-grade equipment can be purchased for pennies of what it used to cost. Digital photography is instantaneous, yet this advantage might also work against new photographers. When every shot costs up to $2, the photographer values each photo more than if it were on digital, because there is not an unlimited amount of storage. There might be a maximum of 32 shots on a roll of film, or as little as 24. This leads to each image becoming more thoughtful and planned, rather than a single shot picked out of hundreds. Film cameras make a photographer think about what they are looking at, how the subject looks in relation to the background, and the overall composition. In other words, film makes beginners better at photography.
A few notes on using film cameras:
Film cameras rely on a working light meter, so it is important to test yours to make sure it works. Working without a light meter is a complete guess, but you can use the rules of Sunny 16 (https://en.wikipedia.org/wiki/Sunny_16_rule) to get a somewhat accurate exposure. This is also a great way to know if your light meter is accurate, it should follow the rule as well. Film cameras also rely on film, which is highly sensitive to light. Even opening it slightly in bright light is enough to ruin it, so make sure to take care when inserting and removing film from the camera. Many old cameras made during or after the ’80s rely on small batteries, so make sure to replace those before taking photos.
Starting with film can be daunting, but as soon as you get to know the placement of the buttons, dials, and switches, one can use a film camera just as naturally as a DSLR. If you want to up your photography game and keep film alive and well, go pick up a cheap film SLR and try it out.
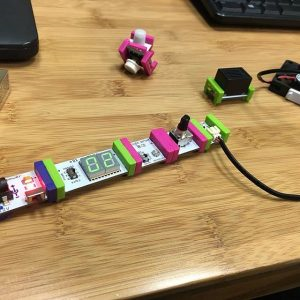
Little Bits are kind of like legos, but for circuits. They were designed with the beginner circuit builder in mind. They are a platform of easy-to-use electronic building blocks that empower you to invent anything, from your own remote controlled car, to a smart home device. The Bits snap together with magnets, no soldering, no wiring, no programming needed. Each little Bit has one unique function such as lights, sounds, sensors, buttons, and with different combinations you can make circuits large or small. Little Bits allow you to create interactive projects without any background in engineering, programming or wiring, in just a few seconds. It’s as easy as snapping LEGO bricks together. And the best part is, its available for check out for The Spark Makerspace collection!

 The EinScan Pro is a portable 3D scanner that can serve a variety of purposes. It is compact and can be used handheld or mounted with the industrial pack that includes a turntable and a tripod mount.
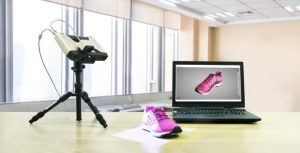 It also supports a full-color scan by attaching the Color Pack that allows you to scan an object with the colors and materials included in the digital scan. The EinScan Pro can be used for creativity, reverse engineering, manufacturing, healthcare, and the list goes on.