

Written by: D. Da Costa Spark Specialist UNT Senior Mechanical and Energy Engineering
Hello there! If you are interested in weaving and weaving accessories, you are in the right place. Whether you are interested in large-scale weaving, or something smaller, here you can find information that will help you understand the weaving process with Mirrix Looms.
Mirrix Loom with Sheading Device
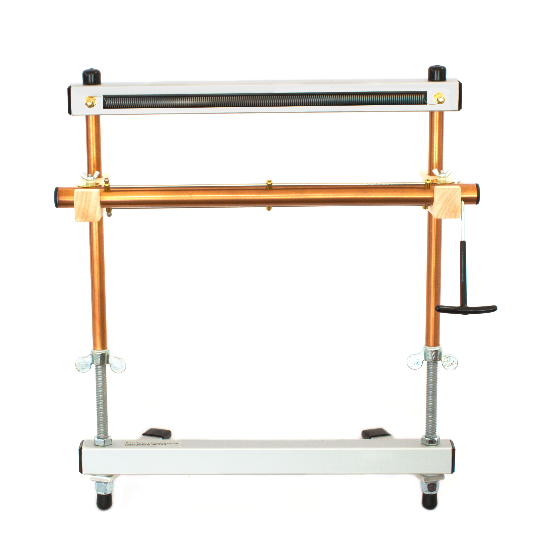
At the UNT Spark, we have 2 Mirrix weaving looms available for students to check out. Here we have our 16-inch big sister loom and 12-inch little guy loom, which are perfect for a wide variety of projects. Seen in the image below is our 16-inch loom, which is better for larger projects, and our 12-inch loom, more suitable for smaller projects.
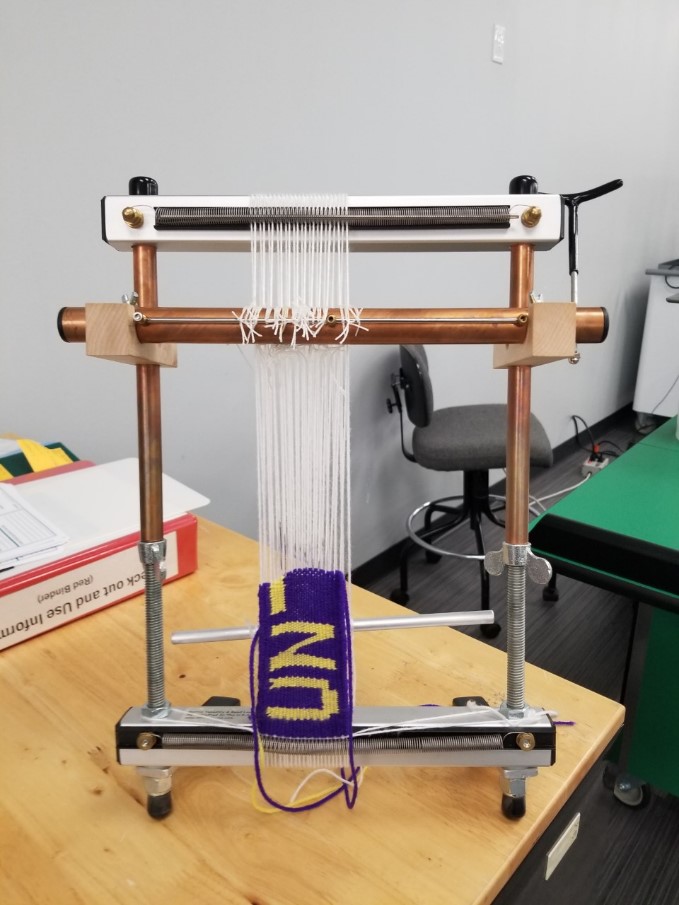
16” Big Sister Loom Located at The Spark
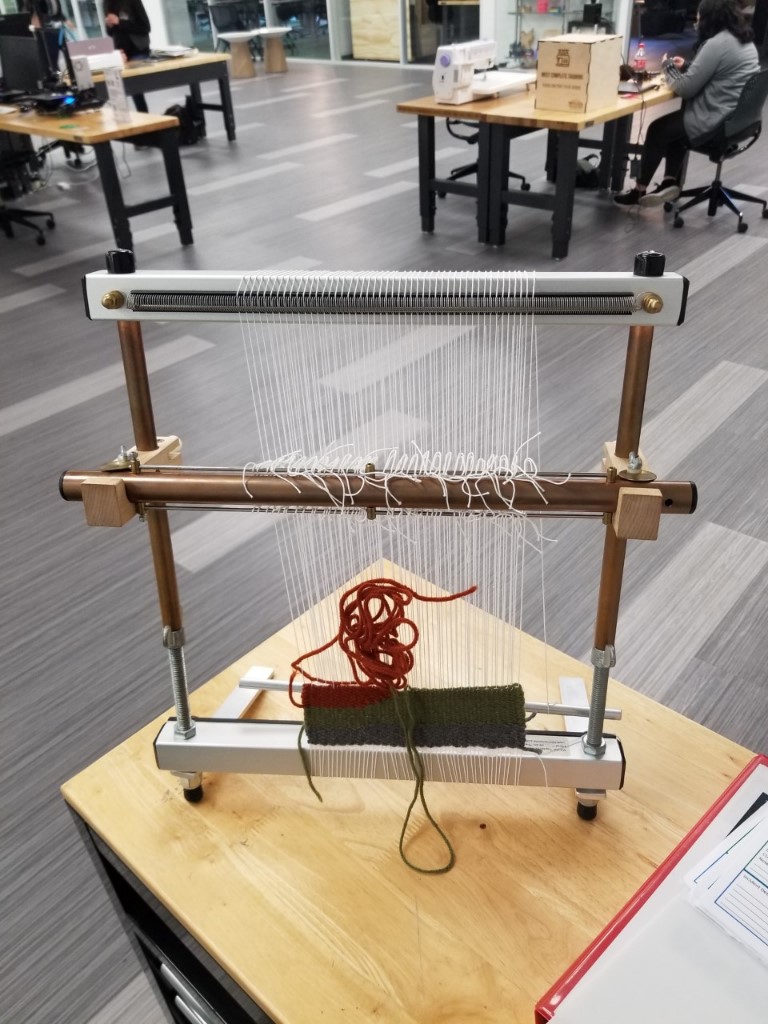
12” Little Guy Loom Located at The Spark
Before diving into the process of weaving, it is important to know all the pieces included in the weaving loom and their purpose.
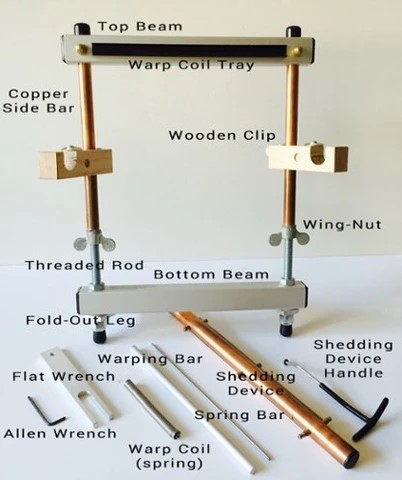
Labeled Parts in Mirrix Kit for Reference
First, we have the main body of the loom, which includes the top beam, warp coil tray, copper sidebars, wooden clips, threaded rods, wing-nuts, bottom beam, and fold-out legs. It is important to note that this set-up will be the same for the two sizes of looms provided by the Spark, and this is the main piece of equipment needed for weaving.
The next important piece of this assembly is the shedding device. Although it is optional to use during the weaving process, it is a great tool for those who are just starting and simplifies weaving. The purpose of this shedding device is to separate top and bottom warp threads for the weft to be woven through. This device will sit in the slots on the wooden clips and be held in place by the small circular discs on the wooden clips. To activate the shedding device, a shedding device handle will be used to move the warping thread forward and backward.
Following this is the warping and spring bar. The warping bar is basically where you will loop your warping threads to complete your warp. Not only will the warp loop around the bar, but also the main body. Additionally, the springs located at the top and bottom of the main body will be used for separating the warping threads an equal distance apart, and a spring bar will be used to hold the thread down while in the spring.
Warp and Weft are the thread/yarn being turned into fabric through the weaving process. Warp is usually longitudinally placed in tension on the main body of the loom and remains stationary throughout weaving. Weft is the thread being woven in a transverse direction over and under the warp threads. These are the main components that transform the thread into fabric.
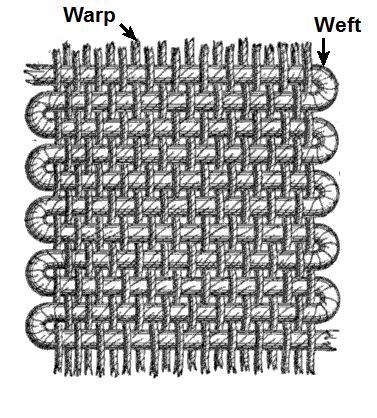
Visual of Warp and Weft Threads
Finally, the last piece of equipment utilized in this kit is heddles. Heddles are attached to each warp thread on the loom and connect the warp to the shedding device. Heddles are the tool used to bring the warp thread pattern in and out, making them a key piece of equipment when using the shedding device. The great thing about heddles is that they are easy to make out of thread or cord, so if you run out you can always make more.
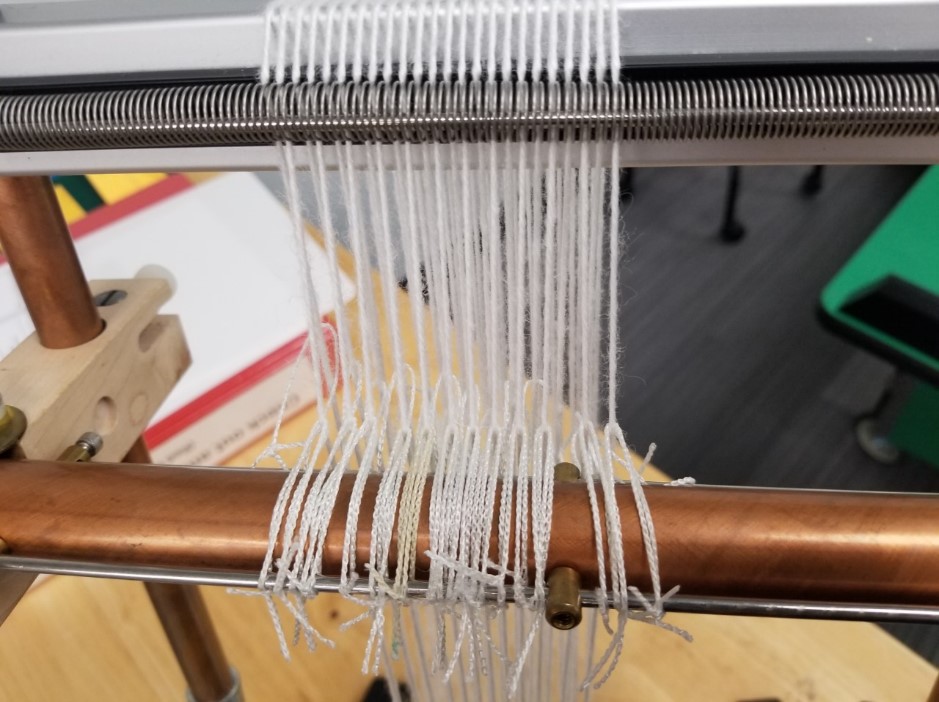
Heddles on Shedding Bar
It is best to familiarize yourself with all the equipment provided in the Mirrix kits for a successful looming experience. Learning about the loom base, shedding bar, heddles, warps, and wefts is a great place to start before weaving.
If you have any questions or want to get started weaving, head over to The Spark located in room 135 at Willis Library and talk to one of our specialists or email us at thespark@unt.edu. Thank you!