
What are supports?
Supports are extra plastic material printed on or around the object you are printing to help make it print and look better.
Example:
When do you need supports?
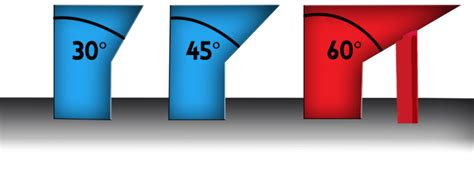
It is best to use supports when printing an object that has overhangs greater than 45 degrees. Overhangs are a diagonal part of the print where some of the top layer is printed on top of the bottom, and the rest goes past the previous layer with nothing underneath. The steeper the overhang means more material will be printed with nothing under it, causing it to droop, and create a poor surface of the part. Supports give the part something to for the object to print on when it moves past the previous layer. This holds up the parts to reduce the drooping effect as much as possible and allow the object to retain its intended shape.
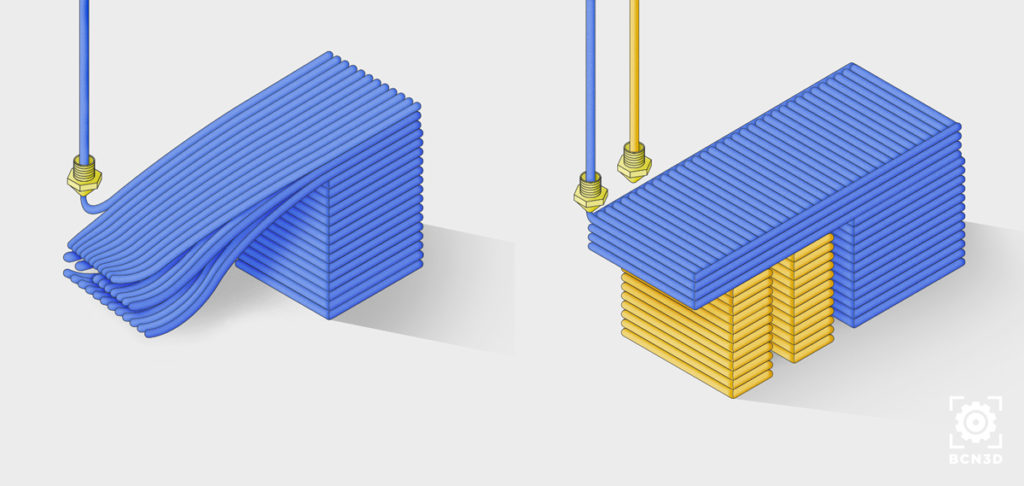
Overhang example:
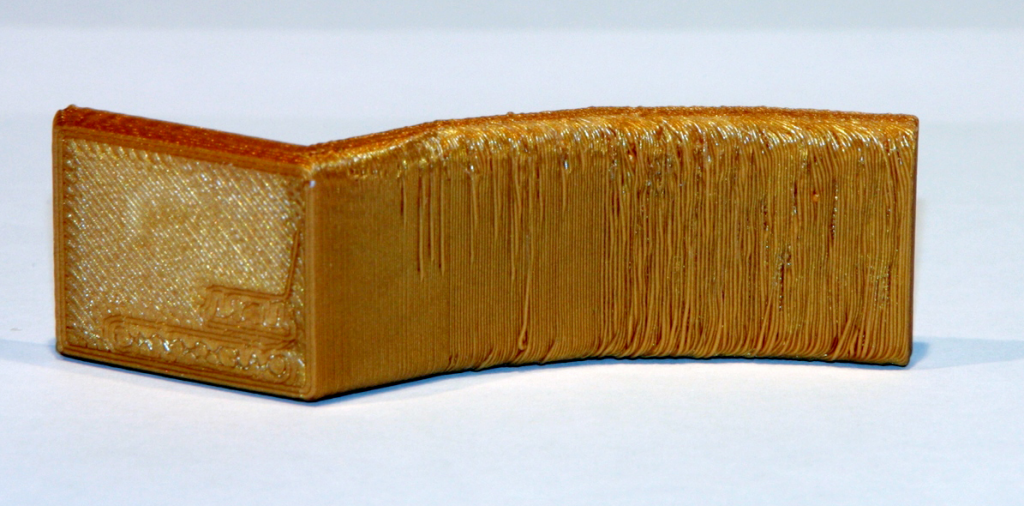
Drooping effect:
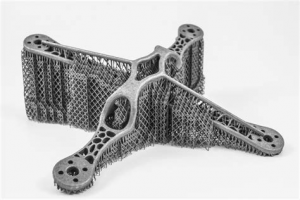
Object with overhang (without and with support):
How to reduce supports?
Supports are useful, but they increase the time it takes to print an object and increases the amount of material you must consume per part. Reducing supports can help save you time, material, and money. Here are some ways to reduce supports for your parts:
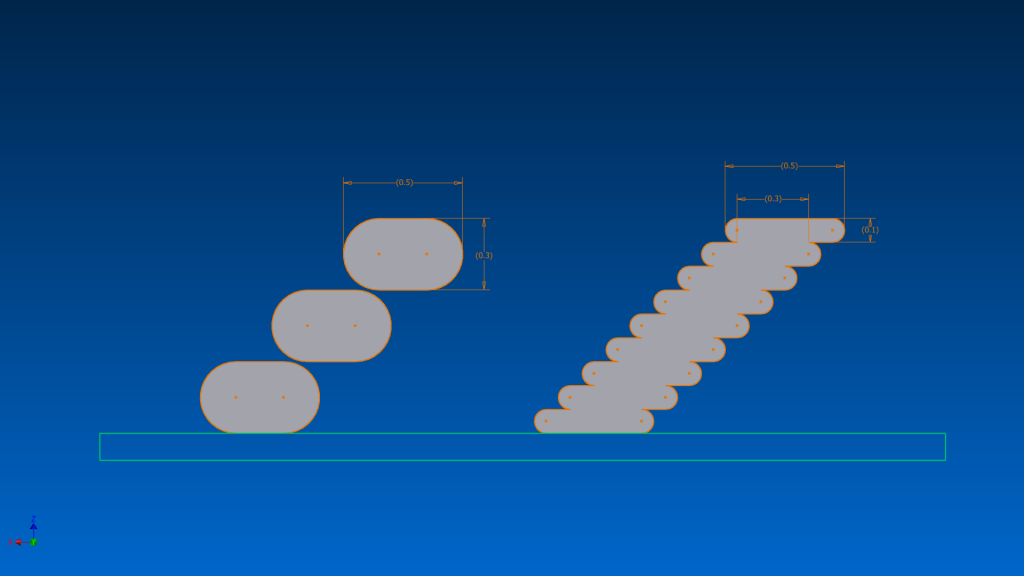
One option is to reduce the layer height you are printing the object with. Layer height is the vertical thickness of each individual layer of the print. When you have a smaller layer height, the layer does not have to extend as far out with each layer when there is an overhang. This makes printing the overhang easier for the printer without support because more of the layer will be printed on the layer before it, improving quality. The downside to this is printing with smaller layer heights takes much longer for the object to print because the nozzle is having to complete many more travel moves.
(Each level represents a single layer on both sides. You can see how far off out each layer must travel on the left. When the layer height is reduced on the right, a much smaller outward distance is traveled by each layer.)
Another option is to alter the object itself to include as little overhangs as possible that exceed 45 degrees. If you were the one who designed the part, that makes it very easy to go in and edit the original file. If the file is an object you found online, that makes it slightly more difficult to make the alterations you need. Having overhangs over 45 degrees is not a deal breaker, all it means is you will need to do a little more work getting the part to come out how you want it.
One more option is to experiment with the object’s orientation. Orientation is the position in which the object will rest on the print bed. By changing the objects orientation, you are also changing the overhang angles without altering the shape of the object. With certain objects, you may be able to remove all overhangs simply by changing the orientation.
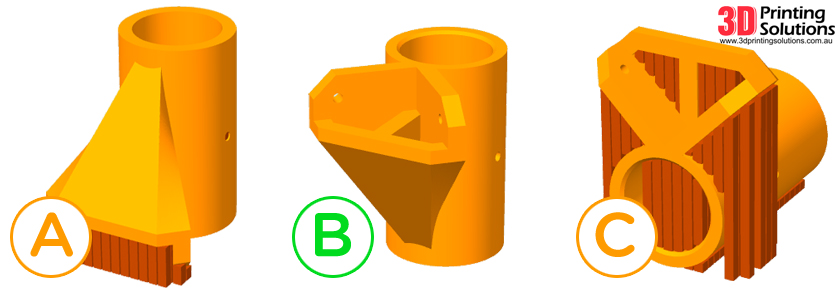
Ex.
the vertical pillars represent support material. For A. there is very little support, but still some at the base. By rotating the object 180 degrees B. can print with no support at all, and no change to the objects shape. C. can still print, but it was rotated in such a way that even more support material is added than necessary, so be careful that you are printing in the best orientation possible.)
What are some problems with supports?
The biggest issue with supports comes with post-processing. Post-processing is the extra work you need to do to the object after it is done printing to make it look like it is supposed to. When printing with support, you need to manually remove it from the print, it does not simply go away when done. If your support settings are not well set, the support can almost seem glued to the object, and you can spend large amounts of time chipping that support material away until it is all off. If your settings are better set, then once you remove the object from your build plate you may be able to hold the object in one hand and pull the support material off in other with one motion. Dialing in you print settings takes time, along with trial and error, but once you can make it work for you it can save you a lot of time overall.
Ex.
Another issue is surface quality. Yes, support helps with drooping to improve surface quality, but it is also sticking to your object. Once that material is removed from the object, wherever the support was touching will leave a scar on the object from being pulled off. A way around this is to finish the surface with sandpaper/other abrasives or paint the object to smooth it out.
Lastly, one problem with supports is environmental. The support material, after being taken off the object, becomes waste and is thrown away. That is extra plastic that you are using that serves no function and goes straight into the trash after printing. That being said, the most common 3D printing filament is PLA, which is a starch-based plastic derived from plants, meaning it is biodegradable. This is not the case for most others however, so keep that in mind when printing with other types of materials.
One more Solution:
Some printers have more than one nozzle, meaning they can print more than one material at a time. There is water-soluble filament (meaning the filament can dissolve in water) that can be used as support material. You can print the object you want with one nozzle and material, while the water-soluble support material is printing through the other nozzle. Once the print is finished, you can take the entire print off the bed, place it in water, and the support material will dissolve away. This greatly reduces the hassle of post-processing and leaves a much better surface finish by eliminating the concern of scaring the surface when pulling the support material off the part. If this is a viable option for anyone with access to a dual head printer, I recommend this as the best way to print complex object and maintain the highest level of surface quality.
Ex.
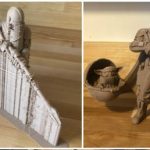
(Right image is the object after support material is dissolved. Left image shows to water-soluble filament still attached to the object)
Written by: K. Mortensen