Film vs Digital Cameras

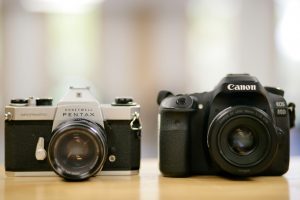
Film and digital cameras work similarly, but with slight advancements for digital such as autofocus and smart auto-exposure settings. The basic concepts for exposure are exactly the same (swapping film for a digital sensor). If you can operate a digital camera in manual mode, there’s a good chance you would do well on film without much extra practice. Finding a working film camera can be difficult, but if you research and make careful observations, there are tons of working, used cameras out there. Film is still for sale on many online retailers, and you can send it to a lab for processing in as little as a week.
Now is the best time to shoot film, as everything is much cheaper than it ever was. Professional-grade equipment can be purchased for pennies of what it used to cost. Digital photography is instantaneous, yet this advantage might also work against new photographers. When every shot costs up to $2, the photographer values each photo more than if it were on digital, because there is not an unlimited amount of storage. There might be a maximum of 32 shots on a roll of film, or as little as 24. This leads to each image becoming more thoughtful and planned, rather than a single shot picked out of hundreds. Film cameras make a photographer think about what they are looking at, how the subject looks in relation to the background, and the overall composition. In other words, film makes beginners better at photography.
A few notes on using film cameras:
Film cameras rely on a working light meter, so it is important to test yours to make sure it works. Working without a light meter is a complete guess, but you can use the rules of Sunny 16 (https://en.wikipedia.org/wiki/Sunny_16_rule) to get a somewhat accurate exposure. This is also a great way to know if your light meter is accurate, it should follow the rule as well. Film cameras also rely on film, which is highly sensitive to light. Even opening it slightly in bright light is enough to ruin it, so make sure to take care when inserting and removing film from the camera. Many old cameras made during or after the ’80s rely on small batteries, so make sure to replace those before taking photos.
Starting with film can be daunting, but as soon as you get to know the placement of the buttons, dials, and switches, one can use a film camera just as naturally as a DSLR. If you want to up your photography game and keep film alive and well, go pick up a cheap film SLR and try it out.

Written by: M. Heins

Down to the Coffee Basics

There are many different ways to prepare and brew coffee, rather than just putting it in the coffee maker and pressing start. Here I will introduce you to some of the different ways coffee can be brewed, and the different types of coffee you can use.

The most common method is the drip method. This is the same type as the coffee maker most people have experienced if you are a coffee drinker. This is one of the easiest and most accessible ways of brewing for most people. This process involves placing the coffee ground into the filter, adding the amount of water you want, and more or less pressing a button to allow the machine to       automatically brew the coffee for you.

After this, a French press is also a common method of brewing. Here, you mix more coarse ground with hot water and let it sit for several minutes. Then, you will press the grounds down to the bottom with a strainer and pour the coffee out. The coffee will taste stronger and smoother through this method than the drip method, this is because no filter is being used in a French press. Coffee beans contain several acids that benefit the digestive system, but most do not pass through the filter when it is being used. The French press eliminates this, allowing the acids to stay in the coffee when you drink it, which creates a noticeably different flavor.

Chemex is an hourglass-shaped glass that holds a filter on the top half, and hot water is poured through to the bottom half. They end up holding about a 32oz. of coffee when filled up. The coffee brews similar to the process of a drip coffee but is poured by hand allowing for a more careful pour to create a better-tasting end product. Chemex coffee is very smooth to drink, and a refreshing enjoyable experience that does not hit you as hard with the caffeine effects as over methods in my experience. If poured properly, and using quality coffee beans, this is one of my favorite methods of drip coffee.

V60 is a funnel-shaped apparatus in a V-shape at a 60-degree angle (hence V60). There are ridges on the inside of the funnel to help ensure an even flow of water throughout the coffee and into the container. The main differences between a V60 Pour Over and a Chemex is grind size, filter paper thickness, amount of coffee made, how long it takes for the coffee to drain and the ultimate taste of the coffee. (Courtesy of https://www.craftcoffeeguru.com)

Along with drip coffee, there is also espresso. Espresso requires its own type of beans to produce the desired flavor and requires an espresso machine to produce. These machines can range from a few hundred dollars for the home, to thousands of dollars for professional coffee shops. A shot of espresso is made by forcing about 1.5 ounces of nearly boiling water through tightly packed, finely ground espresso coffee. This creates a very strong and concentrated coffee. After making the shot of espresso, you can either drink it as is or use it to create a variety of other espresso-based drinks.
(Courtesy of https://recipes.howstuffworks.com/question645.htm)

Written by: K. Mortensen

The Spark Collection: Little Bits

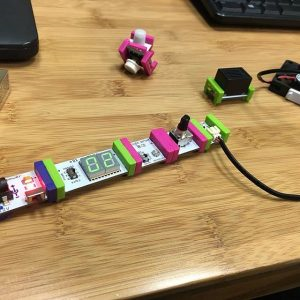
Little Bits are kind of like legos, but for circuits. They were designed with the beginner circuit builder in mind. They are a platform of easy-to-use electronic building blocks that empower you to invent anything, from your own remote controlled car, to a smart home device. The Bits snap together with magnets, no soldering, no wiring, no programming needed. Each little Bit has one unique function such as lights, sounds, sensors, buttons, and with different combinations you can make circuits large or small. Little Bits allow you to create interactive projects without any background in engineering, programming or wiring, in just a few seconds. It’s as easy as snapping LEGO bricks together. And the best part is, its available for check out for The Spark Makerspace collection!

Meet Specialists Arthur

Hi! My name is Arthur Sliter and I’m a knowledge specialist here at the UNT Makerspace. I’m currently a freshman majoring in mechanical engineering and have a passion for all things technical. I especially love 3D printing since it enables me to create crazy and custom parts I need for my projects. I got my first 3D printer in 2013 and have been addicted ever since. As my major would imply, most of the projects I do are mechanical in nature but almost all have a dash of electrical engineering or computer science. I’ve always been fascinated with how things work, as a kid I would always take toys and old appliances apart to understand the designs and mechanisms that made them tick. Since then not much has changed, I’ve just gotten better at putting things back together.

For 3 years I ran the maker space club for my high school, teaching peers and even staff how to design projects, weld, use power tools, woodwork, and 3D print. I love guiding others through the engineering design process and watch as their ideas come to life. When I found out there was a position open at the UNT maker space I knew I had to apply.

After teaching myself circuit design and coding in Arduino I was able to bring out the full potential of my projects and started working with more mechatronics and robotics. Some notable projects I’ve worked on over the years are:

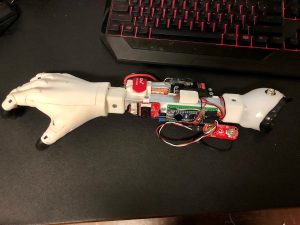
A bionic prosthesis I created for my capstone project as a senior in high school. The goal of this project was to fill the need for affordable prosthetics. The bionic arm uses an electromyograph to convert residual nerve signals into a command that opens and closes the 3D printed hand.

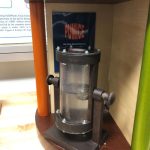
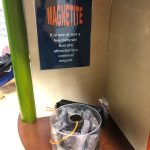
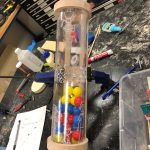
These are some science exhibits I created for the University of Texas at Dallas’ Science and Engineering Education Center during my employment. I love teaching and passing on knowledge so these were a blast to make. From left to right, demonstrating the buoyancy of pumice, the magnetic properties of magnetite, and the concept of herd immunity.

This is a home smart hub powered by IBM Watson AI for another school project in my junior year. This was designed to work with wireless and wired home devices and used Watson to improve energy efficiency and comfort by learning your routines.

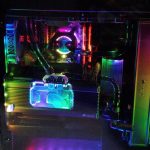
My love for tech doesn’t stop at gadgets and robotics, this is a custom gaming PC I made with a hardline water loop, Ryzen 9 3900x, 32 GB of DDR4 ram, GeForce RTX 2070 Super for any PC nerds out there

This is another school project for my sophomore year sustainability project. This robot prototype was designed to skim the surface of oceans and lakes picking up trash and other floating debris. GPS telemetry allowed the robot to clean a determined area and dock at a specialized barge when it was full. Only one was made but they were meant to work as a swarm configuration.

Written By: A. Sliter

Maker Mindset: What is a Makerspace?

Makerspaces are a technology-focused subset of the DIY culture. Before Makerspaces, there were what are known still as “hackerspaces”, which were first organized in Germany. The idea of a physical gathering of hackers spread to the United States via interaction at a conference, and the first United States hackerspaces were founded (some still in operation) in New York City.

Eventually, there came to be a division between what some hackerspaces were hosting; some stayed focused on hacking, altering electronic components for other purposes, and innovating on boards and code. Others chose to integrate other interests, with interests in design, woodcutting, sewing/textiles, metal-smithing, etc. These spaces became known by the term “makerspace”, where members could physically meet, collaborate, and work together outside of a narrow context like their jobs, single skills set, or group.

Makerspaces are inherently inclusive, innovative, and educational. And a serious plus is that now people don’t have to buy and store things like giant laser cutters, CNC milling machines, and 3d printers in their homes! The original feeling of the hacker culture, that agency to play and change something, mixed with the hands-on myriad of other material and skills interests found in the DIY culture, culminating in makerspaces like the Spark at UNT!
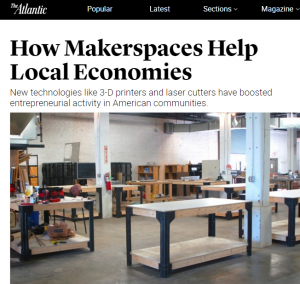
The maker movement has been growing in education from k-12 through college and the public sector. The interesting and challenging aspect of a maker space is that they are grouped together around an ideology more so than a specific physical make up. Makerspaces, are generally agreed to be a social or lab space dedicated to the process of hands on learning, tinkering, investigating and making. Makerspaces can have a wide range of setups and therefore the definition can be just as varied:

Laura Fleming –   “A makerspace is a metaphor for a unique learning environment that encourages tinkering, play and open-ended exploration for all.”

Diana Rendina –  “A makerspace is a place where students can gather to create, invent, tinker, explore and discover using a variety of tools and materials.”

John J Burke –  “A makerspace is an area in a library where users can use tools and equipment to design, build, and create all sorts of different things.  It may be a dedicated room or a multipurpose space in which a collection of raw materials and resources can be utilized as desired. Projects range from prototyping product designs with 3D printers, to programming robots, to creating art out of recycled items.”

Colleen Graves – ” A makerspace is not only a place where you can make stuff but many times its a place where you make “meaning” which many times is more important than the stuff you make.”

Ann Smart – “A space with materials for students to let their curiosity and imagination come to life.   An informal, playful, atmosphere for learning to unfold.   A space where making, rather than consuming is the focus.   A space where trans-disciplinary learning, inquiry, risk-taking, thinking, crafting, tinkering, and wondering can blossom.”

TheRSA.org –  “Makerspaces are open access workshops hosting a variety of new and old tools – from 3D printers and laser cutters to sewing machines and soldering irons.  Makerspaces are more than just sites to craft objects. They are also places to experiment with a different way of living – one that responds to the challenges and opportunities of a world in which technology is ubiquitous.”

i3Detroit.com –  A Makerspace is  “a collision of art, technology, learning, and collaboration”

Mad-Learn.com –  “A makerspace is a place that provides creative time and space for people of all ages to build prototypes, explore questions, fail and retry, bounce ideas off one another and build something together. These spaces don’t always include technology, since some prototypes and designs can be built out of anything or may include various stages of design that move from analog to digital and back again, but many do include technology. Now, with 3D printing and design, makerspaces are really taking off.  Kids gather in a common area to design and ideate on 3D printing projects.   The makerspace becomes a safe area where creativity and risk-taking becomes common practice.”

Techtarget.com – “A makerspace is a community center that provides technology, manufacturing equipment and educational opportunities to the public.  Makerspaces allow community members to design, prototype and manufacture items using tools that would otherwise be inaccessible or affordable such as 3-D printers, digital fabrication machines and computer-aided design (CAD) software.  Makerspaces are typically funded by membership fees or through affiliations with external organizations, such as universities, for-profit companies, non-profit organizations and libraries.  The free exchange of ideas and resources is a central tenet of makerspaces.  Often, members of different makerspaces will collaborate on projects and share knowledge at gatherings known as build nights or open-house days.”

Bozeman Makerspace –  “A Makerspace / Hackerspace allows groups of people to pool resources and create a community of people with varied interests. These interests may include but are definitely not limited to: circuitry, robotics, soldering, woodworking, fabricating, programming, networking, hacking, bending, etc.”

Room 6KGH.com –  “A makerspace is simply a place where people gather and make.  They come all shape and size.  A makerspace is a student centered learning environment with limitless possibilities.”

Educause.edu – “Makerspaces are zones of self-directed learning. Their hands-on character, coupled with the tools and raw materials that support invention, provide the ultimate workshop for the tinkerer and the perfect educational space for individuals who learn best by doing…they promote multidisciplinary thinking and learning, enriching the projects that are built there and the value of the makerspace as an educational venue.”

Libraries & Maker Culture –  “Makerspaces which are sometimes called hackerspaces–can be any area where people gather to make and create. These spaces often include 3D printers, but do not necessarily have to.  In makerspaces, people share supplies, skills, and ideas, and often work together on projects.  Makerspaces grew out of maker culture–a group of people dedicated to craftsmanship and creation. Makerism focuses on DIY projects, and makers value creation by individuals or small groups rather than bulk production. In general, makerism is also a culture of creation over consumption.”

Library as Incubator – “Makerspaces are collaborative learning environments where people come together to share materials and learn new skills.  Makerspaces are not necessarily born out of a specific set of materials or spaces, but rather a mindset of community partnership, collaboration, and creation. ”

OEDB.org –  Makerspaces, sometimes also referred to as hackerspaces, hackspaces, and fablabs are creative, DIY spaces where people can gather to create, invent, and learn. In libraries they often have 3D printers, software, electronics, craft and hardware supplies and tools, and more.
 

Meet Maker Cameron

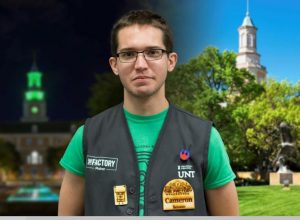
“My name is Cameron Driller. I am a biochemistry major in my third year at UNT with minors in biology and technical writing. I first discovered the Factory as part of a job search after I decided that I NEEDED to get out of previous call center job, and I’ve been working here as a Maker for going on three years now. I’ve worked in “hands-on” workplaces before but never one that focused on DIY which is what really peaked my interest.
I work mostly on the 3D printing and science tools in space. Since I’m the only science major out of all my coworkers, I get called on anytime those tools are of interest. This setup is perfect for me because I get to work with sensors on all kinds of projects and then teach others on how to use them. This work combined with the 3D printing aspect means that I get to play with designs that have benefit to people. Designs that could range from automating greenhouses to articulated robotic limbs.”

Spark Tutorial: Taking a 2D Image to 3D

For this tutorial we will be making a 3D representation of this image:

Credit: Saffron Blaze, Wikimedia Commons

Being able to take a picture of an item and turn it into a 3D model can be a very useful skill. This is a multi-step process that begins with the picture, then utilizes photo editing programs, vector manipulation, and finally Tinkercad. First you need to take your picture and open it some kind of photo manipulation program… I prefer to use Photoshop because it has good selection tools. In the program you should work to cut out the background from the image (see P1). In this case, I simply used the magic wand selection tool in Photoshop and deleted the background.

P1:
Next, you will want to selectively remove an outline of any details you want to keep in your image… in this case, we’ll keep the eye, nostril and outline of the neck. (see P2). Then select all of the white areas of the image and use the inverse selection option to select the opposite area of the image instead. Now with this area selected, color the whole selection one color (see P3). After this… just clean up any of the rough edges and save the file as a .BMP file.

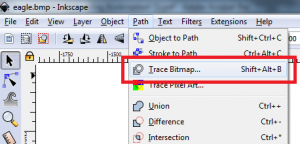
The next step is to change our .BPM image into a vector image, specifically a .SVG image. To do this I use the free program Inkscape, but you could also use Adobe Illustrator. Once you open the file in Inkscape, it will bring up a pop up window with some options to pick from. You should choose “Default import resolution” for DPI and “Smooth” for Image Rendering Mode. Click on your Image and go to Path à Trace Bitmap (see P4) and click it. A window will open up. Click the Update button and then Okay and you can close the window. Now delete the .BMP image (identifiable by the way it gets blurrier as you zoom in on it.) and save the file as an .SVG.
P4:
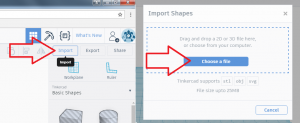
For this next step, we will use yet another free program… this time called Tinkercad. First you need to make an account, or sign in via Facebook, and then open up a new project. Now go and click the import button and upload the .SVG file to the program (see P5). Sometimes the file will be too large to import… if this is the case the just use the scale feature to reduce the scale until it will fit into Tinkercad’s plane.
P5:
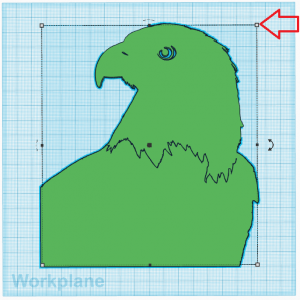
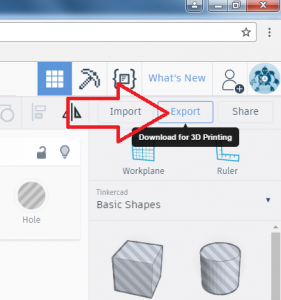
Next you can scale the object to the size you want with white and black squares located in near proximity to the model (see P6). Holding shift while moving the white squares will uniformly scale the model to as to avoid warping the features. Once you have to model the size you want, you can export it (see P7) as an .STL (for 3D printing) or .OBJ (for more general purpose modeling) and save it to your computer. And you’re done!
P6:
P7:

Meet Specialist Steven

Hi, I’m Steven. I’m a first-year media arts major and theatre minor. I’ve been working for the factory for almost four months now. I really love working at the factory. I love to work with the A/V equipment that the factory provides. I’m very well versed in Live Audio Equipment and studio recording equipment as well. I also have a strong understanding in electronics and woodworking. I was attracted to the factory from my first time touring UNT in high school. I been an avid follower of the maker community and dreamed of being able to use a maker space, but I never imagined I’d be working at one. When I learned that they had a position open I was determined. For anyone, who may be curious about maker spaces I would have to say this is the friendliest environment I’ve ever been in. All the employees are very nice and are very willing to help guide you in creating or learning something new. 

Maker Machine: Serger or Overlock

Did you know?
Overlock stitching was invented by the Merrow Machine Company in 1881. J. Makens Merrow and his son Joseph Merrow, who owned a knitting mill established in Connecticut in 1838 and designed the first overlock machine in 1889. In the United States the term “overlocker” has largely been replaced by “serger” but in other parts of the world (Australia, UK) the term “overlocker” is still in use. You can use an overlock aka serger in your makerspace The Factory!

But what is a Serger
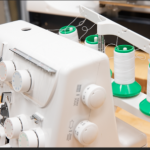
A Serger is a machine that sews the seams of fabric and at the same time trims the seam allowance and finishes the raw edges .ie. it sews, it cuts, it finishes the edges of fabrics all in one go. The professional finish you see in most store bought garments are finished with a serger.

Serger finishes the seam and edges in one go – so saves a lot of your time
Serger stitch is best for sewing knits, being very flexible and stretchy
Narrow seams, overcast edges, rolled hems, blind stitched hems are all made easier with sergers

Your makerspace has a Janome Serger for in Space use once we are able to open again!

Meet Maker Hanna

Hello! My name is Hanna Flores and I’m the team development coordinator at UNT’s makerspace. I am majoring in computer science, so a lot of my projects here at the makerspace center around computers and software. Even so, I love working with almost every machine we have in space. My mom sews all the clothes she wears, and my dad’s garage is really a woodshop where he makes whatever he thinks would be fun or useful around the house, so I come from a very creative family and my interests are very broad.

I love to sew, though I’m less inclined towards garments like my mom and more towards other kinds of projects like bags and other utility items. I learned to knit from my mom, and to crochet from my grandma, and it’s one of my favorite pastimes. On my own I learned tatting, which is a very convoluted way to make lace and one which I will never torture myself with again.

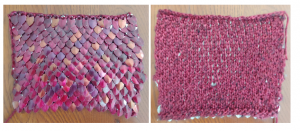
Included are pictures of some face masks I’ve been working on for work, and some hand knitted “scale-mail”, which is the process of knitting tiny metal scales into your work one by one. And yes I did hand paint each and every one of them with nail polish. Never again. My original plan was to knit a whole top out of them. That’s how far I made it before losing my mind.

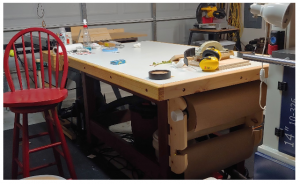
I’ve worked with my dad in the garage since I was very little, so I really enjoy woodworking, especially building furniture because that’s what my dad taught me to make. Someday I want to try hand carving wood for decoration! This is a photo of the work bench I helped my dad make for his shop!


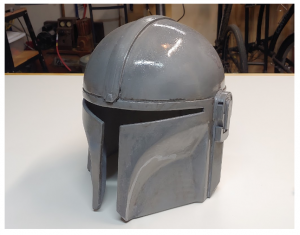
Now that I work in a place with even more advanced technology, I feel like I’ve become so much more creative. Through working here, I learned how to design models for 3D printing and then make the printers work to give me my materials. Below is a Mandalorian helmet I’m almost finished with, entirely 3D printed and finished with paint. Big huge enormous giant thank you to my coworker and one of my best friends, Kyle, for letting me use his personal printer for this!

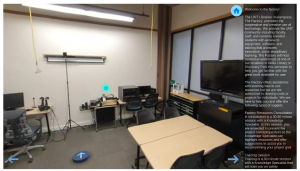
I’m also very lucky to use my love of software development at the makerspace by creating virtual 360 tours of both our locations using Unity These are both online now but not yet ready for public viewing yet, but here are some previews!

Working at the makerspace has been by far my favorite thing about going to university, both because of everything I’ve learned both creatively and professionally, but also because of the lifelong friends I’ve made here. To me, the makerspace feels like a family, and I have never been happier to know such an incredible group of people.