All posts by Alondra

ELECTRONIC MUSIC AND MAKING

Don’t forget to check out one of our podcast episodes about Electronic Music!

Join our hosts Alondra and Cameron as they explore the genre of electronic music and how making electronic music has evolved. In this episode, we discuss electronic music with our guest, Steven Sparkman, who is an expert in audio production and the tools used to develop the sounds in electronic music.

Alondra:

My name is Alondra Lopez, and I’m a Knowledge Specialist at The Spark Makerspace since 2019. At The Spark, I mostly focus on creating blog posts and teaching and training textile-based equipment such as the Cricut, embroidery, and sewing machines. I’m a senior Media Arts major and Marketing minor student at UNT. I love music, especially electronic music. I’ve always had an interest in that specific genre back in 2018, so it was nice to discuss it in this episode.

Cameron:

Hello!

My name is Cameron. I’m a biochemistry and technical writing student at the University of North Texas and I’ve been a maker at the Spark since June of 2018. My expertise in The Makerspace is based around 3D printing, sensors, and laser cutting.

I enjoy listening to different kinds of music while I work, but most of my work playlists switch between types of electronic music and oldies. This fact is one of the reasons why I decided to work on the electronic music episode of the podcast since I wanted to learn more about the genre I listen to.

Guest: Steven Sparkman

Host Team: Cameron Driller and Alondra Lopez

Producer: Judy Hunter and Steven Sparkman

MakerBot Digitizer and the History of 3D Scanning

Written By: S. Sparkman Spark Maker UNT Junior Media Arts

One of the tools available at The Spark is the MakerBot Digitizer. This device allows a user to take an everyday item that will fit on the scanner turntable and capture its likeness in 3D. How this scanner work is using lasers to project lines on the object, then a camera with a filter captures how the laser light deforms to the model. Slowly the model rotates on the turntable, and the camera captures every new line segment. In software, the different lines are stitched together, and your 3D model is complete.

Although 3D scanning may seem very new and high-tech, the idea and the technology has been in development for quite a while. 3D scanning started in the 60s thanks to new computing technologies. This type of scanning was very much in its infancy and took long hours for a not that great result. Later decades in the 80s and 90s when computers were developing faster. The push for a 3D scanner by the manufacturing and animation industry was at its highest. New techniques like line scanning used in the MakerBot Digitizer gave the scanners a better resolution. Faster computing and more memory space allowed software to capture more data and better details. Today, some of the best 3D scanners can capture the smallest detail up to thousands of an inch, all in full color.

Serger 101 Series – How to thread

How to thread a serger 
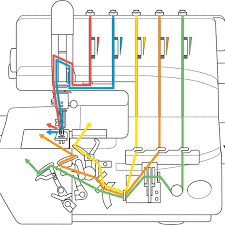
This may look intimidating but once you’ve done it and learned it, it is rather easy.

But here we go! Threading your serger starts with your thread! Since sergers feed the thread through the machine faster than a regular sewing machine; using spool caps and thread cone inserts are a must. Also, note that not all your cones have to match. If you cannot afford 4 cones of thread wind 3 bobbins with that same color and use those.

Now, pull your thread through the fully extended thread tree, and the thread guides above the tension disks.

Pull your threads through tension disks making sure they are well seated between the disks. I find it faster to do this for all 4 threads at once since I’m short and I have to stand up to reach the thread tree.

Here is the order you should be threading your loopers in;

1) Upper looper
2) Lower looper
3) Right needle
4) Left needle

***Note: Threading out of order will cause thread jams.

Turn your handwheel toward you until the upper looper is accessible.
Then, using your tweezers pull the thread through the eye in the upper looper.

Now the lower loopers, this one is personally the worst, but you will get through this I assure you!

Pull the thread through the lower looper thread guides.

Turn your hand wheel until you have access to the thread guides that are attached to the lower looper and pull your thread through the guides.

Now turn your handwheel until you see the left edge of the lower looper peeking out.

Use your tweezers to grab the thread and thread the eye or thread guide on the left side of the lower looper.

Now, using your tweezers again, bring your thread back to the right side of the lower looper.

Now things get a little tricky because we have to keep turning the handwheel to thread the lower looper, it’s easy to get the lower looper thread under the upper looper arm. This will cause the thread to jam every single time.

Also, we need to make sure the upper and lower looper threads do not cross.

The best way to do this is to turn the handwheel (always toward you) until the lower looper is above the upper looper. Then thread the lower looper. 
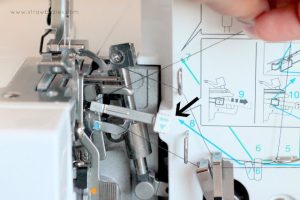
Pull the thread through the lower looper thread guides.

For this, pull out the small ‘threading lever’. Position the thread so it’s just resting against the lever as shown.

Push the lever back into place while holding the end of the thread.

Thread the eye of the lower looper, making sure not to cross threads with the upper looper. In other words, make sure that the lower looper thread is over the upper looper thread.

The lower loopers are done!

Threading the needles is the easy part. Thread the right needle first then the left needle second.

Make sure your thread is well seated in the tension disks, then run it through the thread guides.

Then pull the thread through the thread guide in front of the needle bar and then the needle.

Also before you get serging;
Just like with a sewing machine, I find it’s easier to start serging with a small piece of fabric under the presser foot– it helps keep the thread from being pulled back into the machine. After that, you should easily be able to make a thread chain.

If none of that made any sense here is a video tutorial.

https://www.youtube.com/watch?v=WThwuOfOSbg

Written By: T. Bruner

-Stay tune to the next post for general advice and a FAQ-

Lego Mindstorms Robotics

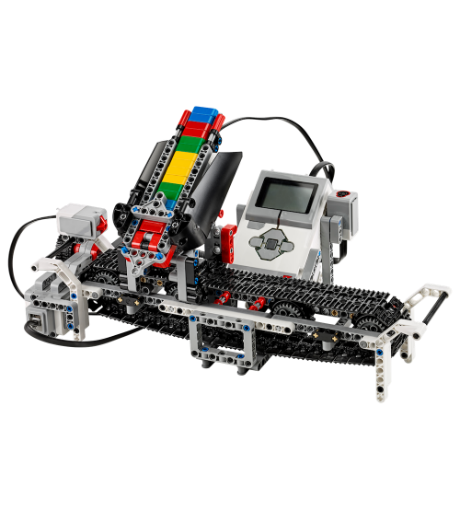
The Spark has a large array of robotics for all ages. Today, I’m going to touch on our Lego Mindstorms Kits. The recommendation age range is 10+ but it can be a good introduction to people who may not know as much in construction or coding.

The construction part is straight forward since it is Lego and their instructions are kid-friendly, but you do have to pay close attention to the picture on how they change. On the coding side, it is block code like Scratch and there are tutorials online through UNT LinkedIn Learning if you want to do self-learning.

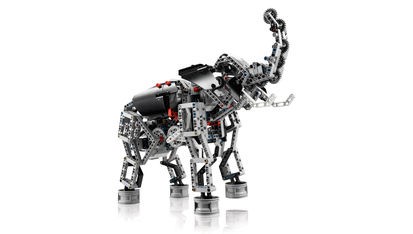
Other than that, you could set up a consultation with the Spark and we would be more than happy to help you. There are several building options with the kit. Some can be more for recreational use such as the Elephant, but it can also have a more functional use like building a color sorting robot or a robot arm. With all the built-in examples from the Lego Mindstorms software, they do include the code for the robots, but that does not limit you on editing the code to make it your own.

Written By: B. Johnson

An Intro to Photography

Photography is a unique form of art, as it is both instantaneous and relatively new compared to mediums such as drawing or painting. These days almost everyone has a high quality camera on them at all times, and it’s as easy as ever to start honing in your image making skills!


To understand how an image is made, let’s first look at how a camera operates. There are three elements of an exposure or image: shutter speed, aperture, and sensitivity (or “ISO”). A perfect exposure or image balances these elements to make a photo that is neither too bright nor too dark. Shutter speed controls how long the “eye” or sensor of the camera is open to the scene it’s capturing, measured in fractions of a second. This effects motion blur on a moving subject. Aperture refers to the size of the hole through which light enters the camera.

On most smartphones this is a fixed size, but on professional DSLR cameras the size of the hole can be adjusted to allow more or less light through and changing the “depth-of-field” effect on the final image. This is a powerful effect that allows the photographer to isolate the background from the subject by shifting it out of focus, blurring it. Sensitivity or ISO effects how sensitive the sensor is to light and effects the grain or noise on the final image. These are the three elements of every photograph, and learning how to adjust them to your liking is a good first step to making amazing images.

Smartphone cameras and other types of digital cameras are most commonly used on an “auto” mode, where the camera decides how best to balance the elements of your photograph. While this is the fastest and certainly most convenient method, auto mode takes away most of the control the photographer has on their final image. Try testing out the three elements by switching your camera to manual (M) mode, where the photographer has control of every aspect of the camera. Smartphone users can find a “pro” or manual mode on many popular apps (such as VSCO), but note that aperture will most likely be fixed and unchangeable. Start by changing the ISO, bring it up to ‘6400’ or as high as it will go and change the other two elements to balance the exposure. Notice how suddenly noisy the image appears. Next set the ISO as low as it goes and change the shutter speed to 1/15. Take a photo of something moving and pay attention to how motion blur comes into effect. Those with a DSLR can change the aperture and see how it effects the background of the image when taking a photo of something up close. With these techniques in mind, it becomes much easier to troubleshoot an image if it isn’t coming out how you’d like.

Photography, like most everything else, relies on practice, practice, practice. Challenge yourself by taking your camera off auto and start making images. You might be surprised by how differently you take your photographs!

Written By: M. Heins

Serger 101 Series

Tryston here!  Today I’m going to explain what a serger is and help take the fear out of sewing with one!  I’ll also be answering some common questions!

What is a Serger? 

A serger is a sewing machine that binds fabric together with an overlock stitch. It uses 3-4 stitches to create the overlock stitch. This is the finishing stitch you see on many of your shirts and garments that you have around the house right now.

What does a serger do?

A serger trims the seam and encloses the seam allowance or edge of the fabric, inside a thread casing, all in one step. The width and density of the stitching are two of the many variables available on a serger. The options are not the same on all sergers. As with almost anything you purchase, the more you spend, the more options you will have. But mostly all basic sergers around the 200-300 range work perfectly for home use.

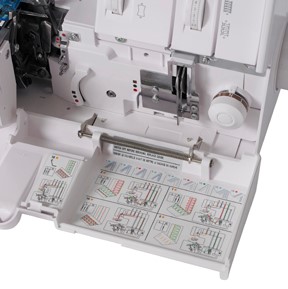
Part of a serger

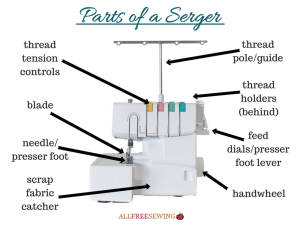
The dials you see on top of the machine are the tension settings for your thread. From left to right, they are: 

  • left needle
  • right needle
  • upper looper
  • lower looper

**Please note that most sergers do look the same so even if you have a different type than this the chances are they will still be very similar to this.

Left of the machine.

  • Adjust the stitch width and length
  • Turn the knife on or off
  • The stitch width and length/ There are times when you may want to turn your knife off.

Inside:

  • The main thing that sets sergers apart from sewing machines is the loopers. These are located inside the machine and under the needle.
  • The loopers act like knitting needles, in that they overcast over the needle threads.
  • The loopers are threaded in a special sequence. 

Many machines include a threading chart right on the machine, for an easy reminder when threading the serger.

Written By: T. Bruner

-Stay tune to the next post: How to thread a serger-

Maker Life Stories: Dallas Makerspace

We have a new series on our podcast called Maker Life Stories where we will share success stories of many makerspaces around our area. In this episode, we talked with James Hennigson about the story of The Dallas Makerspace and its impact on the maker community. Have a listen!

Guest: James Hennigson

Host Team: JP Abah and Danielle Da Costa

Sound Production: Steven Sparkman

Producer: Judy Hunter

Photoshop

What’s Photoshop about?

Adobe Photoshop is a program for editing photographs, graphic design, digital art, and much more! It uses layering to allow complexity and versatility in the editing process and offers powerful editing tools that are capable of doing just about everything when used correctly.

Photoshop, or Lightroom, is it better? The truth is not that you compare the two programs, but that you define what you need for your project. Both are fantastic Adobe programs that provide excellent photo editing features. And why do you use Lightroom instead of Photoshop? Use both the simple way and use Photoshop when you can’t find Lightroom!

Photoshop CC

If you want more power over your photo editing, than you need Photoshop CC. It is the most robust and sophisticated program for photo editing. Photoshop CC is not designed exclusively for photographers.

You will work with 3D models and a qualified color control program on the Photoshop CC. Everything to remember certainly whether you want to print artwork, and not just pictures. The downside is that there’s a high learning curve at Photoshop CC. You do not know where to start as a beginner since there are so many tools and functions. However, as a beginner, you will be able to install the Previous Version of Photoshop and start simple modifications such as text editing, replacing the background, and so on so forth.

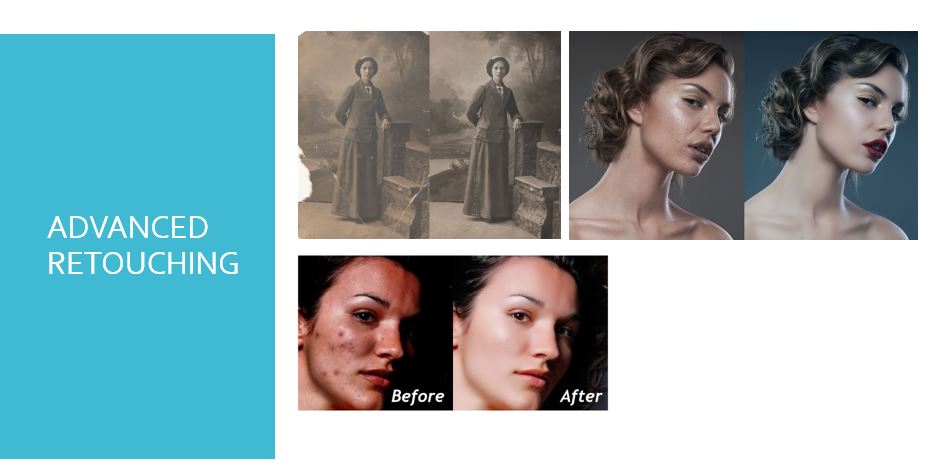
1. ADVANCED RETOUCHING

You need Photoshop if you want to make a leg shorter, an individual taller, or apply other elements to your frame. Also you can brighten and darken the skins, you can also able to put make-ups using on the photoshop without real make-up on women face.

2. ADVANCED HEALING

When in Lightroom, you can replace small items and white teeth; the features aren’t as spectacular as using the magic-conscious material of Photoshop’s healing brush and patch software. The Content-Aware method helps Photoshop to search and examine the whole image as it tries to find out what the photo field would look like if the object were not there. It is still not flawless, and you will always (most likely) need to fine-tune the images with one of the other retouching tools from Photoshop until you have the result you want.

3. CREATIVITY

If you want to create a single creative picture using elements from various photographs, Photoshop is your choice. Again, Photoshop’s only constraint is the imagination! You may imagine an unrealistic world, and you can bring it to the designing, which looks like a real one.

4. KEEP CAPITAL!

You don’t have to hire someone to print your business cards, show posters, flyers, and more after you master Photoshop. You can create anything you want with Photoshop, whenever you wish. Start a new page and take advantage of your creativity.

5. MAKE MONEY

You can provide photo retouching services, design logos, open a graphic design company, build and sell PSD web templates, or start a website/YouTube channel where you make videos. Also, you can become a freelancer in the graphic designing category.

6. HUGE TOOLBOX

Every progressive release of Photoshop appears to bring increasingly useful tools into the mix. From content-aware loading, camera shake effects removal, lens filters, and automated panoramic image stitching, there is a resource for almost any job.

Written By: N. Dangalla

FDM Versus SLA 3D Printing

What is FDM Printing?

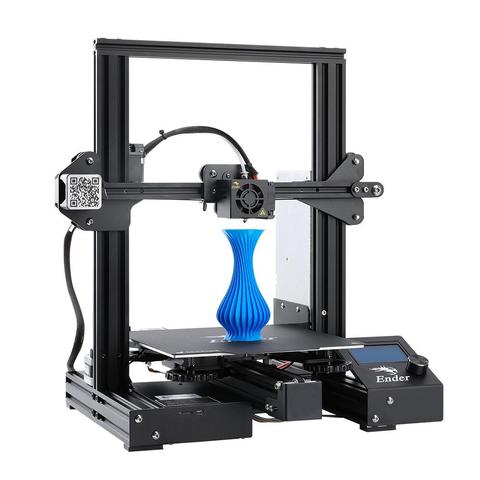
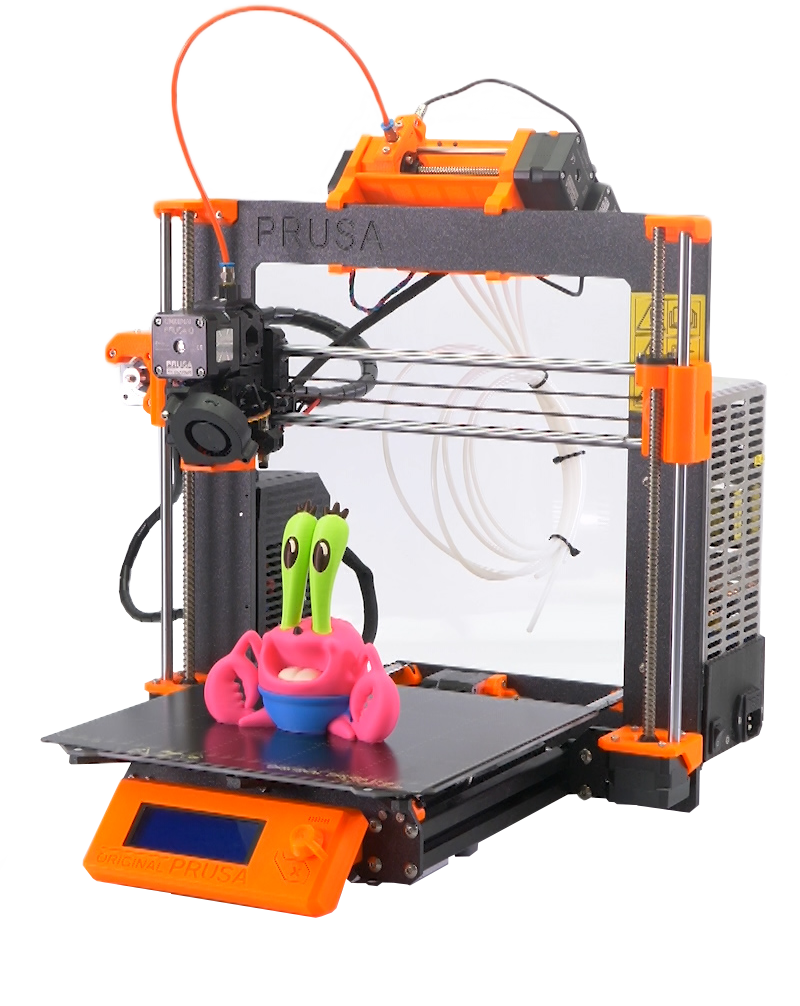
FDM printing is the most common method of 3D printing. It is the easiest to learn and is the most cost-effective way to print. FDM printing stands for Fusion Deposition Modeling. It is also commonly referred to as FFF, which stands for Fused Filament Fabrication. Both FDM and FFF are the same process, and the terms are interchangeable. The actual process involves melting a spool of plastic material at high temperatures through a nozzle that travels along a specific path to model the object you are printing. This path is created by G-code, a list of coordinates that tell the nozzle where to go and when.

Advantages:

The most considerable advantage of FDM printing is its price. It is very cheap to print using FDM printing. A good hobby printer costs about $250, and material can cost $20 per spool, which gives you 1kg of material. FDM printing is very friendly to people who are new to 3D printing, which is one of the main reasons it is so popular. All the user needs to do is load the object into the slicing software (so the printer knows what to do with the object), press print, and give the printer time to make your part. If the objects you want to print are for practical purposes, FDM prints are stronger than SLA prints, which allows them to last much longer.

Disadvantages:

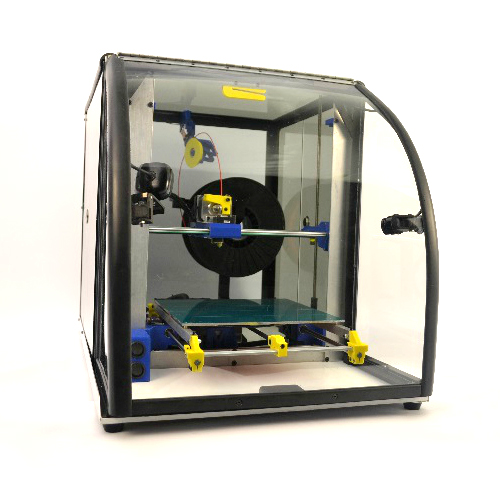
Because FDM printers are so popular, there are countless different printers from which to choose. All these options can make it hard to decide what printer to buy, and they vary widely in usability from one to the other. FDM printers can also be a bit finicky, depending on the printer, causing you to spend time fine-tuning it. Many variables, like the software settings, mechanical aspects, maintenance, and even the climate of the room, can all affect how your printer runs to get a successful print. There are also many different types of filaments that require higher temperatures, heated beds, enclosures for the printer, and stronger filaments that can even wear down the printer’s internal components. Not all printers can print with every filament type, so be aware of the limitations of your printer. Some brands will mention the specific filaments their printers can print with, which is something to keep in mind depending on what you want to do with a printer.

What is SLA Printing?

SLA printers are quickly growing more accessible since the price of these printers is getting cheaper. A few years ago, a reliable SLA printer would have cost roughly $2000, but now an SLA printer that can produce high-quality prints costs about $300.

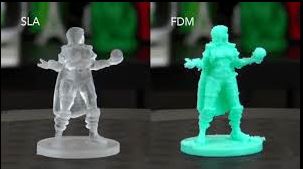
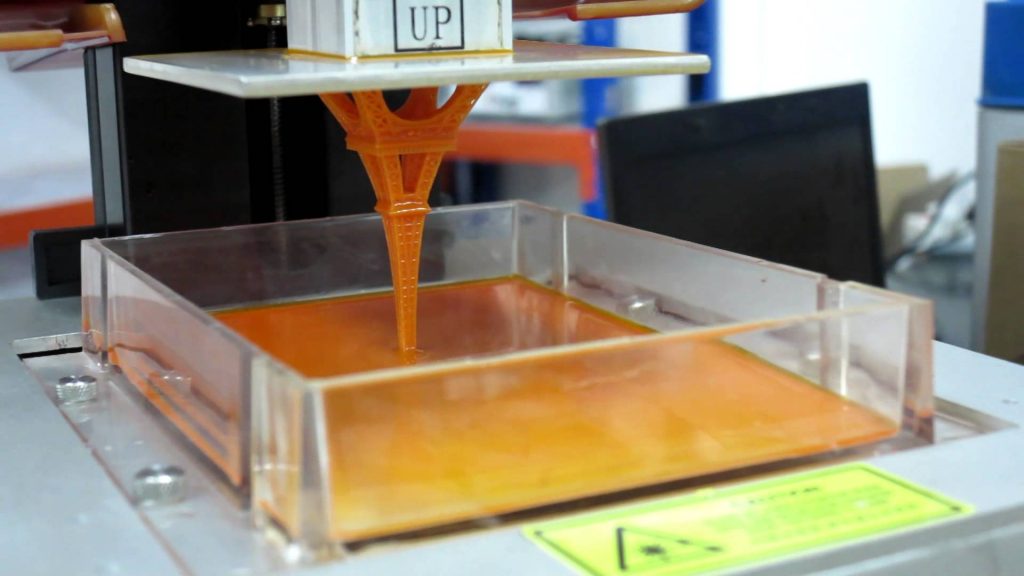
This method of printing involves a pool of resin rather than plastic cured by ultraviolet light. The light is projected by an LCD screen below the resin pool, curing the resin at each cross-section. The printer will then peel the cured layer off the base to let fresh, uncured resin flow under the object allowing the light to cure the next layer. Because this method cures material, rather than depositing material layer by layer, SLA printing enables you to achieve much greater detail in the object than what you might be able to get out of FDM printing.

Advantages:

SLA printing is the way to go for objects with high detail, steep overhangs, and intricate parts. SLA can also achieve much greater detail in layer height, to the point where layers are nearly indistinguishable. Most of the applications for SLA include miniatures, jewelry, and highly complex objects. This printing method is the best choice for aesthetic prints.

Disadvantages:

The printer itself is quite loud, given the fan needs to work hard to keep the electronics from overheating. The resin used to make the prints has a very potent smell, causing you to need a well-ventilated area for the printer when using it. When the print is complete, it needs to go through an acetone bath to remove the uncured resin and be placed in a UV curing station to improve its strength. These added steps to post-processing are not needed with FDM printing and require extra materials that need to be purchased. The prints themselves, though very high detailed, are not very strong. SLA prints cannot withstand stress well before they break, so if the object goes under any consistent strain, it will not last long. SLA prints are also sensitive to UV light, so if they are exposed to the sun for an extended time, they will become brittle and degrade.

Of course, there are more methods to 3D printing than just these two, but since they are the most common, they are the most reasonable to discuss. There are many more advantages and disadvantages to both FDM and SLA printing, but both are perfectly effective for 3d printing for different needs and purposes. When deciding which method is the best for you, look at what you need to print, what its purpose is, and the limitations that either method possesses to produce your intended object effectively.

Written By: K. Mortensen

Multimeter

Written By: E. Lopez Spark Specialist UNT Senior Mechanical and Energy Engineering

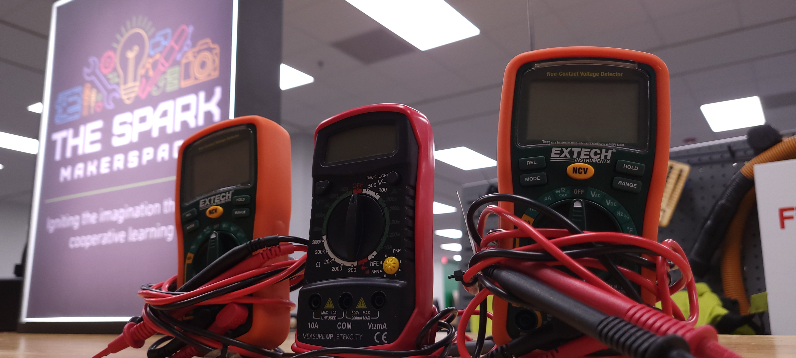
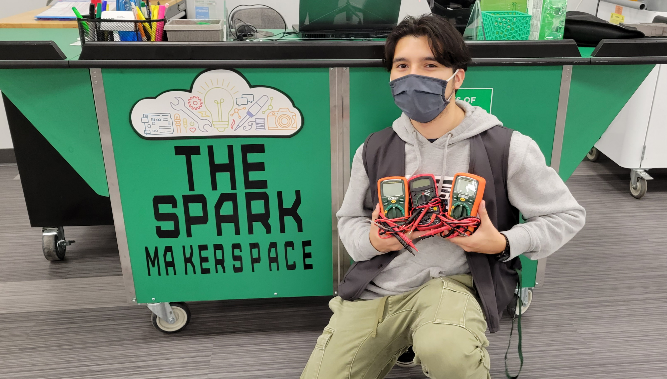
Hey everyone! The Spark Makerspace can provide you with portable Multimeters! With advanced technology, our digital Multimeters are simple and easy to use with high accuracy. Our Multimeters vary in purpose; testing can range from examining simple DC circuits from a flashlight to a more complex system from an electrical junk box. Some functions include testing for AC/DC Voltage, temperature, and frequency. An included User Guide will give you more detailed instructions on how to use each function and what all the values mean. Using a multimeter is highly recommended when dealing with electrical projects since it can act as a troubleshooting tool assuring your circuits are working properly. So if you have an electrical project coming up soon, make sure to stop by and check out one of our Multimeters here at The Spark Makerspace!